RealHighway (RHW)
The RealHighway (RHW) system is a series of new highway networks added by the NAM, based on an unfinished transportation network (known internally as "DirtRoad") that Maxis left in the game. It is a variable width, variable height system with extensive modular interchange construction capabilities.
Overview
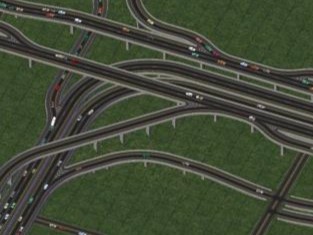
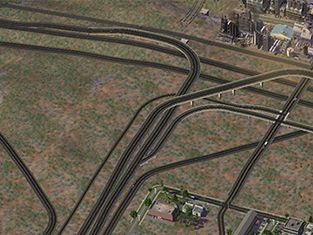
The RHW and its interchange system is a highly modular system designed for the construction of (mostly) realistically-scaled interchanges, hence the name RealHighway. The game’s default highway system and its interchanges are quite drastically under-scaled, in some cases by as much as 50%, when compared to the game’s designers’ intended dimensions (consider that Maxis’ intended scale is 1 SC4 tile = 16 meters = 50 feet). There are some key differences in terms of how the RHW system operates compared with the default Maxis highways:
| Multiple heights and widths | Complex Interchanges | Real world scaling |
|---|---|---|
| RealHighway networks come in a wide variety of shapes and sizes, from 2-lane rural highways to 12-lane freeways. All networks in the system can be built at 3 to 5 different height levels, including a double-decker style. | RealHighway allows for a high level of customization and creativity for those who want precise control over constructing interchanges. Recent NAM releases have included features making the RHW system more accessible by migrating toward "FLEX" pieces that can be used by multiple networks, and new QuickChange Interchanges bring a more Maxis-like pre built interchanges. | The scale of the RealHighway networks are based on current transportation design standards. Transitions and interchanges are larger, sometimes considerably, when compared to the compressed scale of Maxis Highways. Interfacing the RHW with Maxis Highways has very limited support. |
Development History
The name “Rural Highway Project” dates back to the project’s origins back in 2005, with the discovery of the only unfinished network stub left in the game. Formerly known as the Additional Network Tool “ANT”, this network is now sometimes referred to as the “DirtRoad” network under the hood. While the project started out primarily for use in rural areas, by 2007 plans were begun to extend the “rural” features of the mod even further into a multi-purpose network designed for building realistically-scaled highways and interchanges in urban and suburban settings. As the scope of the project changed, the name of the project has also shifted from “Rural Highway” to “RealHighway”. This name was chosen because it has historical precedence having been suggested by project founder qurlix back in 2006, it retains the same acronym of “RHW”, and finally, it removes the “rural-only” stigma.
Multi-height elevated networks, introduced in NAM 31, had a dramatic impact on the variety of interchanges that could be created. The QuickChange system added in NAM 32 simplifies the construction of some basic intersection types greatly, almost to the level of ease of Maxis pre-fabs, without sacrificing the flexibility of the RHW system.
Also beginning with NAM 31, the development team has been pushing the vast majority of new feature development away from standard “static” puzzle pieces toward FLEX items. With the release of NAM 33, at least 90% of all ramp interfaces now exist in a FLEX form allowing for single pieces to function for many different RHW networks, vastly reducing the number of pieces to navigate in the process. Height transitions have also been converted to a FLEX format, reducing the number of required pieces from 100 to 4, and width transitions and wide-radius curves are on the docket for future FLEX treatment.
Installation
A complete install of the RealHighway plugin is included by default in the NAM Installer. It is found in the installer under 2 Additional Network Features → RealHighway. We recommend RealHighway is either installed in its entirety or not at all. Removing any optional components in this section should only be done by advanced users who are manually compiling a NAM Controller to exclude certain RHW networks.
The RHW requires a 4GB_Full NAM Controller, and as such, also requires the 4GB Patch. It is the largest component in the NAM package by a wide margin, and requires a 64-bit operating system and at least 4GB RAM to utilize.
Euro textures for the RealHighways will be automatically installed if one selects one of the Euro road texture options.
RealHighway Basics
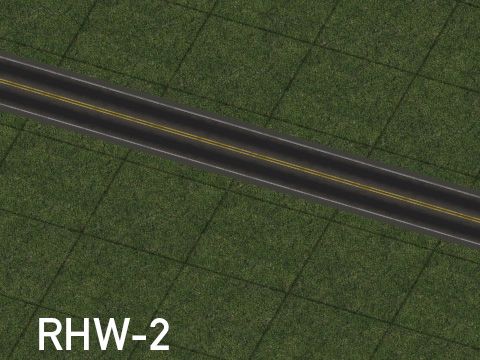
The RealHighway’s base network is the 2-lane RealHighway, called RHW-2. However, through clever use of overrides, more than 36 additional networks are possible, all based off of RHW-2.
The nomenclature used for RealHighway networks distinguishes each network by the total number of lanes to facilitate two-way traffic with the network. For instance:
- RHW-2 contains two lanes, one in each direction.
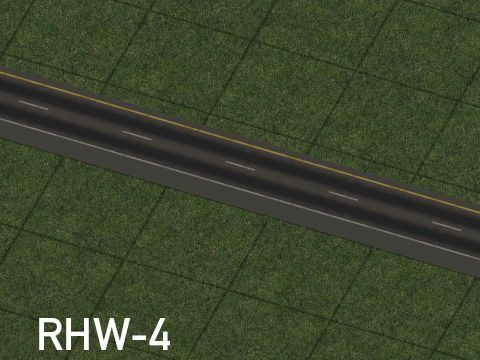
- RHW-4 has four lanes, two in each direction. One individual tile of RHW-4 carries two lanes in one direction; however, full bidirectional traffic with RHW-4 requires two stretches of the network traveling in opposite directions, resulting in a total of four lanes.
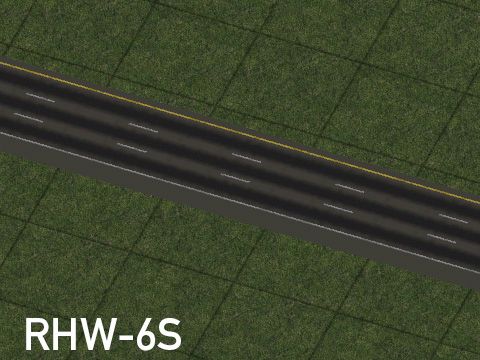
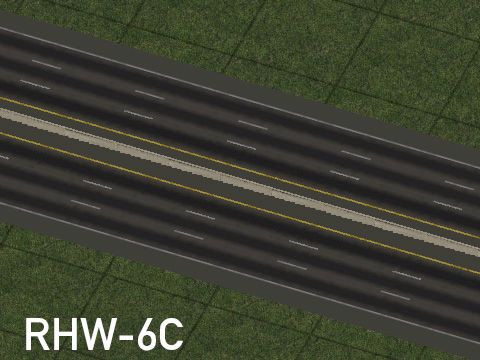
Some of the wider RHW networks may have letters “S” or “C” added after the lane count designation (i.e. RHW-8S or RHW-6C).
- “S” stands for “separable”, meaning that the lanes carrying travel in the opposite direction may be separated by any number of tiles.
- “C” stands for “combined”, meaning the center tile of the “C” networks carries the contains separating the two directions of traffic, making the two directions inseparable.
It is possible to make ad hoc asymmetrical networks as well. For instance, one could create a 5-lane highway by using the RHW-4 (two lines) on one side, and an RHW-6S (three-lanes) on the other. The C-type networks, while not separable, also support this sort of functionality, and a dedicated starter exists for an “RHW-7C”, which uses parts of the RHW-8C (four lanes) and RHW-6C (three lanes) for construction.
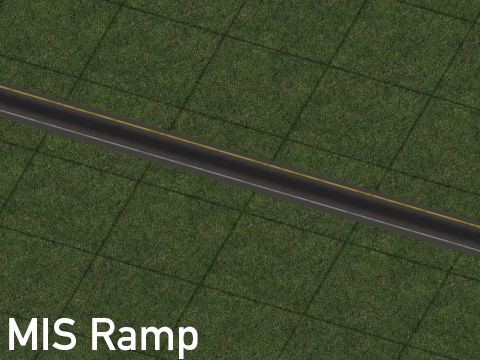
The main exception to this naming scheme is the Modular Interchange System (MIS) Ramp override network, which is single lane RHW typically used for highway on and off ramps.
Network Widths
The following networks are included as part of the RealHighway mod:
| Network | Full Name | Tile Width |
|---|---|---|
| MIS Ramp | Modular Interchange System Ramp | 1 (One-Way) 2 (Two-Way) |
| RHW-2 | 2-lane RealHighway | 1 (Two-Way) |
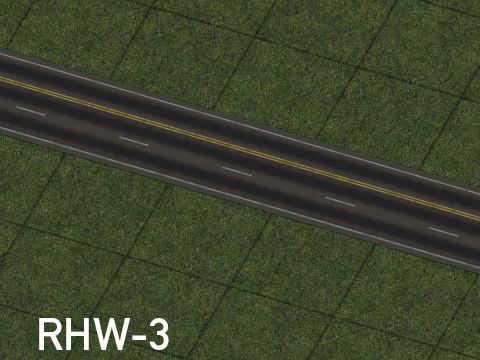
| RHW-3 | 3-lane RealHighway | 1 (Two-Way) |
| RHW-4 | 4-lane RealHighway | 1 (One-Way) 2 (Two-Way) |
| RHW-6S | 6-lane Separable RealHighway | 11 (One-Way) 21 (Two-Way) |
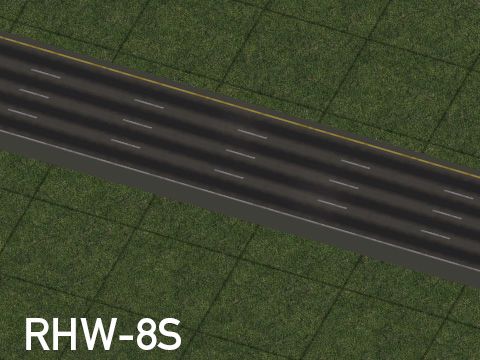
| RHW-8S | 8-lane Separable RealHighway | 2 (One-Way) 4 (Two-Way) |
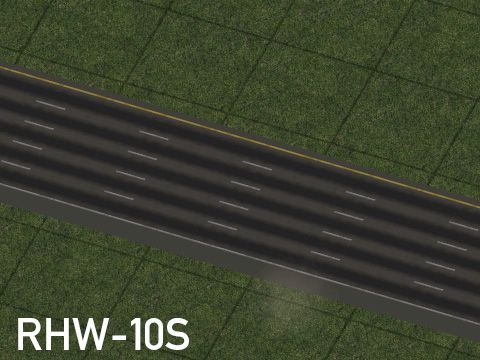
| RHW-10S | 10-lane Separable RealHighway | 2 (One-Way) 4 (Two-Way) |
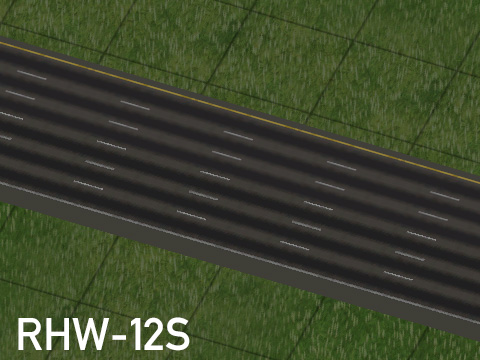
| RHW-12S | 12-lane Separable RealHighway | 21 (One-Way) 41 (Two-Way) |
| RHW-6C | 6-lane Combined RealHighway | 3 (Two-Way) |
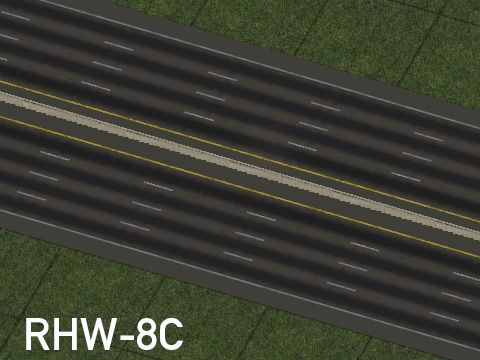
| RHW-8C | 8-lane Combined RealHighway | 3 (Two-Way) |
1 The RHW-6S and RHW-12S networks have partial tile overhang. The network itself only occupies one tile, but the shoulder visually overlaps part of the adjacent tile.
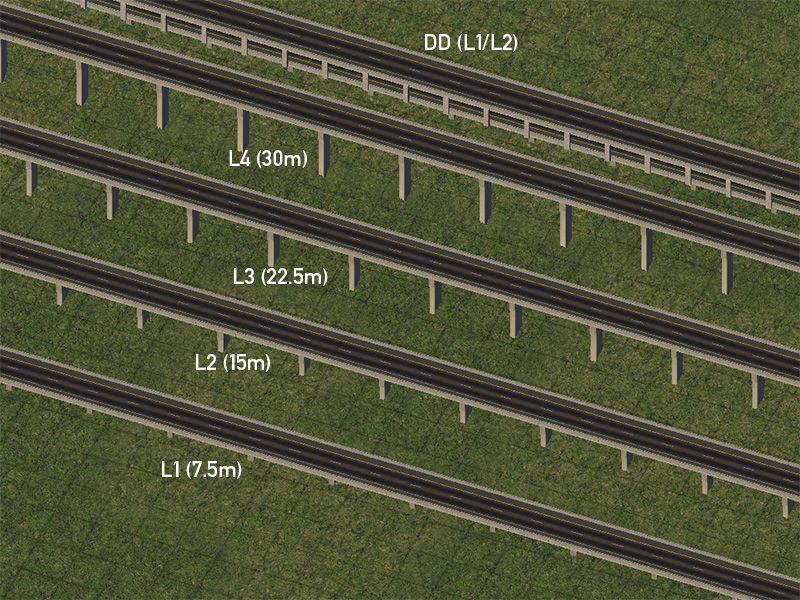
Network Heights
There are multiple elevation levels for the RealHighway override networks. These heights are in increments of 7.5 meters and have a simple shorthand system of denoting each level:
- Level 0 (L0) networks are ground-level networks and have no elevation above the terrain
- Level 1 (L1) networks are at 7.5 meters
- Level 2 (L2) networks are at 15 meters
- Level 3 (L3) networks are at 22.5 meters
- Level 4 (L4) networks are at 30 meters
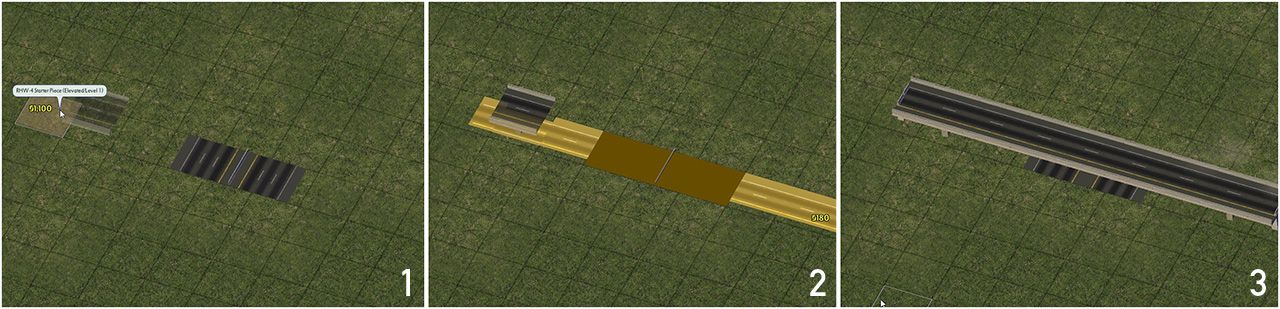
All RealHighway widths have L0, L1, and L2 elevations at their disposal, each produced with a separate starter. MIS, RHW-4, and RHW-6S also have the ability to reach L3 and L4 elevations. Double-decker (DD) setups also exist, albeit only in a configuration with 4 total lanes called DDRHW-4. The upper deck of the DDRHW is at L2, while the lower deck is at L1.
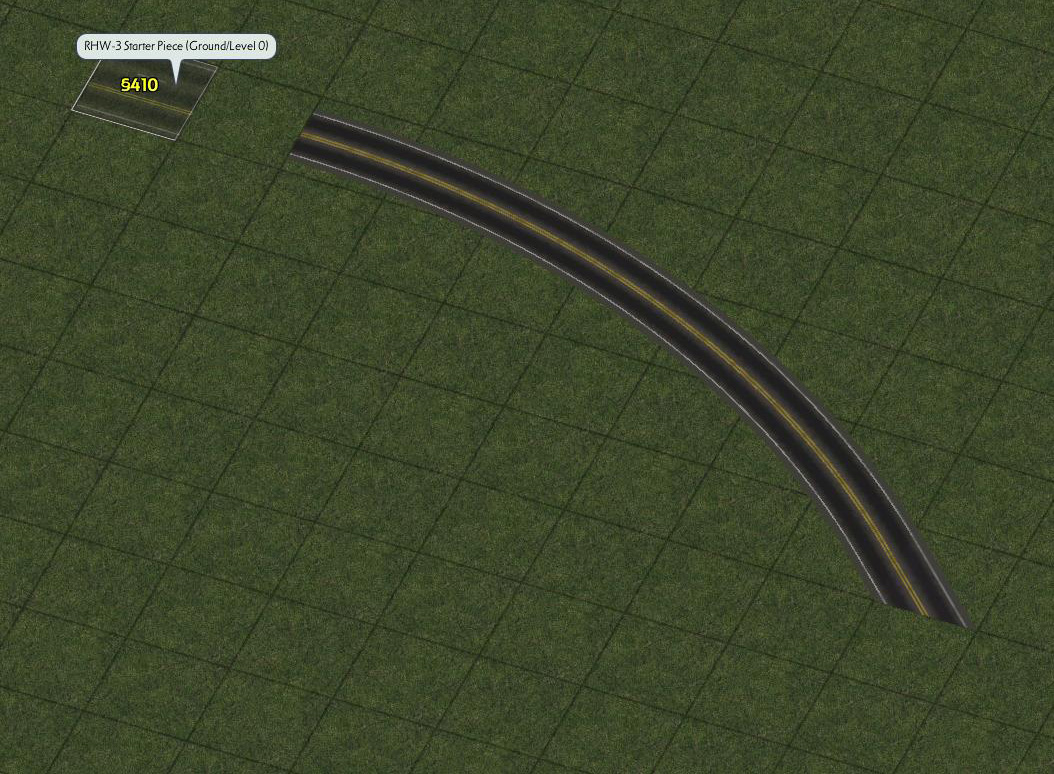
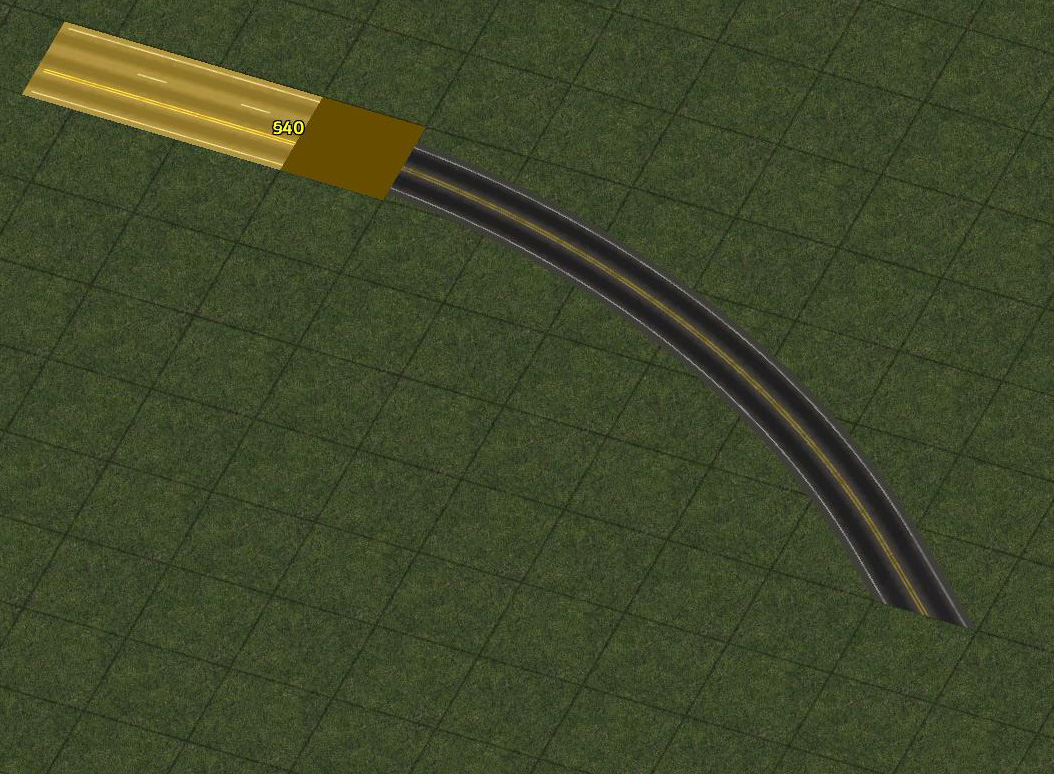
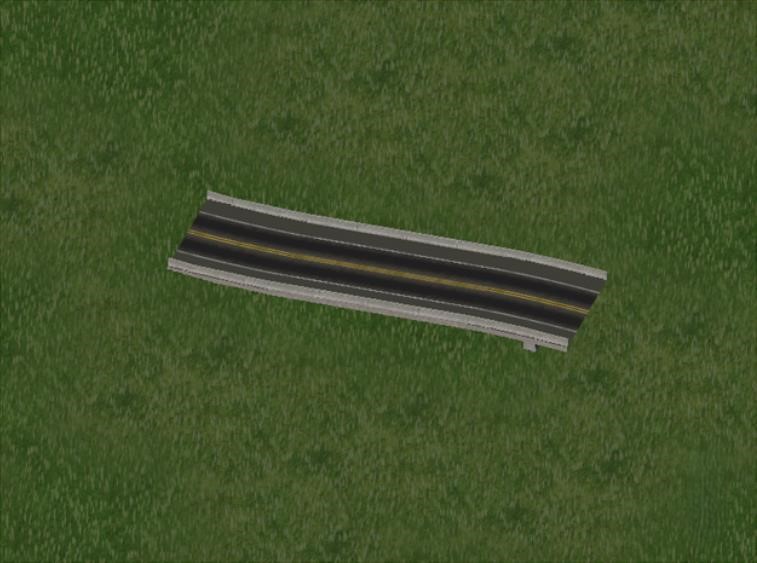
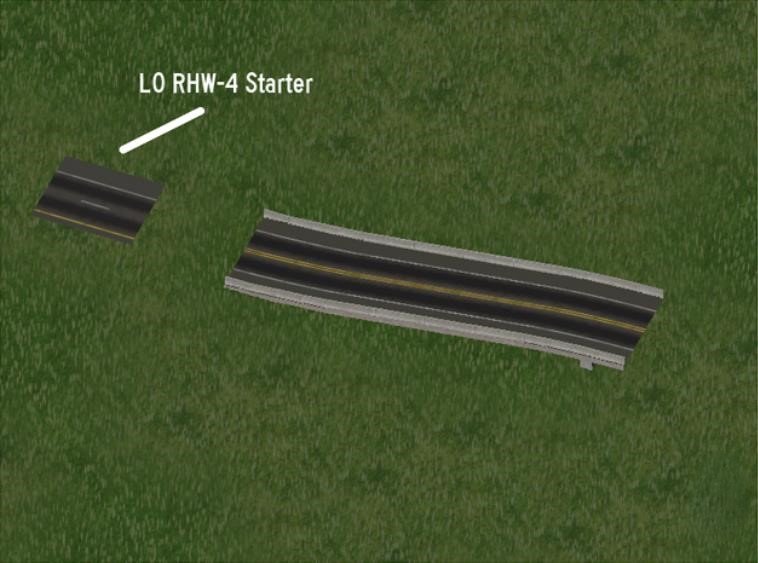
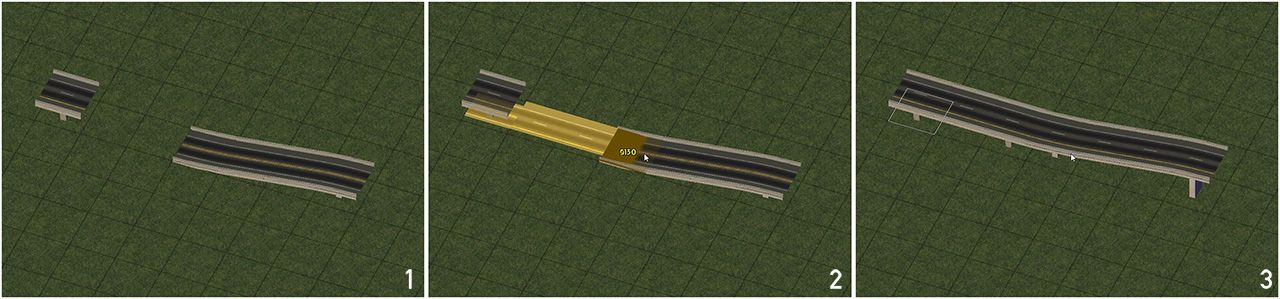
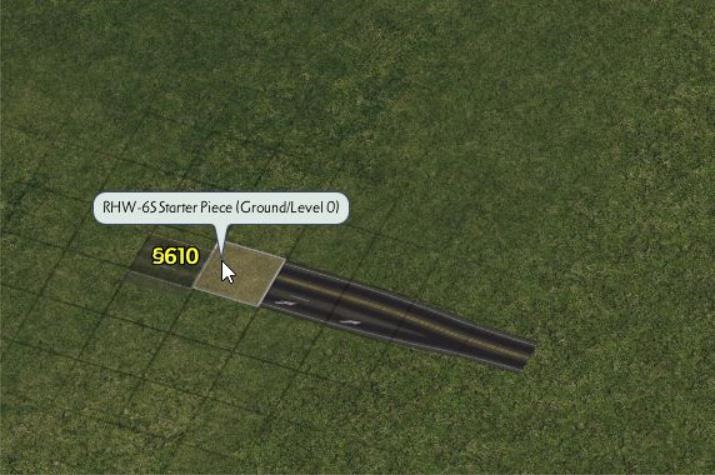
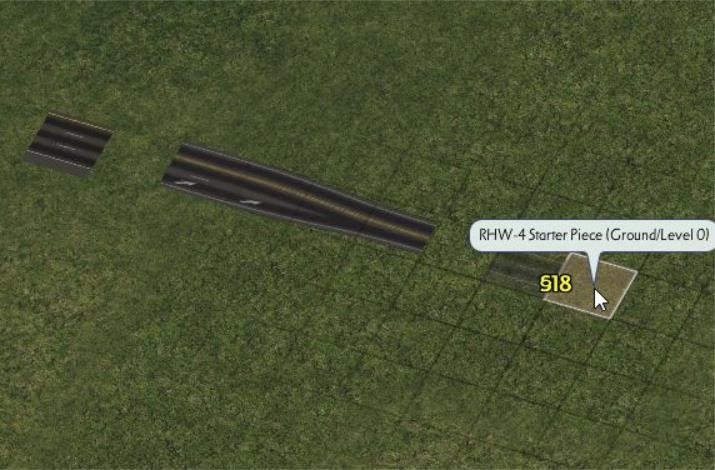
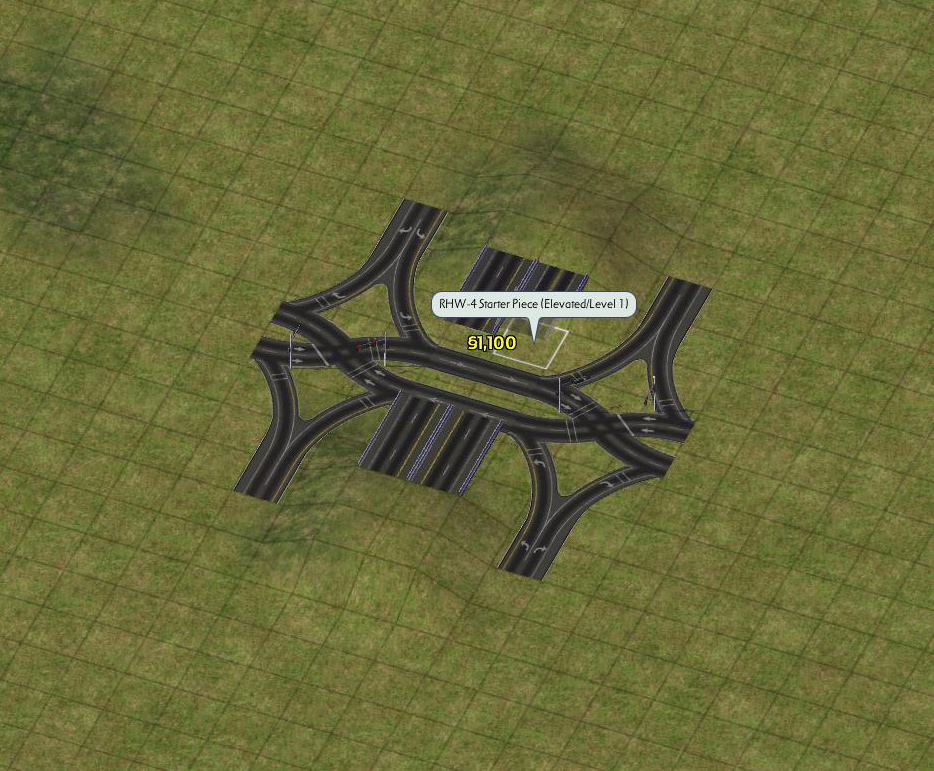
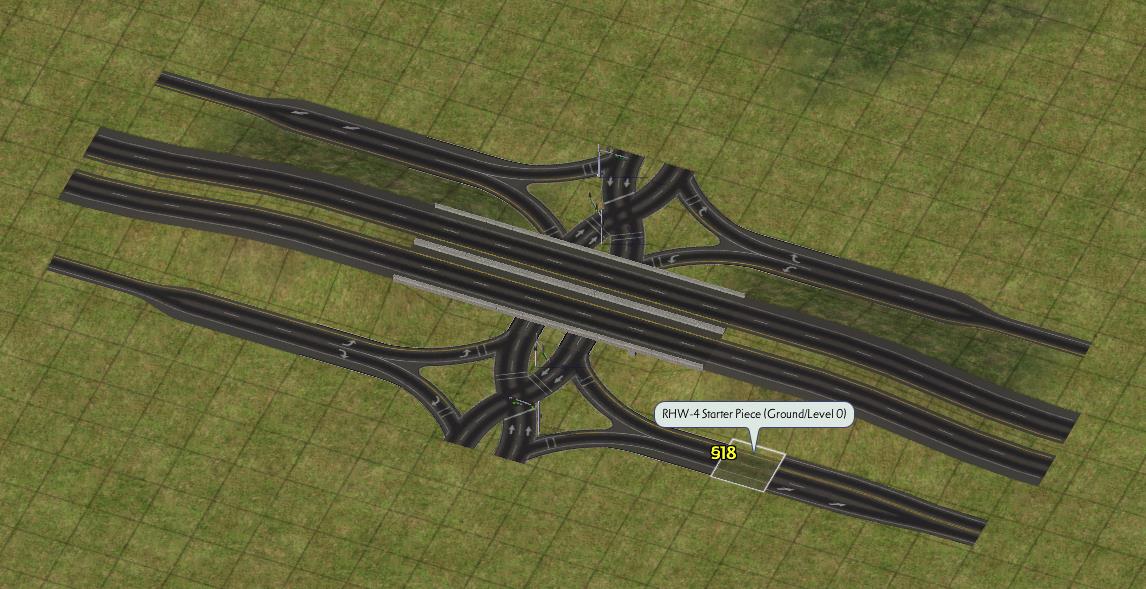
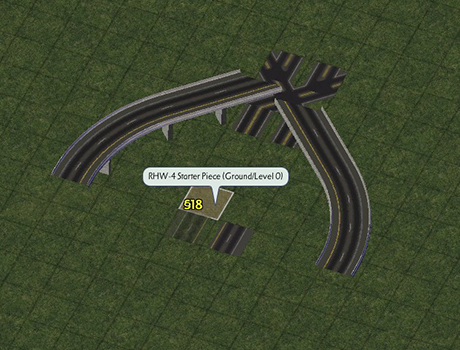
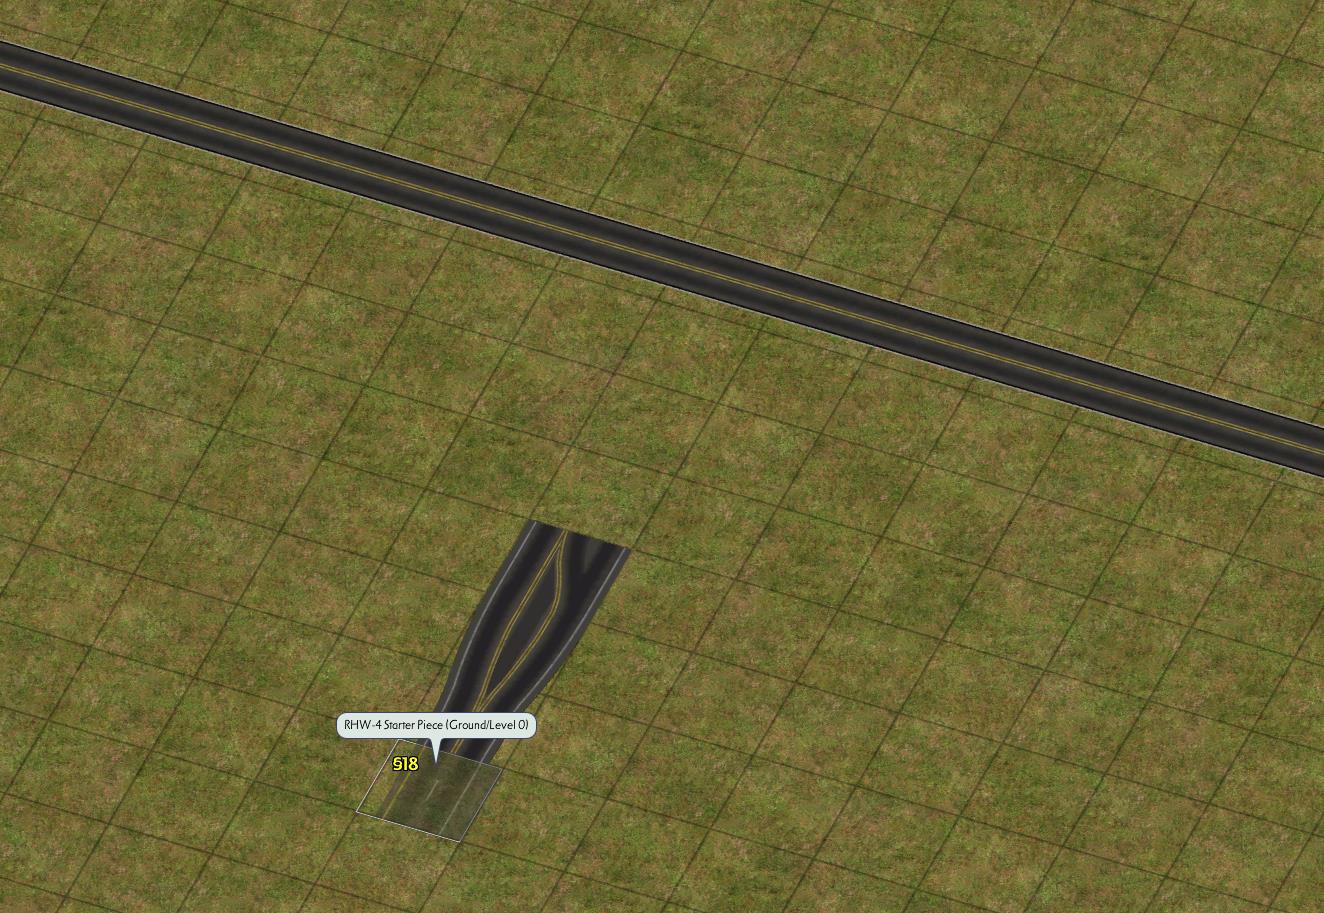
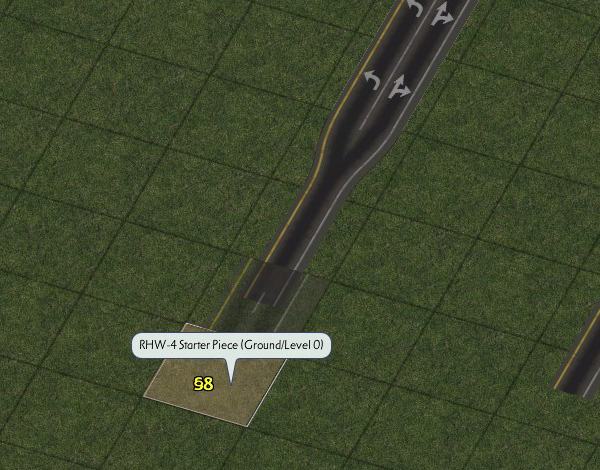
Starter Pieces
The base draggable network can be found under the RHW-2 button.
RHW-2 Network Button
The Starter Pieces can be found under the RHW Starters button.
RHW Starters Button
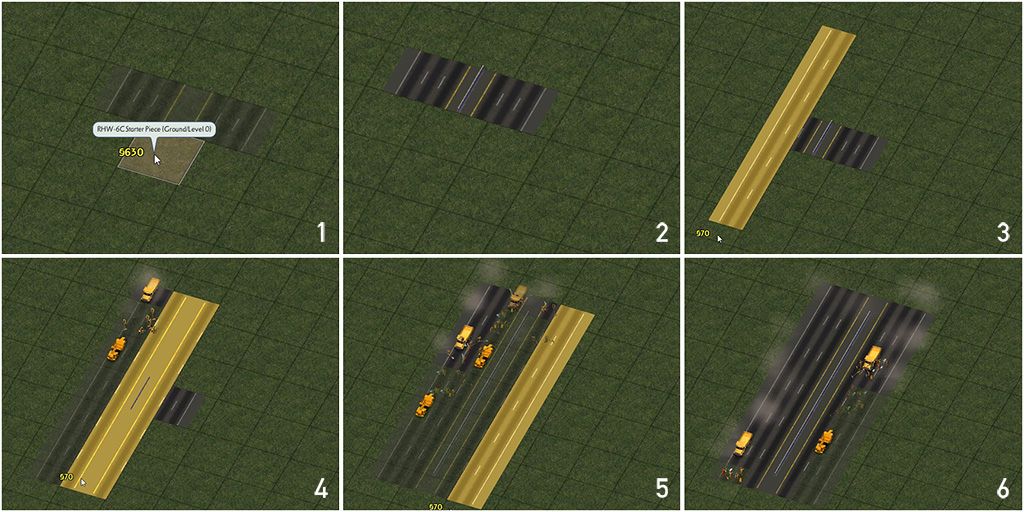
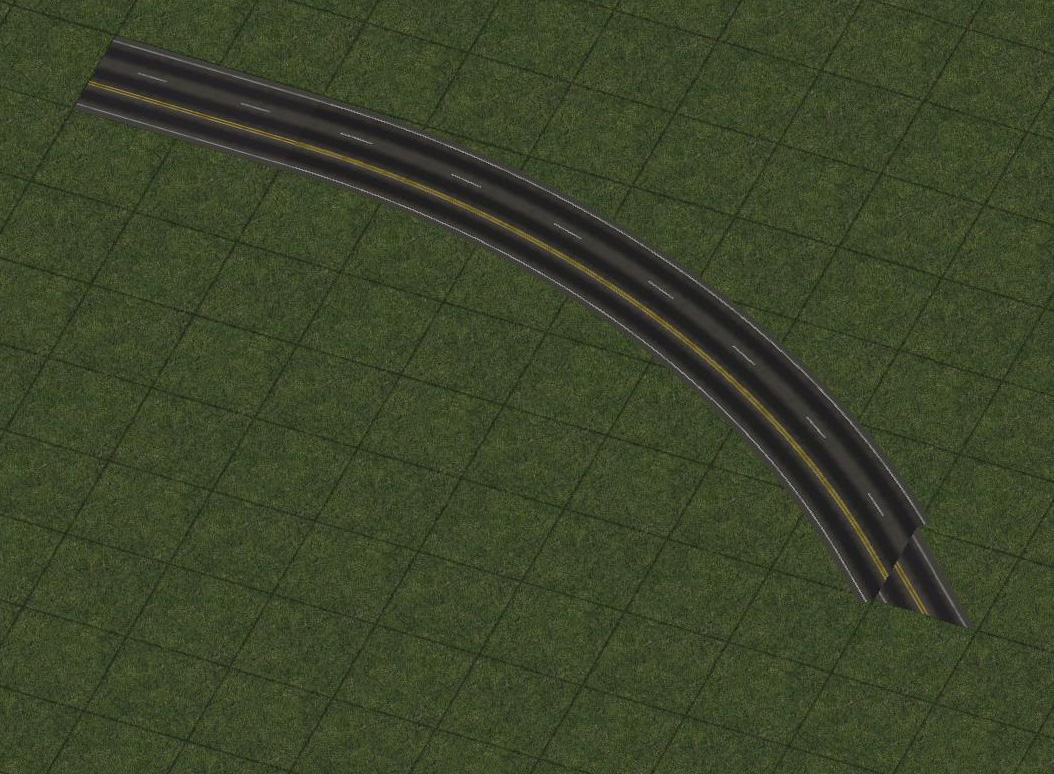
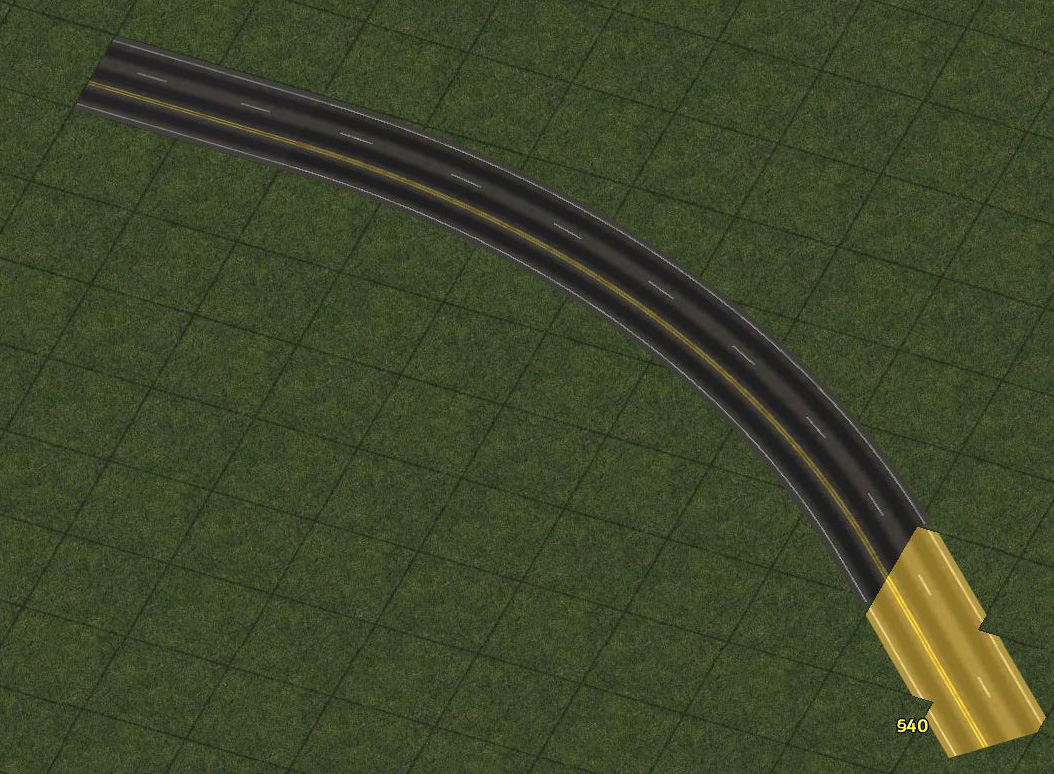
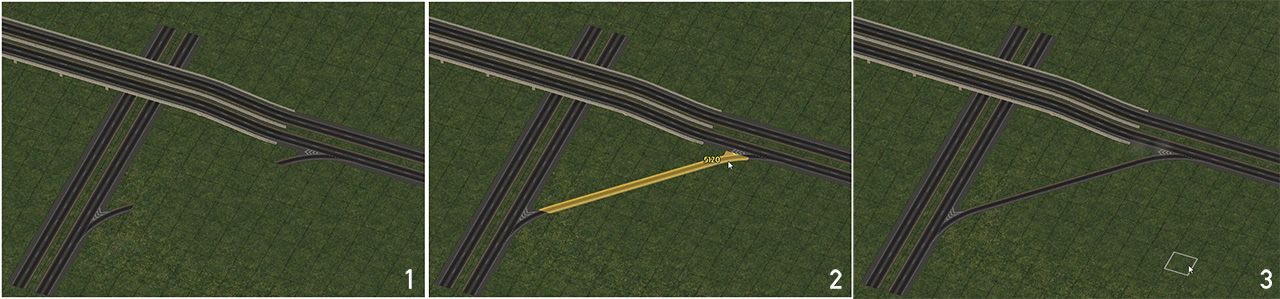
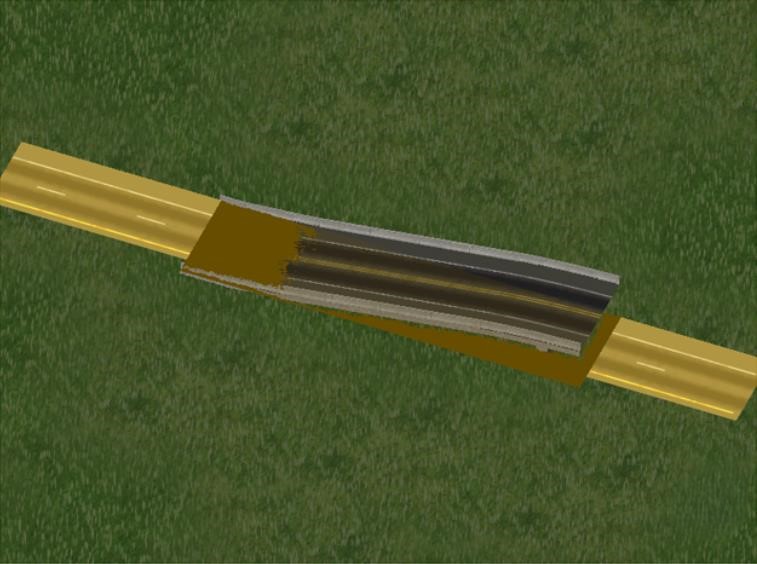
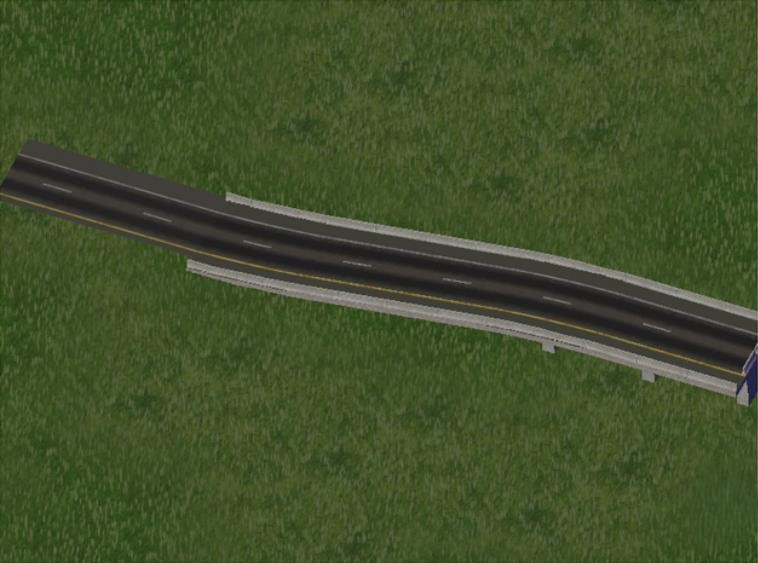
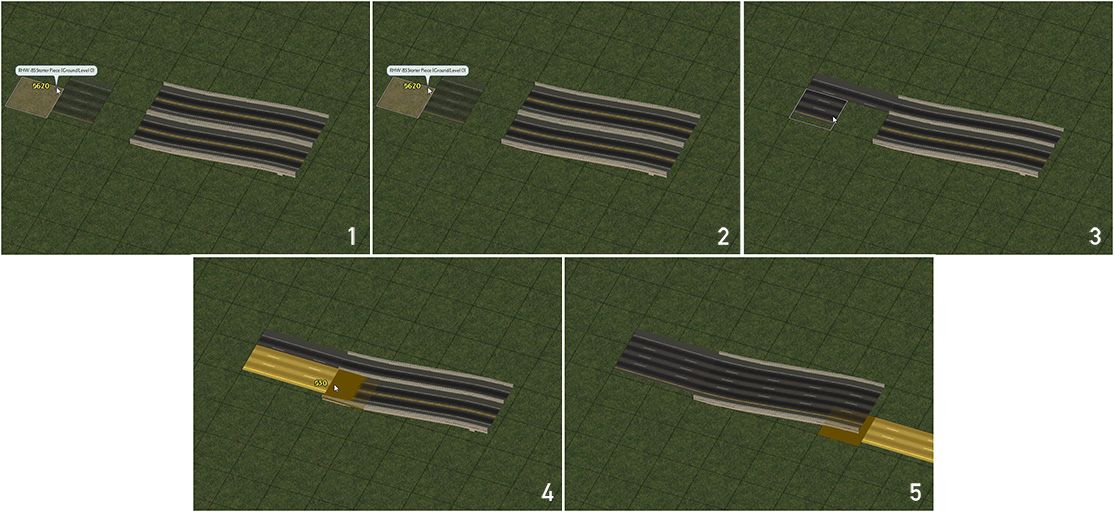
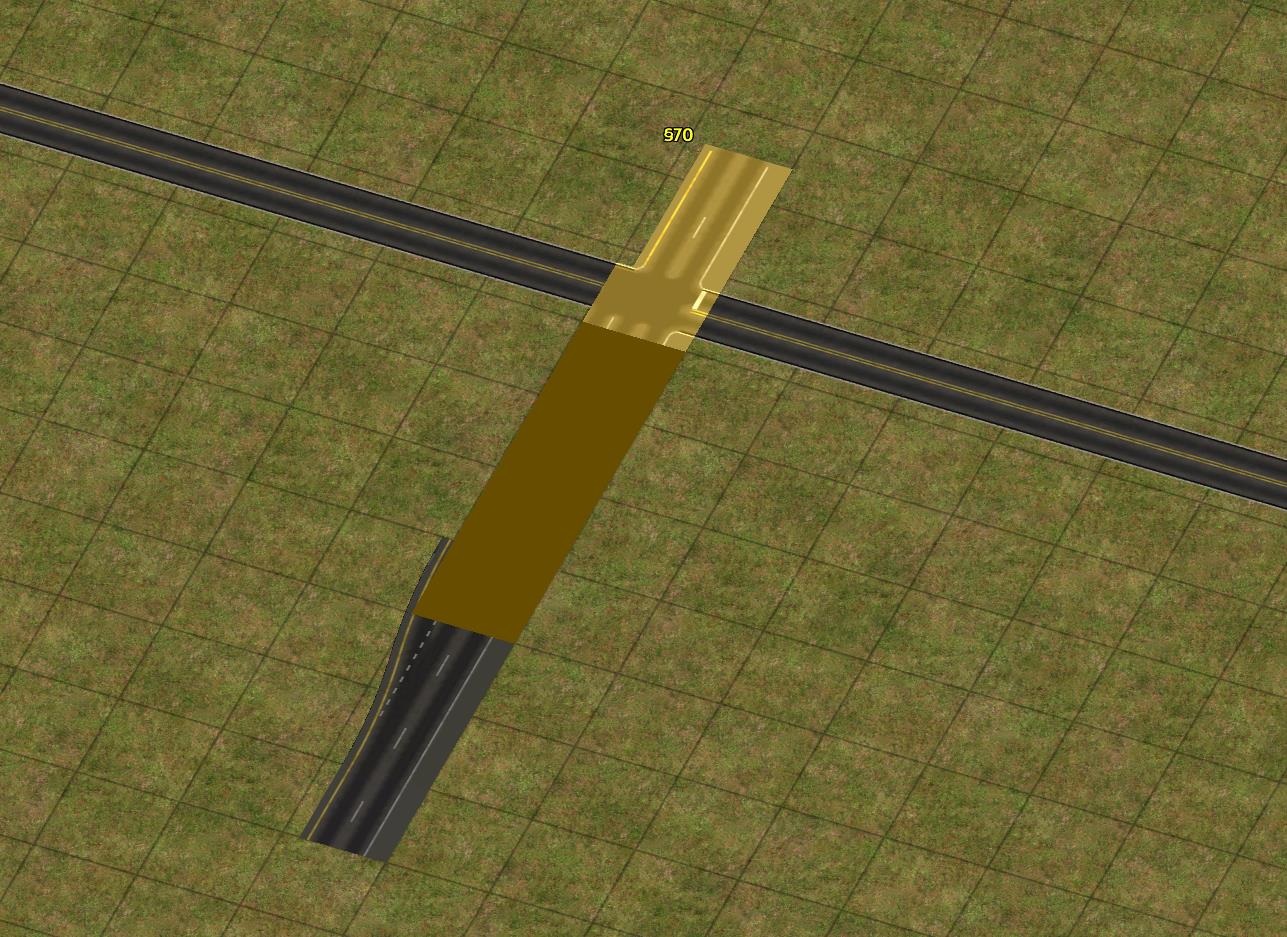
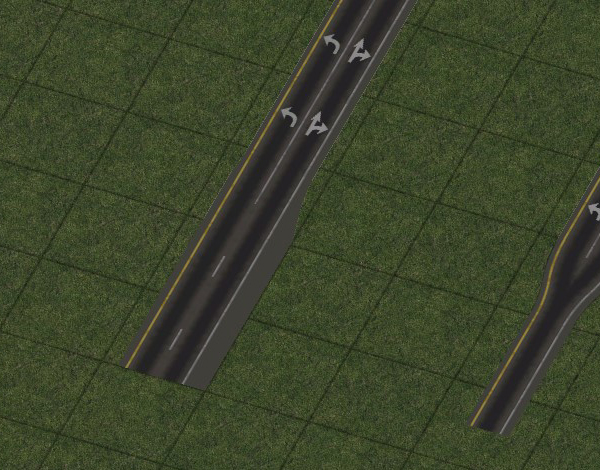
All of the RHW networks can be constructed by first placing a Starter Piece, then dragging the RHW-2 network through the starter, causing the dragged RHW-2 to convert to match the starter. This process is shown below.
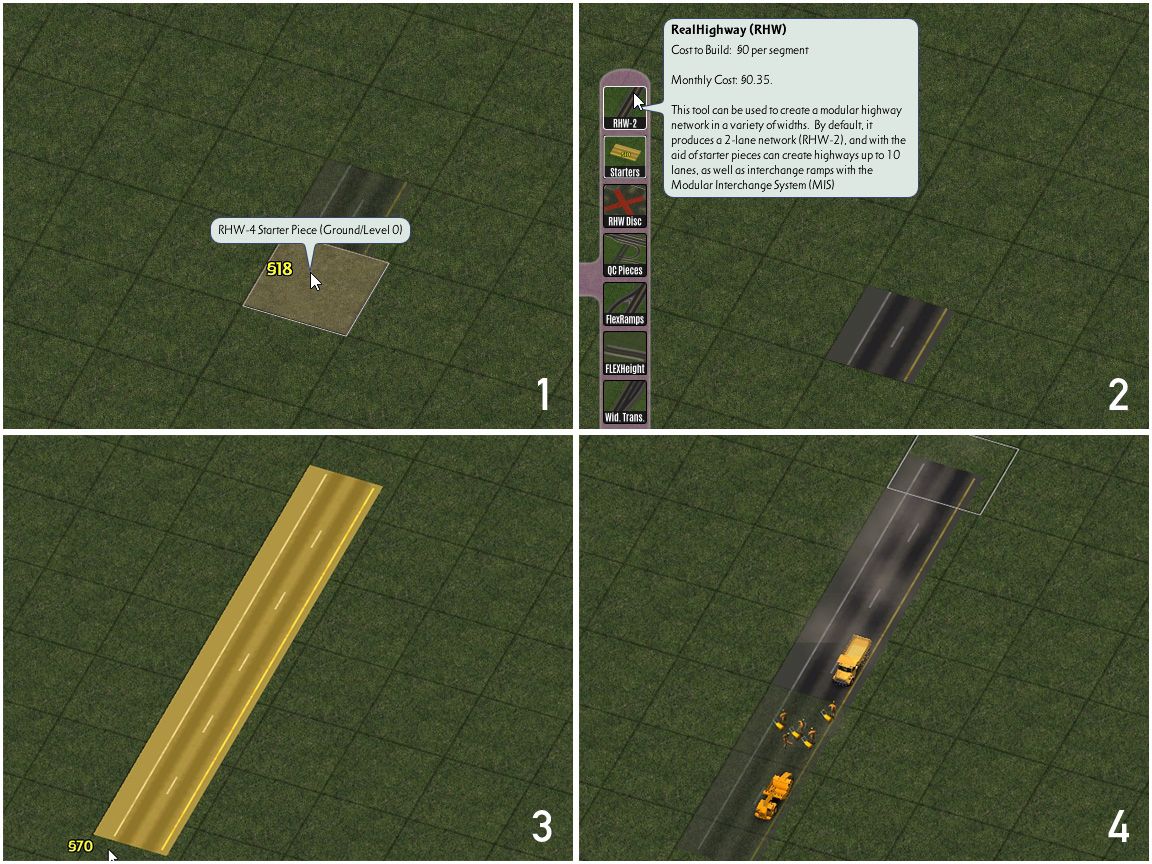
Multi-tile override networks work similarly. Place a Starter Piece, and drag RHW-2 through each tile of the starter piece.
Additionally, RHW Starter Pieces can be crossed by other RHW networks, allowing for maximally-stable highway-over-highway crossings.
Zone Access Restrictions
The RealHighway family of networks is considered to be Highway-type by the game which limits its ability to provide direct access to zones and buildings, as one would expect from a highway. This limitation is especially true of Residential zones, which cannot be built at all along RHW networks, and attempting to have any zone type use RealHighway network frontage for access is not recommended. Instead, it’s recommended to downgrade to a non-highway network, such as the Road, One-Way Road, or one of the Network Widening Mod override networks if zone access is required.
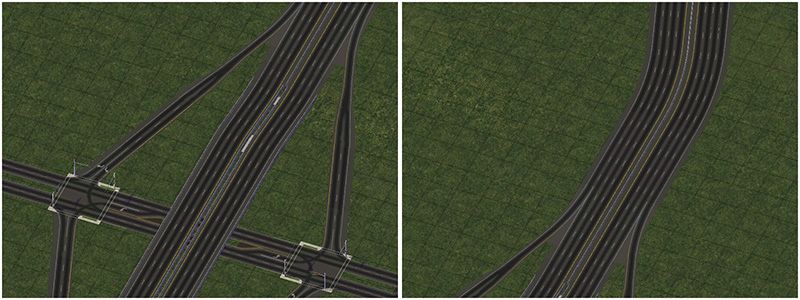
Constructing The RealHighway
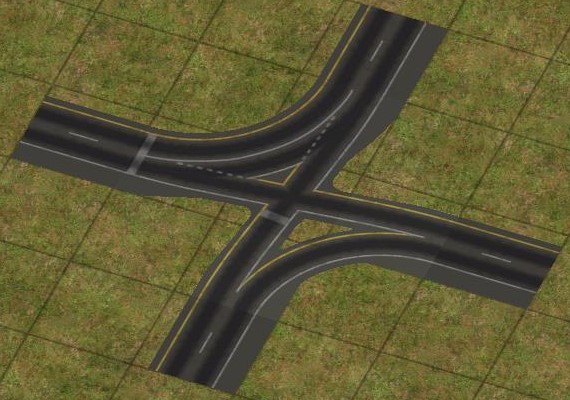
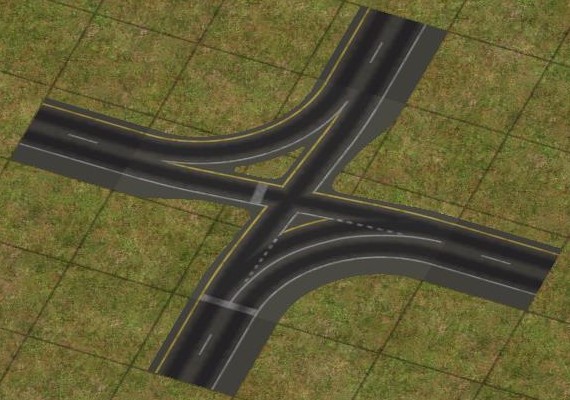
Diagonals and Base Curves
Single tile RHW networks (MIS, RHW-2, RHW-3, RHW-4, RHW-6S) can be simply be dragged diagonally as normal. Multi tile RHW networks (RHW-8S, RHW-10S, RHW-12S, RHW-6C, and RHW-8C) must have each tile drawn diagonally over adjacent tiles. This is referred to as a “split-tile diagonal” - no diagonal pieces overlap on the same tiles. This is in contrast to many Maxis networks that allow “shared-tile diagonals” (or “double diagonal”) setups. With the exception of L0 RHW-2, double diagonal setups are not supported.
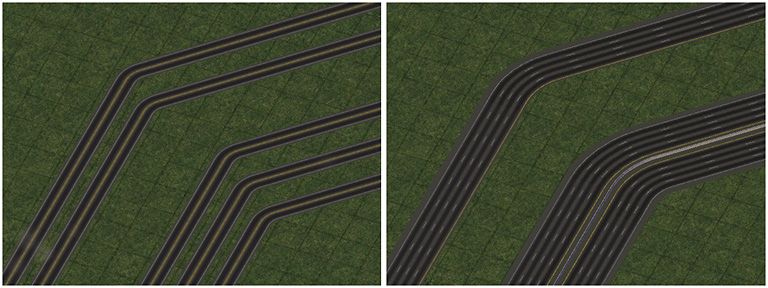
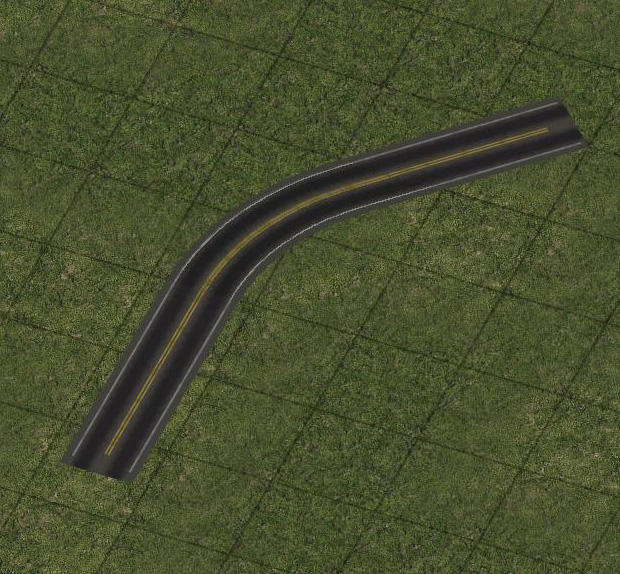
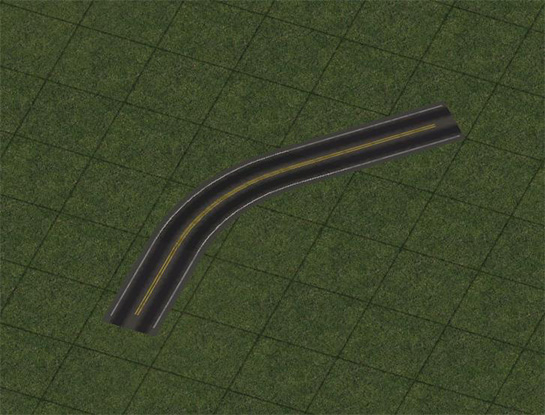
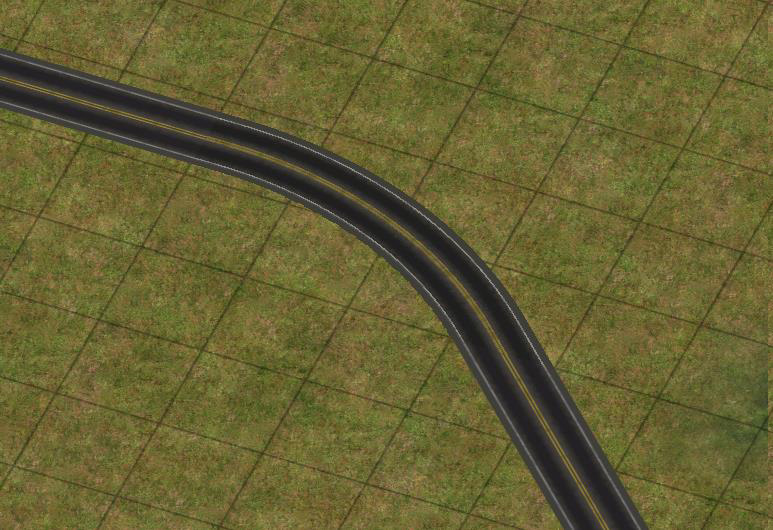
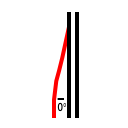
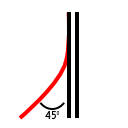
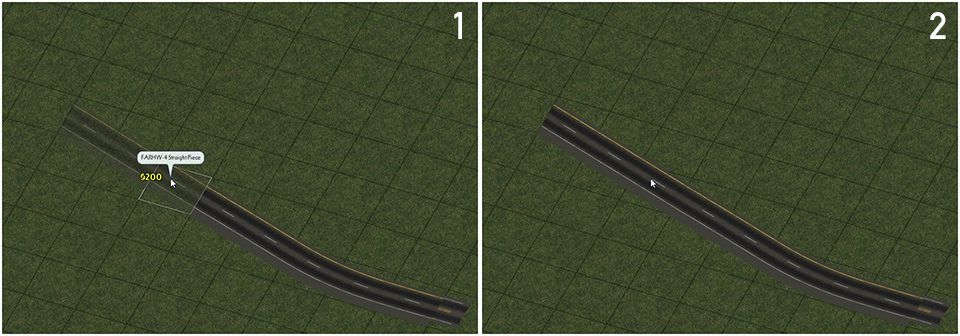
The default draggable curves for the RealHighway networks are not exactly the smoothest or most realistic. The FLEX-based and draggable Multi-Radius Curves (MRCs) and the Puzzle Piece-based Wide-Radius Curves (WRCs) provide smoother curves with wider radii than the defaults. Fractional Angle RealHighways (FARHW) are also available for even gentler curves.
The default sharp 90-degree bends are only available with the RHW-2 and MIS Ramp networks (at all height levels), for the sake of realism. The MIS Ramp’s version also overrides one “buffer tile” on either side of the bend itself, to produce a smoother curve automatically. 90-degree curves for all other networks may be created by combining two 45-degree curves together.
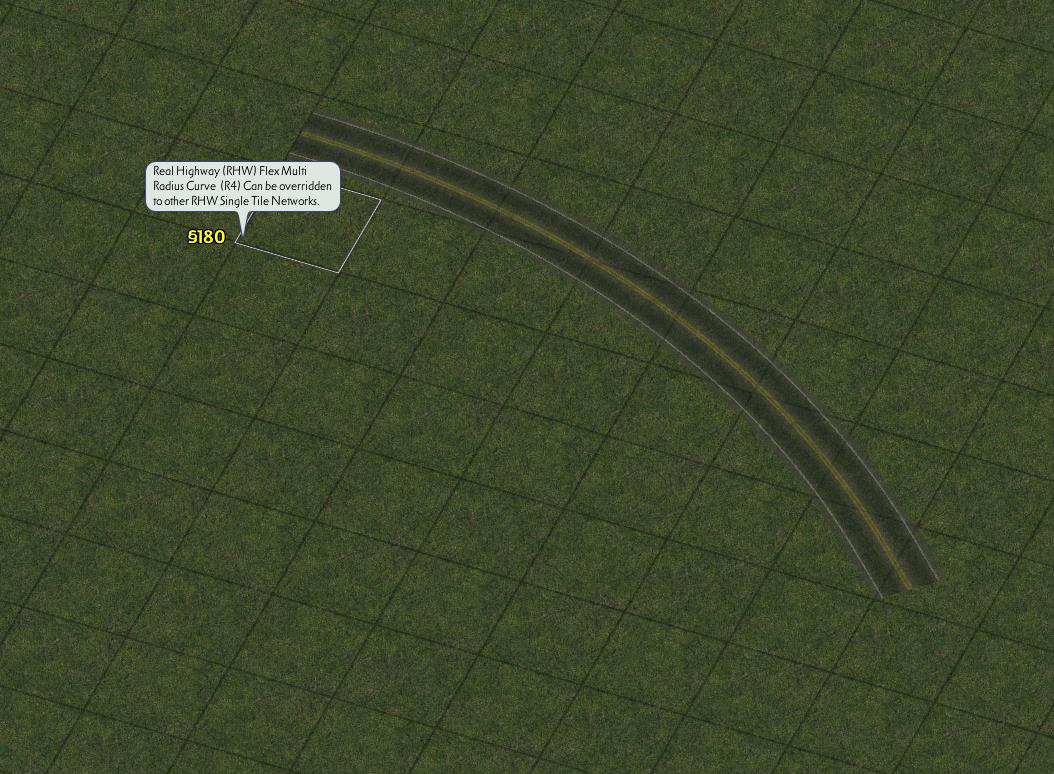
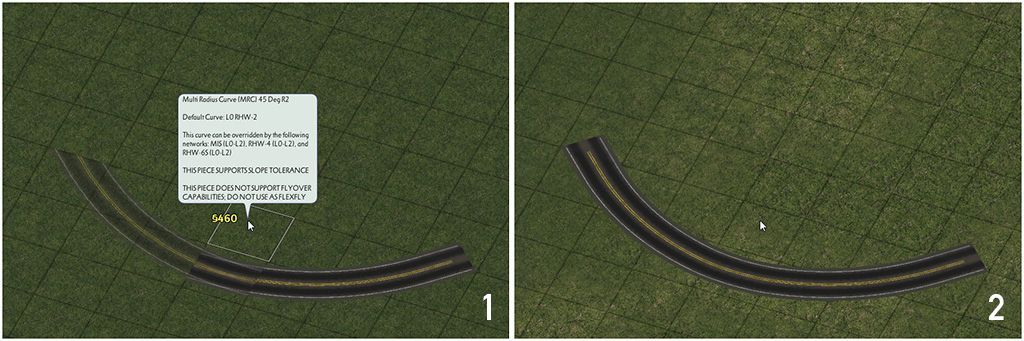
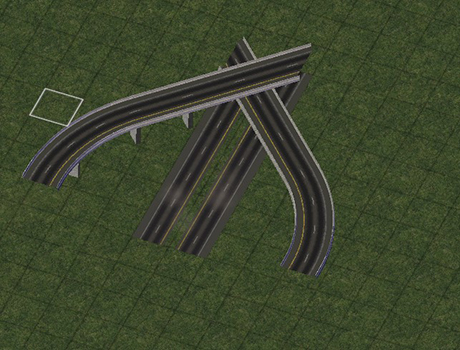
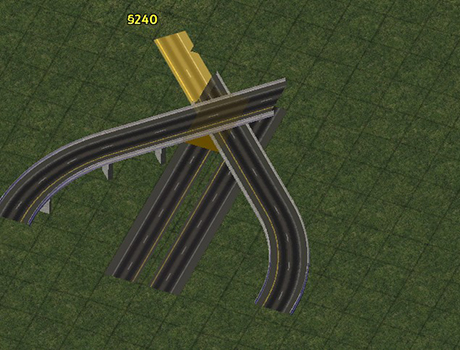
Multi-Radius Curves (MRCs)
Both the FLEX MRCs and puzzle piece WRCs can be found under the RealHighway Curves button on the Highways menu.
RHW Curves Button
The Multi-Radius Curves are a series of wider-radius curves that are constructed through either draggable means or with FLEX pieces. There are five radii total included in the MRC system, R1, R2, R3, R4, and R5, as well as an S-Curve and a Basketweave setup. The higher the number, the wider the radius. As with all RHW FLEX items, the default network when plopping is RHW-2, but these will support overrides up to RHW-6S width. Refer to the RHW Compatibility Guide for the full detail on what is supported.

The Multi-Radius Curves do not support the creation of intersections or crossings at any point in the curve, and attempting to build one will destabilize the curve. The FLEXFly system does allow for an equivalent functionality, however.
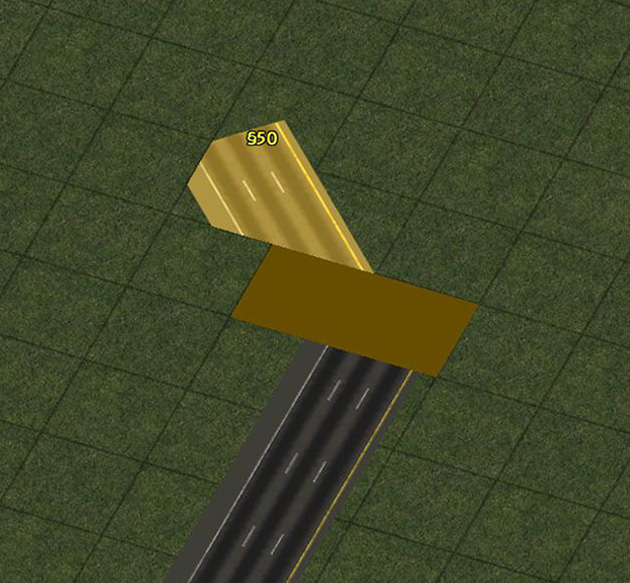
R1 Curves
R1 45° curves, also known as “mini-curves”, are constructed by draggable means, and can be easily constructed with a simple additional motion when building the default network curves. Build the standard diagonal curve first, then drag in a straight, orthogonal motion back over the curve. Afterward, a smoother curve will appear.
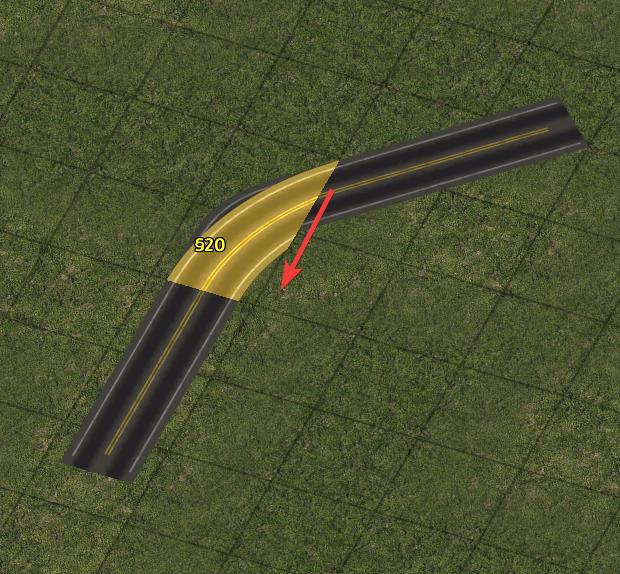
Alternatively, instead of dragging the default curve, move your cursor one tile further away from the curve to automatically trigger the curve.
Standard diagonal curve
Move one tile further instead
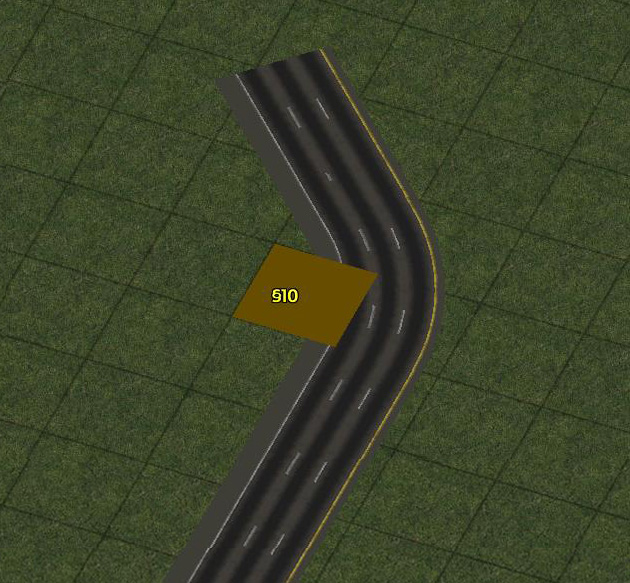
When dragging R1 curves with RHW-6S, due to the overhang there may be a “bite” missing from the inside of some curve setups. Use the RHW tool and click once in the area of the missing “bite” to fill it in.

Standard diagonal curve
Move one tile further instead

A little "bite" is missing from the curve
Click with RHW tool
R2 Curves
R2 45° curves may be constructed either via draggable means or FLEX pieces. For the draggable R2 setup, drag the default R0 curve, and then build a 90° bend on the inside of the curve by dragging one tile away from the curve on the inside, then one tile back towards the curve.
Regular diagonal
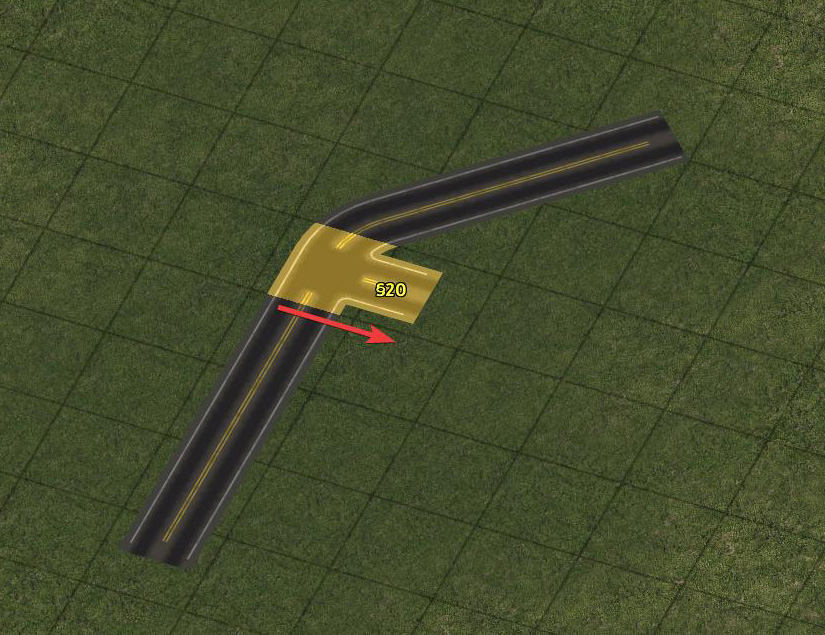
Drag one tile right
Drag one tile up
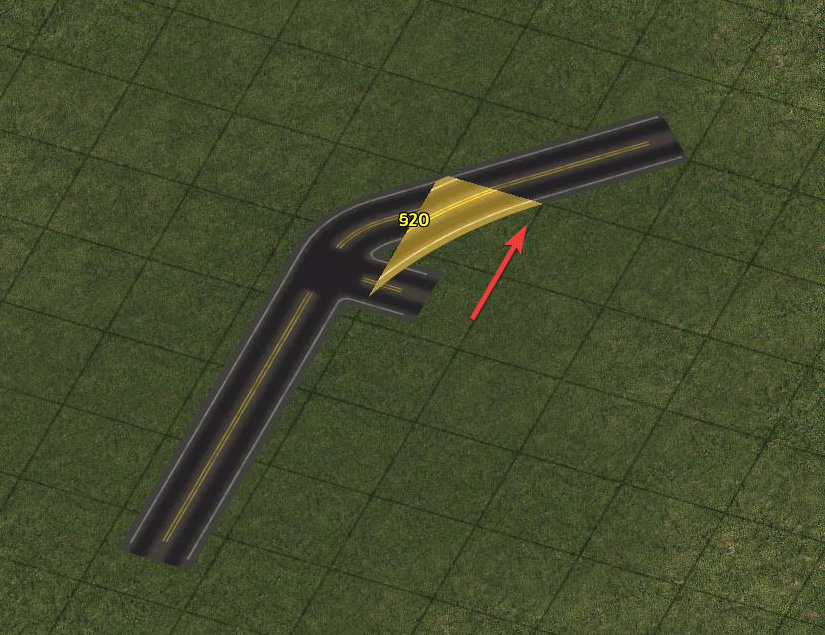
To build FLEX curves, select the desired radius and place it in the city. Remember, FLEX pieces all default to the base L0 RHW-2 network, but dragging an override network into a FLEX MRC piece will cause it to convert to the dragged network. The overridden network can be dragged out of either side of the FLEX curve.
Place a starter piece
Drag into the curve to override
Network is draggable from both ends
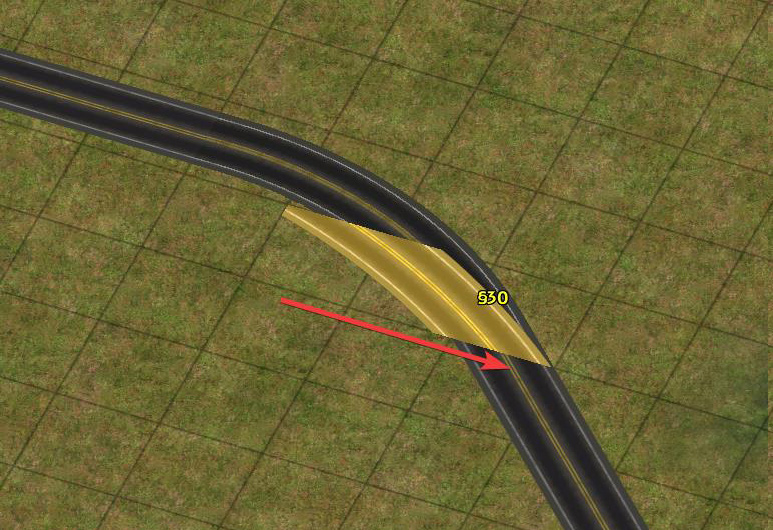
Note also that the orthogonal ends of R2 curves can overlap by one tile, allowing for one to create a smooth composite curve, which can be very useful in building aesthetically-pleasing interchange ramps. Other radius curves do not support this feature.
R3 Curves
The R3 45° radii may be constructed either via draggable means or FLEX pieces. For the draggable setup, begin with an R2 curve. Drag three tiles across the diagonal, parallel to the orthogonal stretch. You may drag in either direction (in reference to the screenshot below, left-to-right or right-to-left).
Begin with an R2 curve
Drag parallel to the ortho stretch
The R3 FLEX pieces are constructed the same way as the R2 FLEX piece.
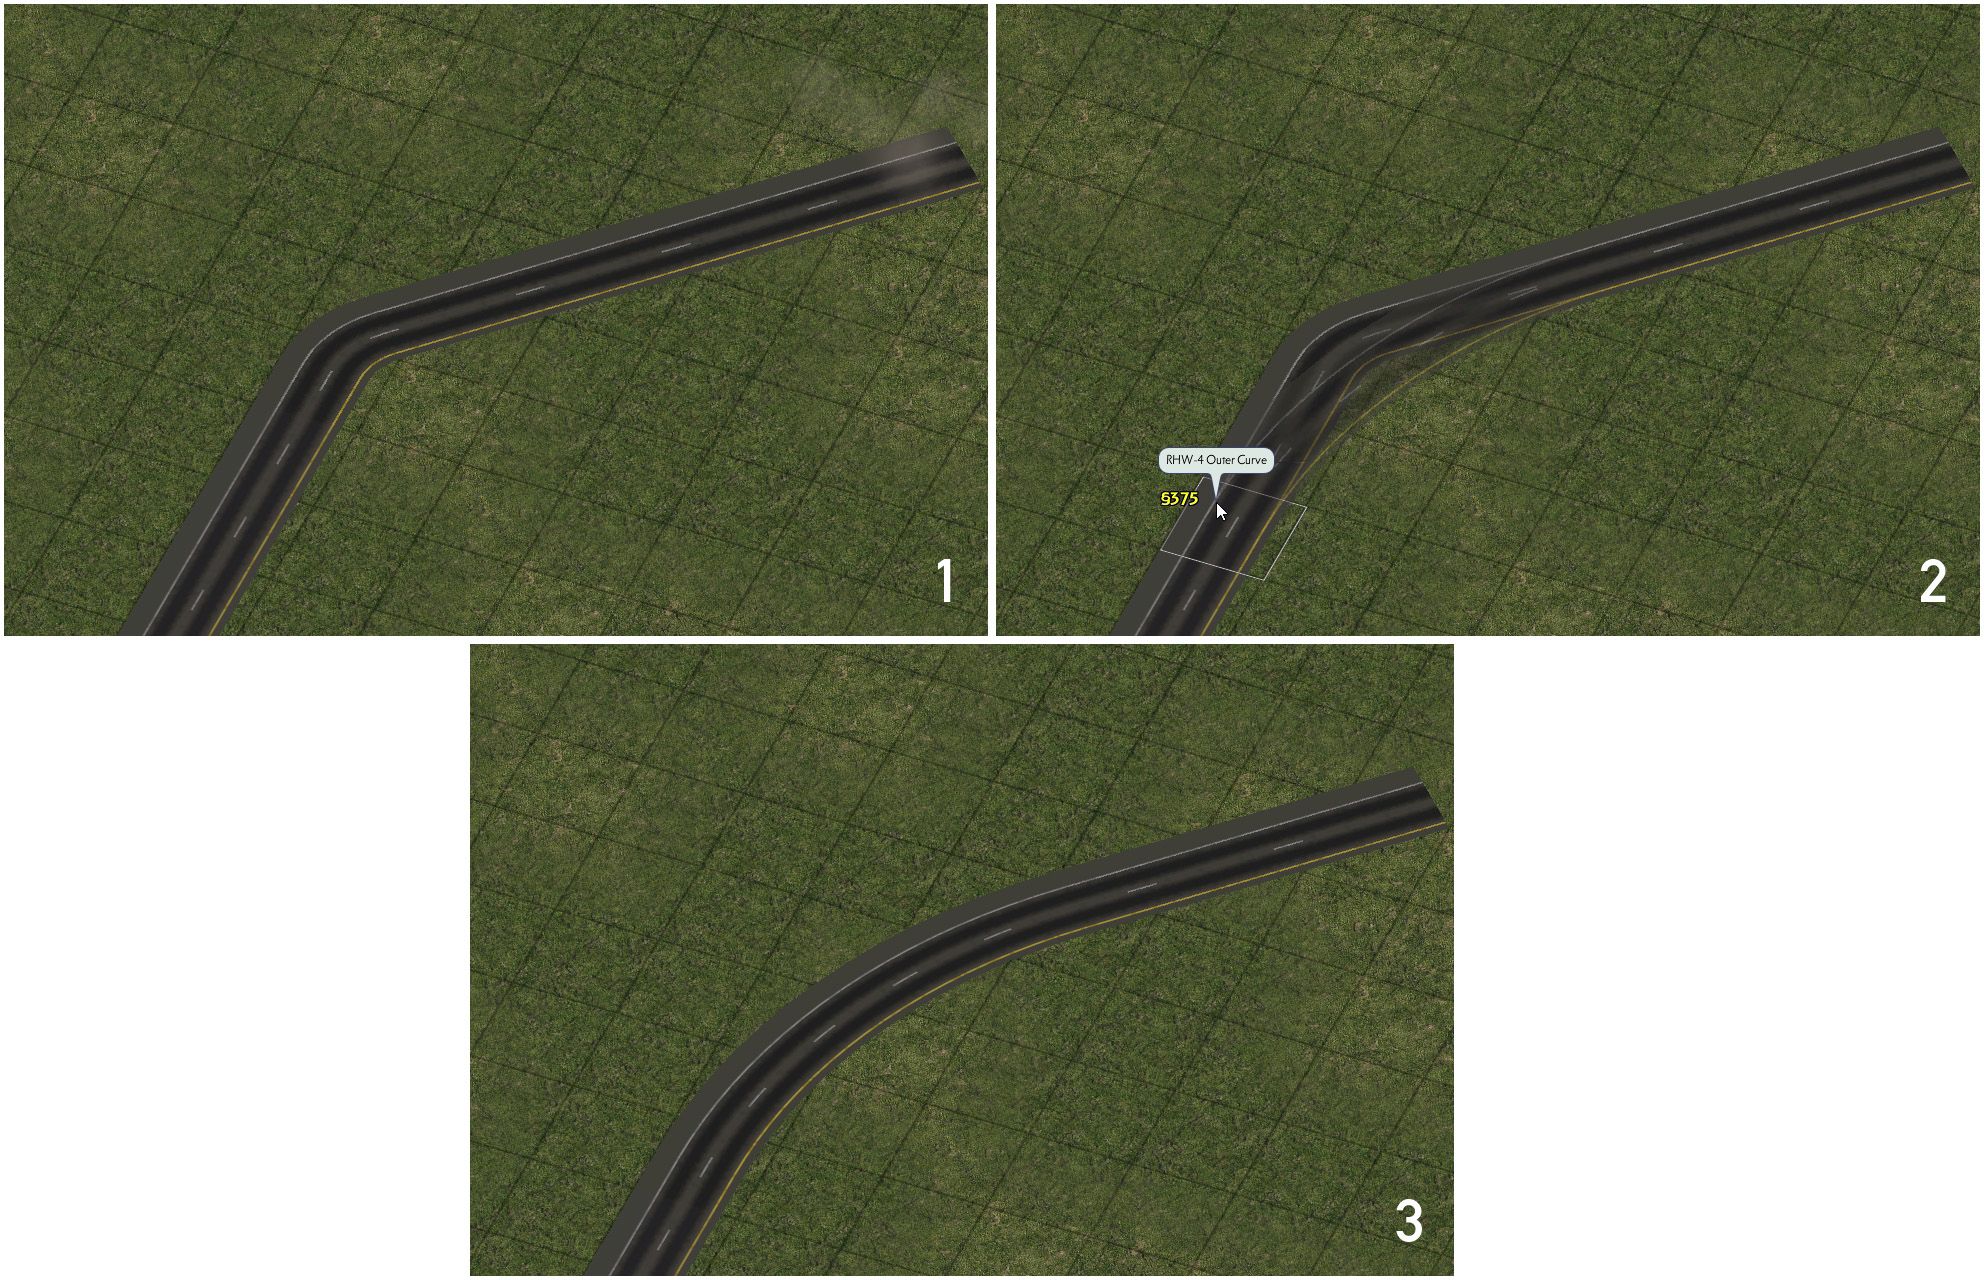
R4, R5 Curves
The R4 and R5 radii only exist as FLEX pieces, and are constructed the same way as the R2 FLEX piece.
Wide-Radius Curves (WRCs)
In addition to the MRCs, a series of puzzle piece-based Wide-Radius Curves (WRCs) also exist, which at least partially cover the gaps for ground-level RealHighway networks where FLEX pieces do not exist. S-Curves exist for all networks, 45° curves exist for all but the RHW-6C and 8C, and 90° curves (in two radii, small and large) exist for the RHW-2 and MIS Ramps.
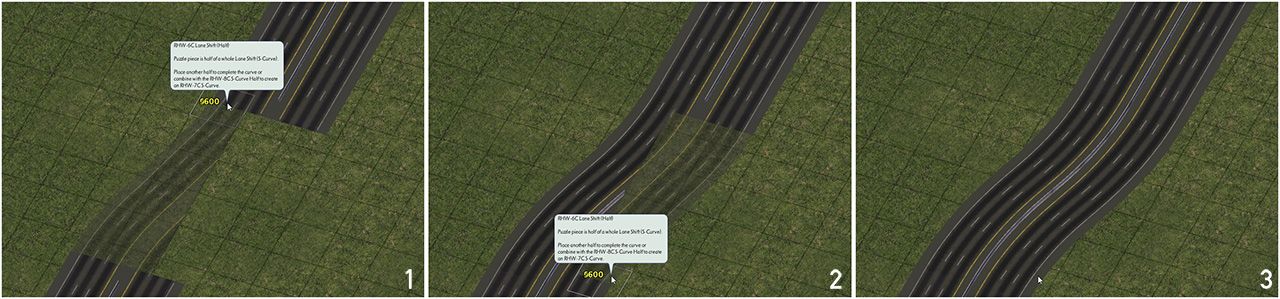
The Wide-Radius Curve puzzle pieces do NOT have starters on their ends, unlike many other older puzzle-based RealHighway items, and being puzzle-based, do not support overrides. As such, they generally must be built on top of an existing stretch of a RealHighway network. The network must already exist up to the point at which the curve piece begins. With S-Curves/Lane Shifts, the presence of base network stubs may allow one to simply place starters oneself on either end.
The S-Curves for the RHW-6C and RHW-8C are built in a modular fashion as well, to allow support for the asymmetrical “RHW-7C” setup. Build the full curve one half at a time.
It is possible to also build larger composite 90° turns with the single-tile networks, using the RHW Filler Pieces, but this functionality does not exist for the RHW-8S, 10S, 6C, or 8C.
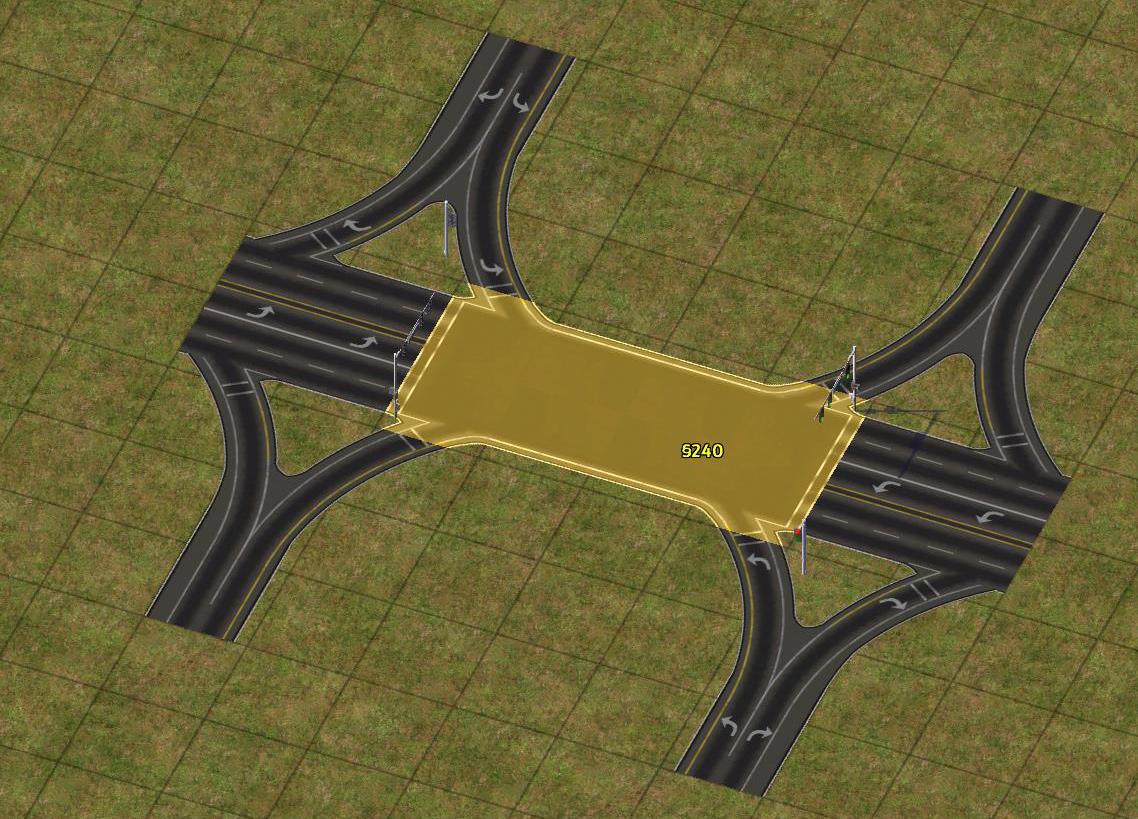
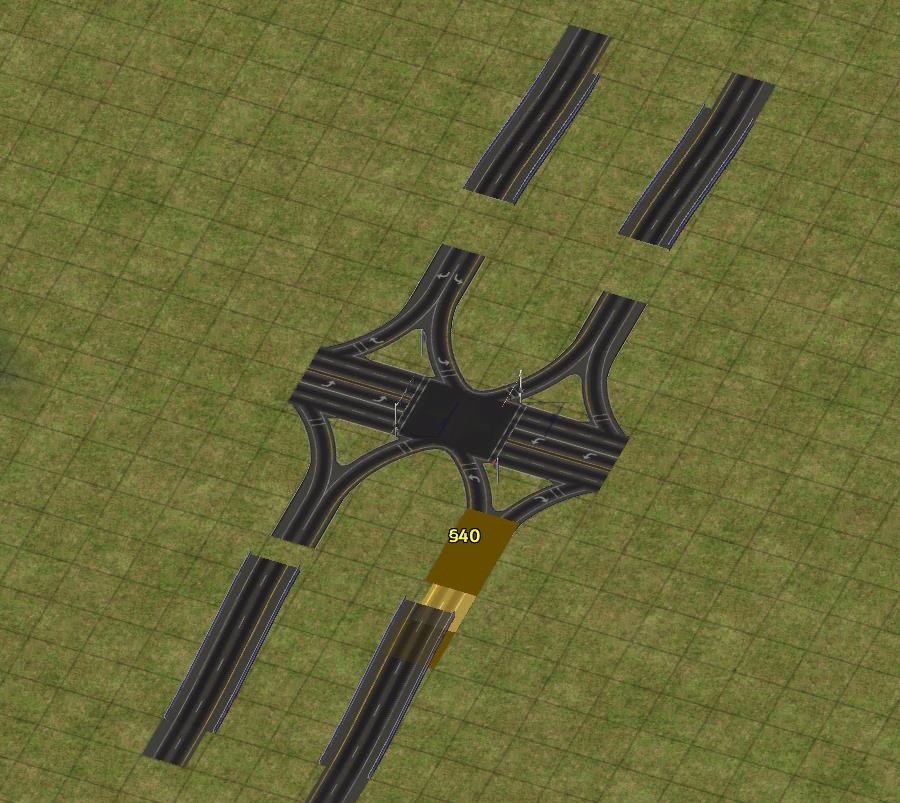
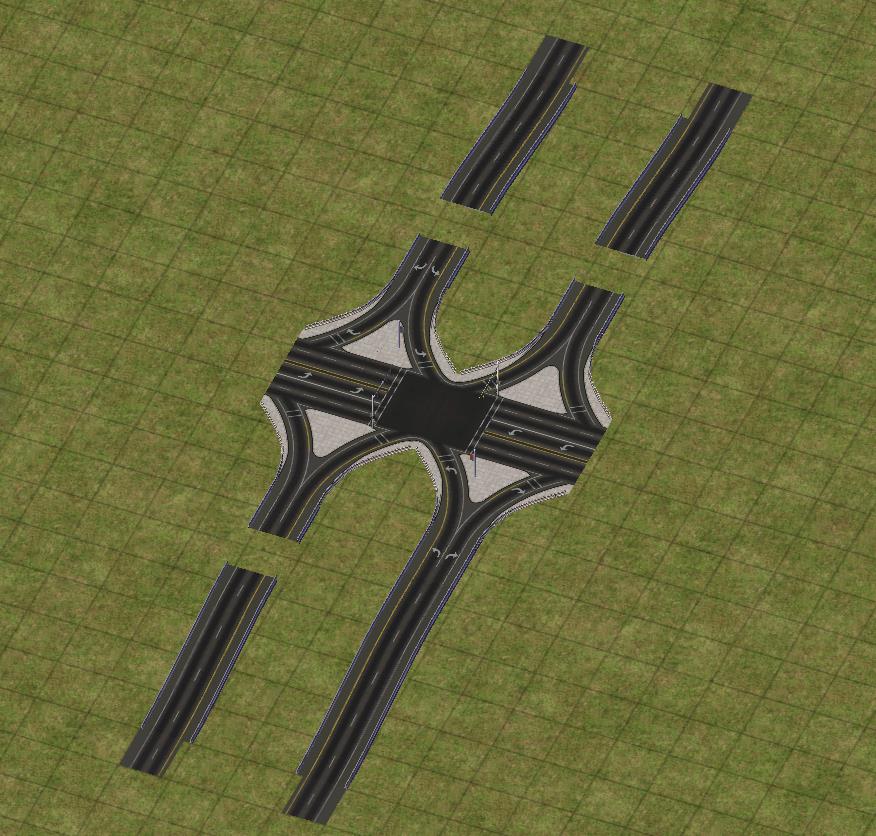
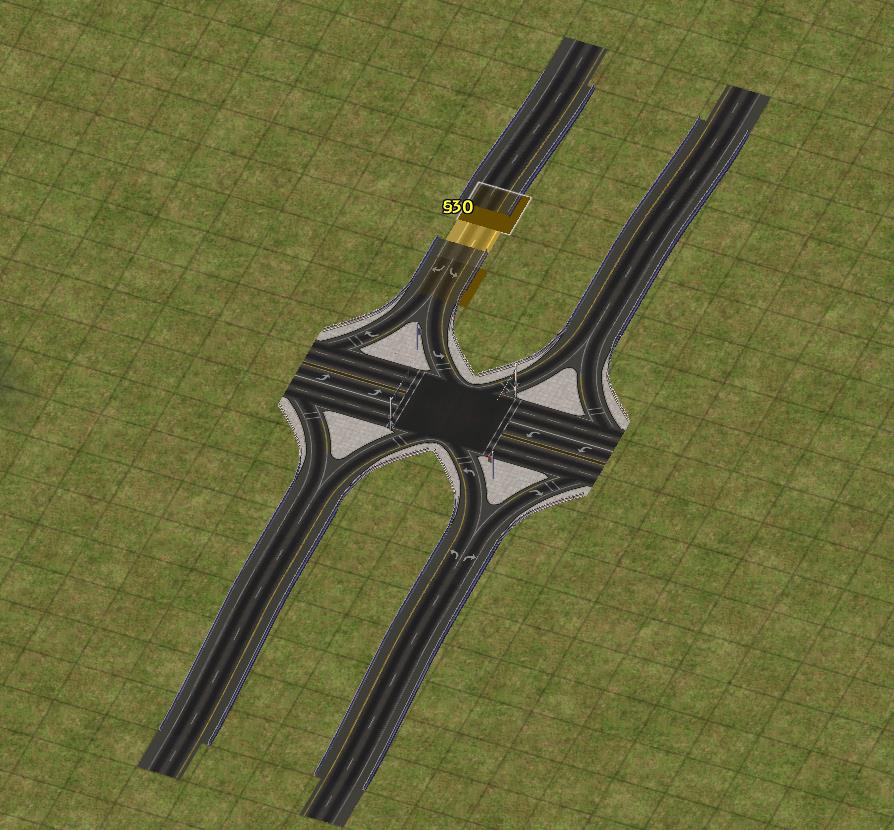
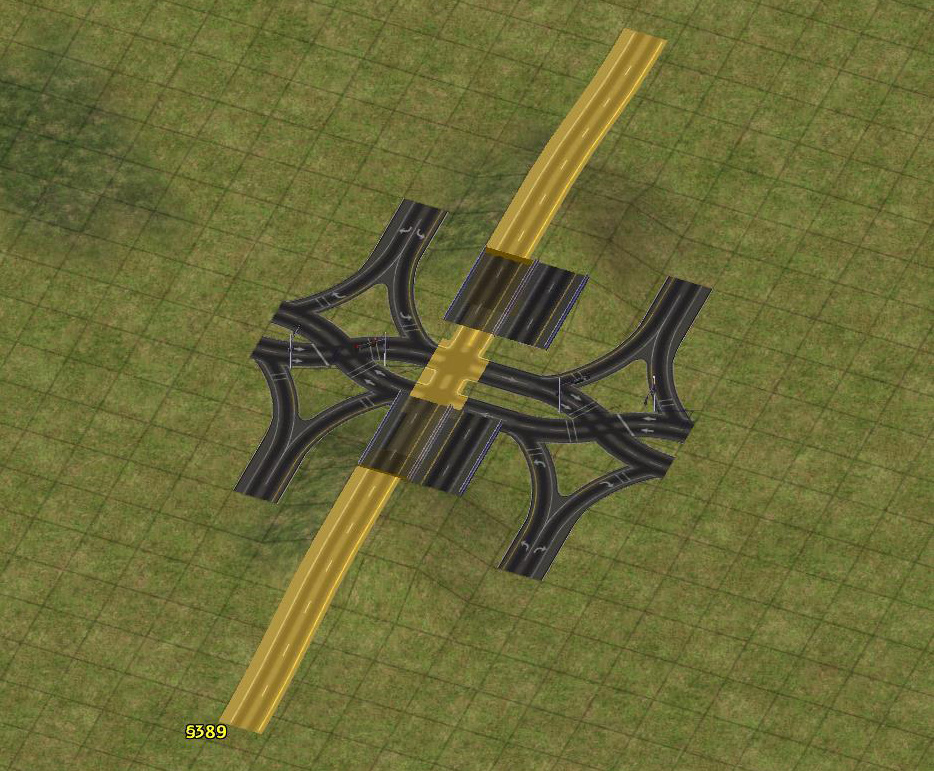
Intersections and Crossings
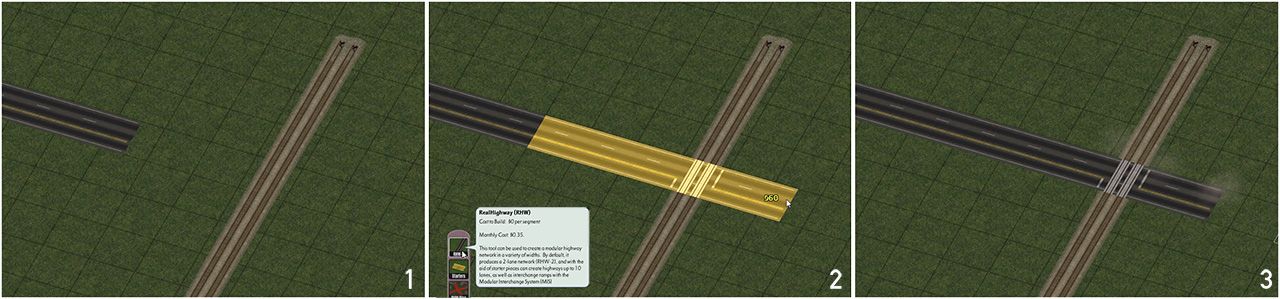
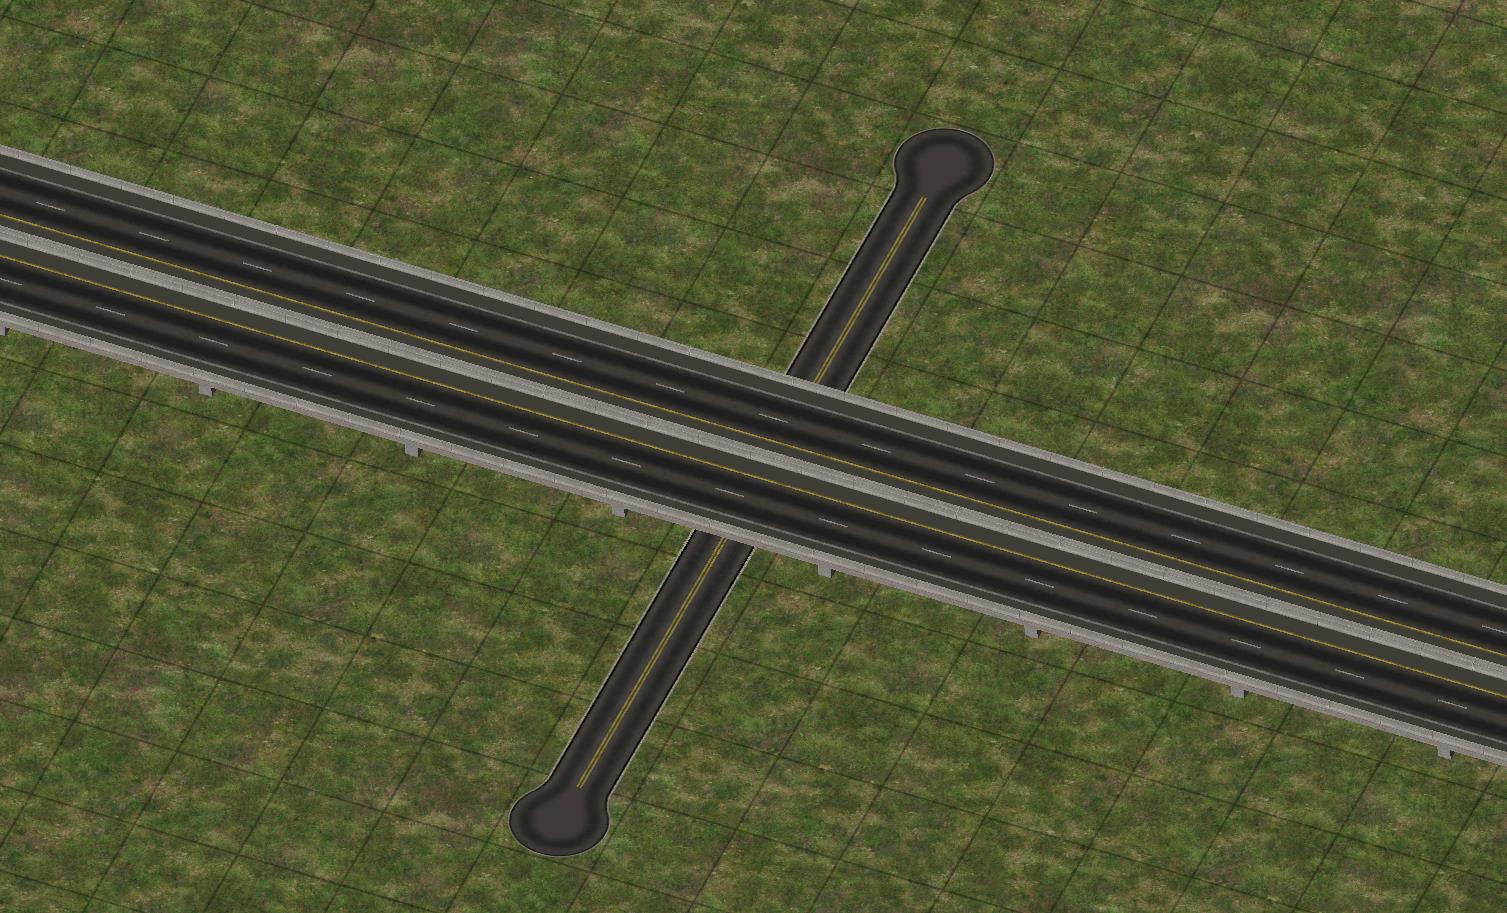
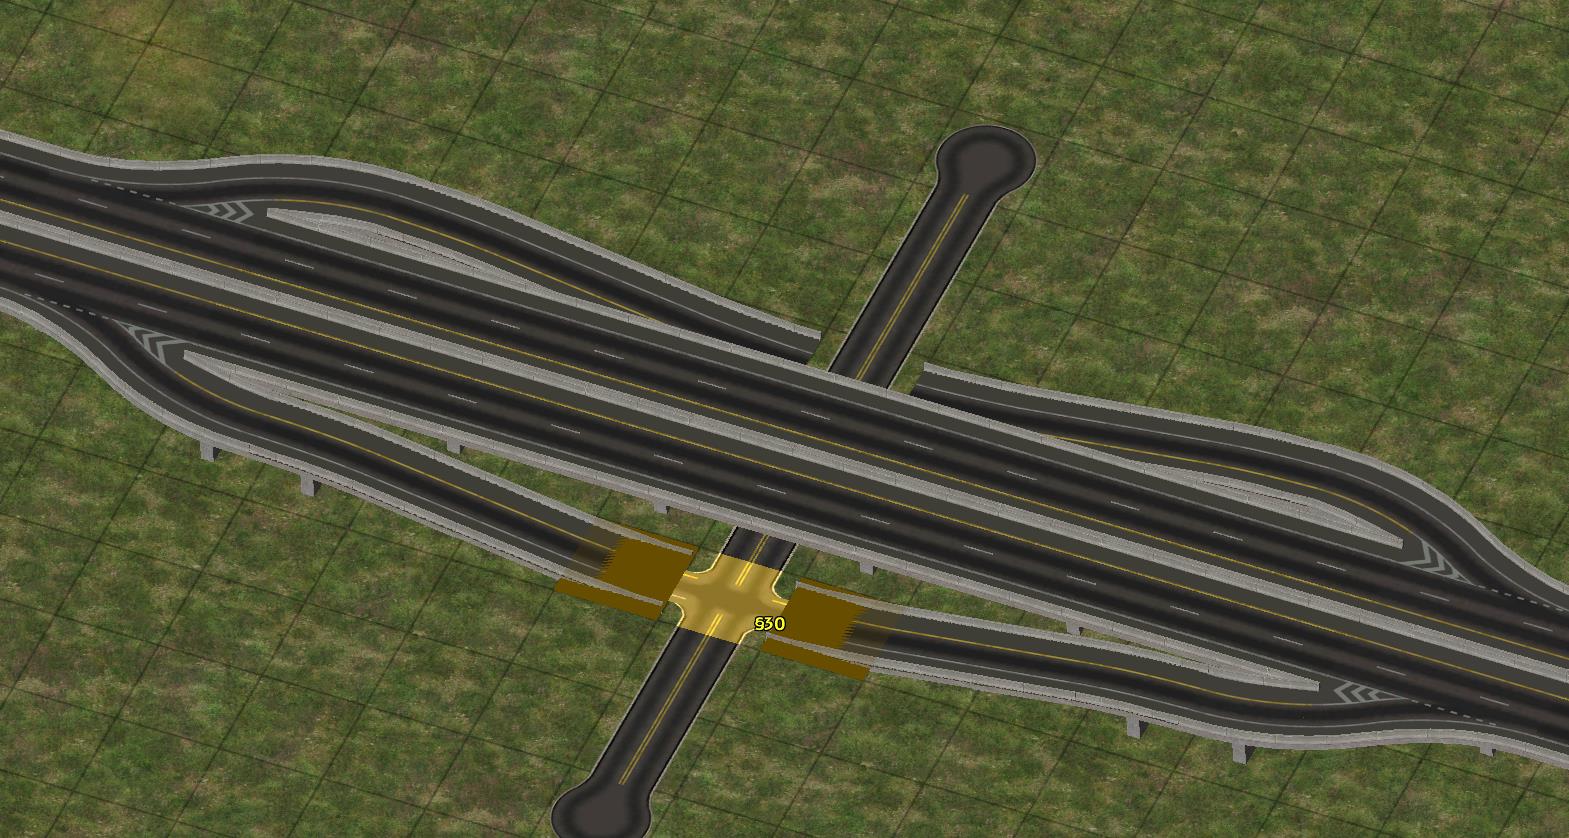
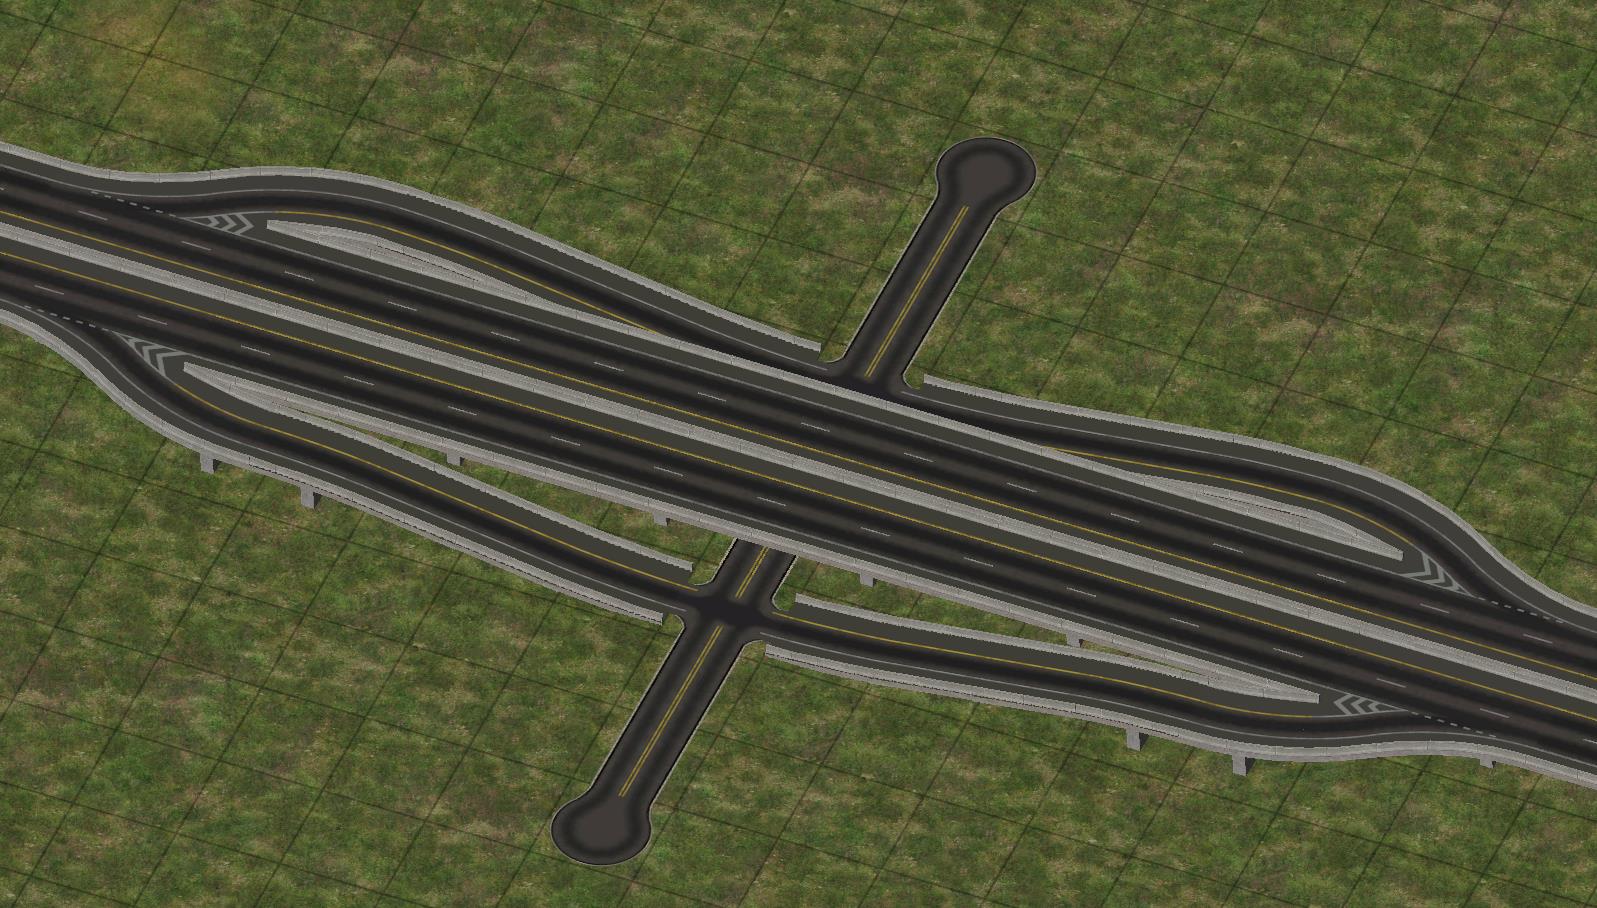
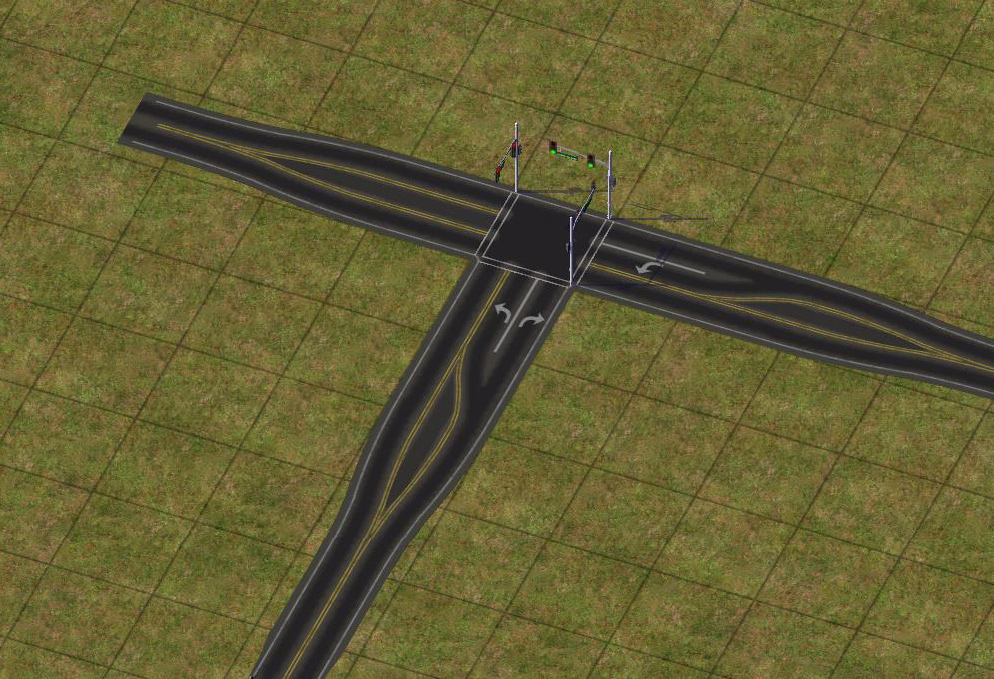
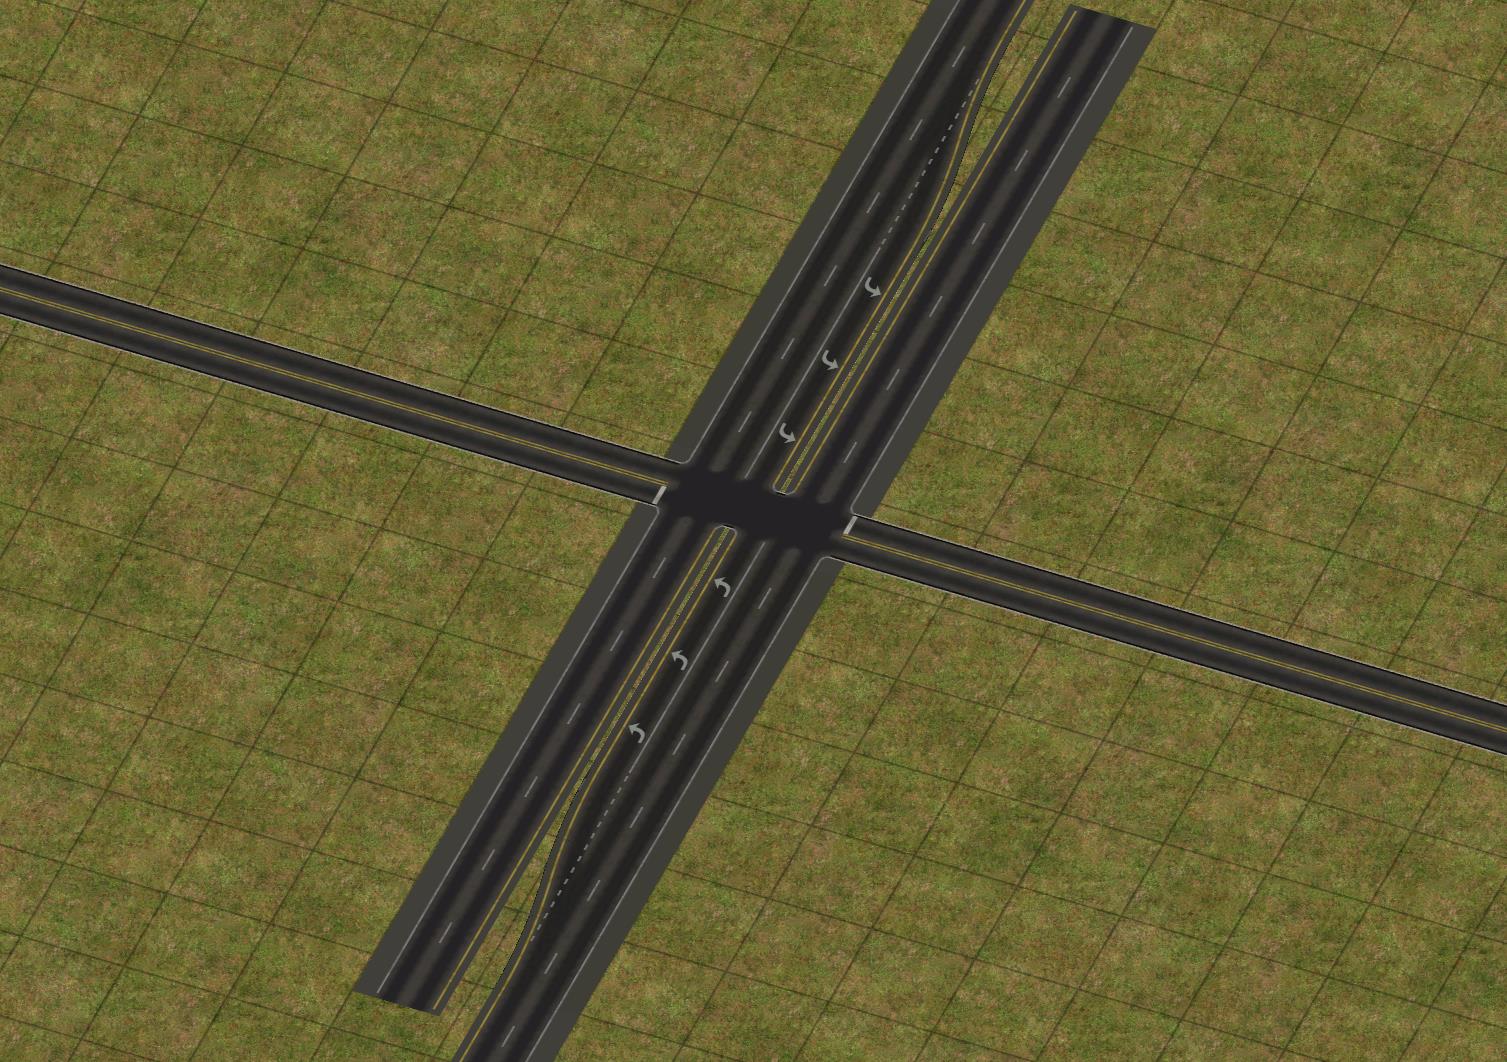
The RealHighway system has two ways of connecting and crossing other networks: At-Grade and Grade-Separated. The smaller RealHighway networks, including the RHW-2 (L0-L2), RHW-3 (L0 only), MIS (L0-L2), and RHW-4 (L0-L2), have the ability to intersect and cross other networks at the same height level. To build these crossings, simply drag the desired RealHighway network through or up to the crossing network to build the type of crossing you want, just as one would with any other draggable network in the game.
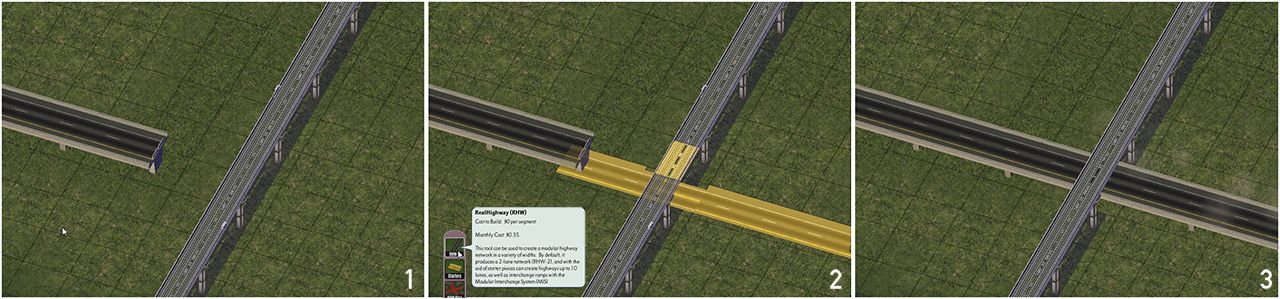
For grade-separated crossings, where networks at different height levels–for instance, an L1 RHW-4 and the game’s default Elevated Rail network (which is at L2)–follow the same exact process. All RealHighway networks at all height levels support grade-separated crossings.
For additional information about what network crossings are supported with the other components of the Network Addon Mod, refer to the RHW Compatibility Guide.
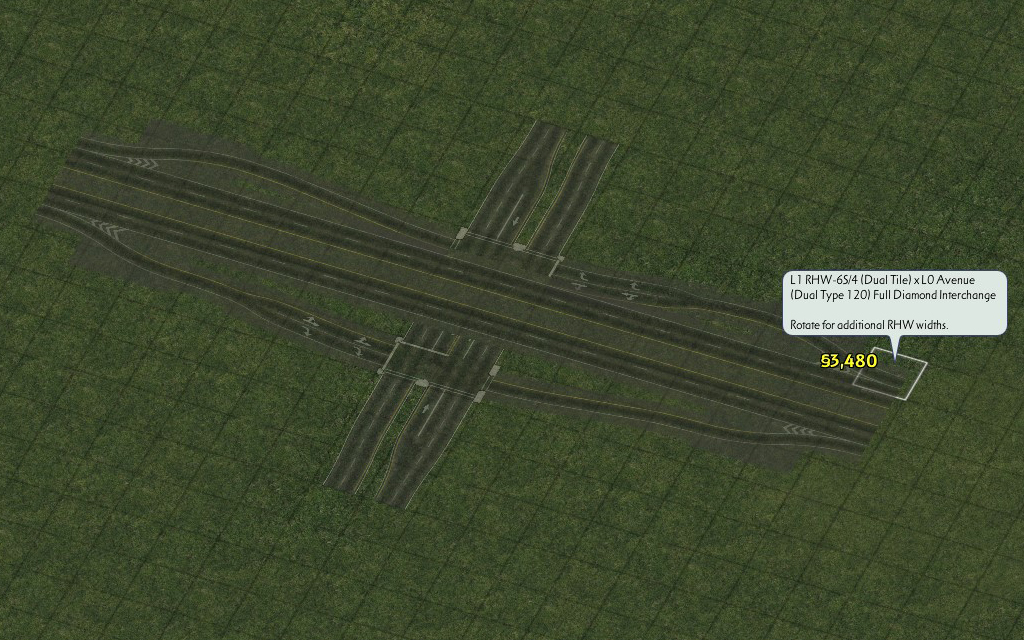
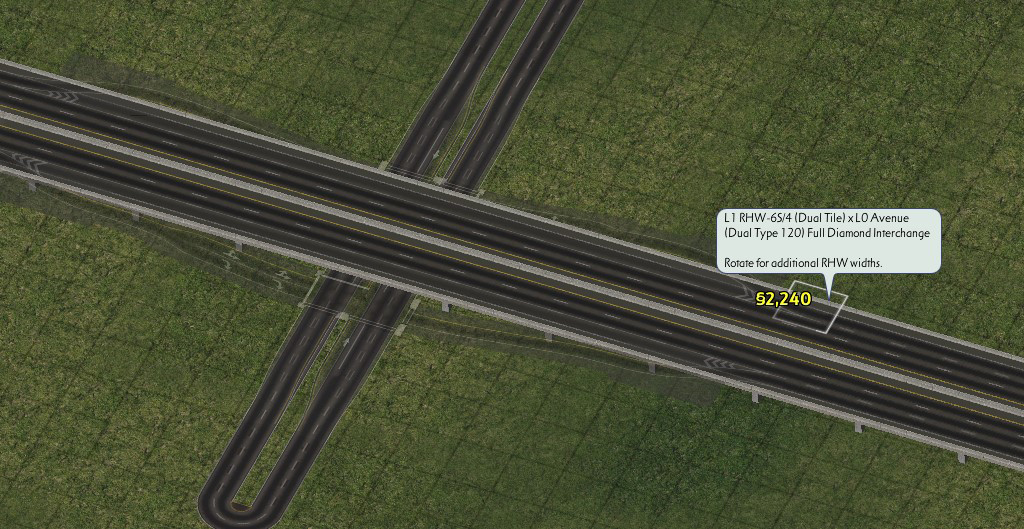
QuickChange Interchanges
The release of NAM 45, for the first time, brought support of for full ploppable interchanges, known as QuickChange Xpress (QCX). Like Maxis interchanges, these are able to be built with a single click. A somewhat limited variety of these interchanges exist, mainly focusing on highway entrance and exit ramps for road-based networks. At present, only Diamond Interchanges involving the Road, Avenue, and 6-lane Avenue (AVE-6, from the Network Widening Mod) networks exist. Each of these interchanges has appropriate turn lanes already applied on the surface networks and the on/offramps. Four different RHW width configurations are supported (RHW-6S/RHW-4 Adjacent, RHW-6S/RHW-4 With Median, RHW-8C/6C, and RHW-10S/8S), and the option to have the RHW go over or under the surface street (in an L0/L1 configuration).
The QCX setups are located near the end of the TAB Loop under the RHW QuickChange button on the Highways Menu. Tab through this loop to change the surface network width (Road or Avenue) and whether the RHW is elevated or the surface network is elevated. Rotate each piece to cycle through the different RHW widths/configurations.
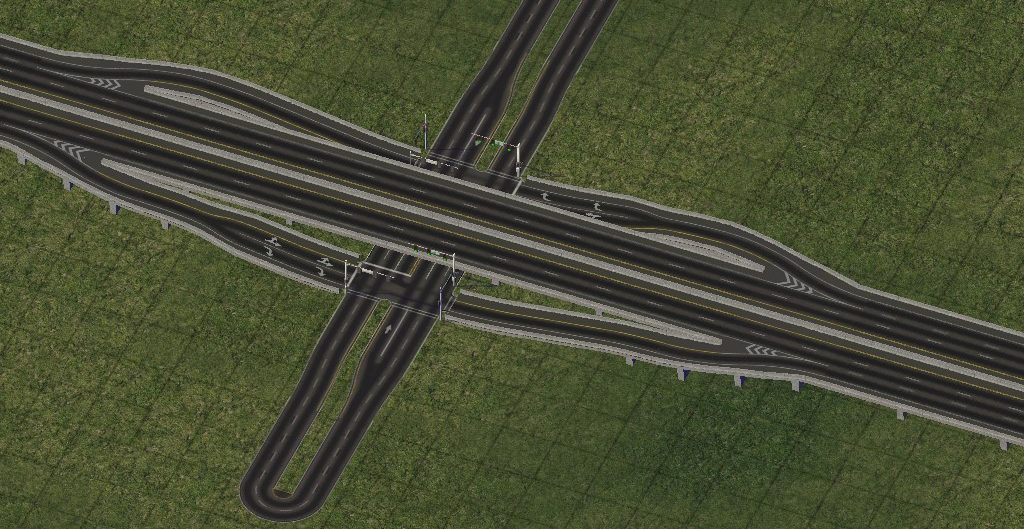
To use a QCX, plop the interchange in its desired location/rotation, and connect it up with the surrounding networks. It’s really that easy!
Plop the QCX
Drag out the Road or Avenue networks
Drag out the RHW networks
It is also possible to plop a QCX directly over an existing crossing.
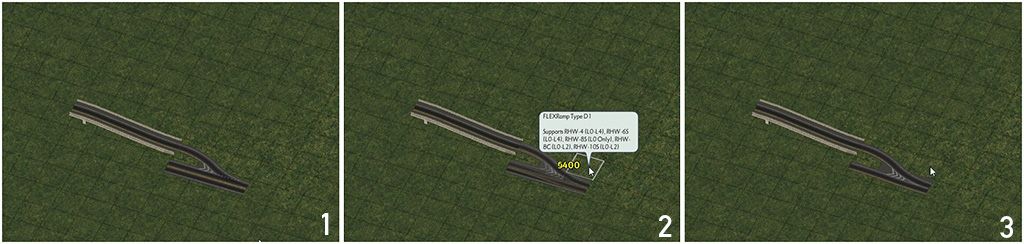
Ramp Interface Basics
At the core of the RealHighway’s Modular Interchange System are the Ramp Interfaces, which allow exit and entrance ramps to branch from or merge into the through lanes, or “mainline”, of a stretch of highway.

Ramp Interfaces come in a wide variety of shapes and sizes, so to properly identify each ramp, there are two, sometimes three or even four parts to the name. These indicate the mainline width, the branch angle and width, as well as whether any of the branch lanes were “exit only” or “acceleration” lanes - lanes added to or subtracted from the mainline. Some more specialized ramp interfaces may append a fourth part, containing other information about the nature and location of the branch in relation to the mainline.
The mainline portion will always indicate the width of the “top” portion of the ramp interface, where the mainline is guaranteed to be at its widest. In the case of FLEXRamps, since they are often shared by multiple networks which override a base version, the mainline network is usually excluded from the in-game description.
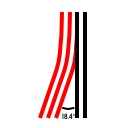
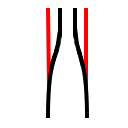
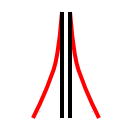
For the “type” designation, the number indicates the number of lanes included in the branch, while the letter indicates the branch angle and indicates whether the branch has any lanes that peel off (on exit) or join (on entrance) the mainline. The letter/number types translate as follows:
 |  | 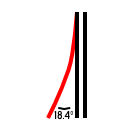 | 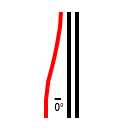 | 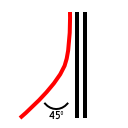 |  |
| Type A1 | Type B1 | Type C1 | Type D1 | Type E1 | Type F1 |
| A single-lane (MIS) branch off the mainline, with an orthogonal branch. No lanes peel off the mainline. | A single-lane (MIS) branch off the mainline, with a diagonal branch. No lanes peel off the mainline. | A single-lane (MIS) branch off the mainline, with a fractional angle (18.4°) branch. No lanes peel off the mainline. | A single-lane (MIS) branch off the mainline, with an orthogonal branch. The branch is formed from one lane of the mainline, and the mainline has one fewer lane at the bottom. | A single-lane (MIS) branch off the mainline, with a diagonal branch. The branch is formed from one lane of the mainline, and the mainline has one fewer lane at the bottom. | A single-lane (MIS) branch off the mainline, splitting at a fractional angle (18.4°) from the mainline. The branch is formed from one lane of the mainline, and the mainline has one fewer lane at the bottom. |
 |  | 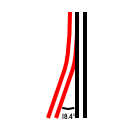 |  |  |  |
| Type A2 | Type B2 | Type C2 | Type D2 | Type E2 | Type F2 |
| A dual-lane (RHW-4) branch off the mainline, with an orthogonal branch. One of the two lanes on the branch is from the mainline, and the mainline has one fewer lane at the bottom. | A dual-lane (RHW-4) branch off the mainline, with a diagonal branch. One of the two lanes on the branch is from the mainline, and the mainline has one fewer lane at the bottom. | A dual-lane (RHW-4) branch off the mainline, with a fractional angle (18.4°) branch. One of the two lanes on the branch is from the mainline, and the mainline has one fewer lane at the bottom. | A dual-lane (RHW-4) branch off the mainline, with an orthogonal branch. Both lanes on the branch are from the mainline, and the mainline has two fewer lanes at the bottom. | A dual-lane (RHW-4) branch off the mainline, with a diagonal branch. Both lanes on the branch are from the mainline, and the mainline has two fewer lanes at the bottom. | A dual-lane (RHW-4) branch off the mainline, with a fractional angle (18.4°) branch. Both lanes on the branch are from the mainline, and the mainline has two fewer lanes at the bottom. |
 |  |  |  |  |  |
| Type A3 | Type B3 Not available | Type C3 | Type D3 | Type E3 Not available | Type F3 Not available |
| A triple-lane (RHW-6S) branch off the mainline, with an orthogonal branch. Two of the three lanes on the branch is from the mainline, and the mainline has two fewer lanes at the bottom. | A a triple-lane (RHW-6S) branch off the mainline, with a diagonal branch. Two of the three lanes on the branch is from the mainline, and the mainline has two fewer lanes at the bottom. | A triple-lane (RHW-6S) branch off the mainline, with a fractional angle (18.4°) branch. Two of the three lanes on the branch is from the mainline, and the mainline has two fewer lanes at the bottom. | A triple-lane (RHW-6S) branch off the mainline, with an orthogonal branch. All three lanes on the branch are from the mainline, and the mainline has three fewer lanes at the bottom. | A triple-lane (RHW-6S) branch off the mainline, with a diagonal branch. All three lanes on the branch are from the mainline, and the mainline has three fewer lanes at the bottom. | A triple-lane (RHW-6S) branch off the mainline, with a fractional angle (18.4°) branch. All three lanes on the branch are from the mainline, and the mainline has three fewer lanes at the bottom. |
Ramps may have an additional modifier on their name to further describe unique characteristics about the ramp:
 |  |  |  |  |
| Outside | Inside | Wide | Wye | Shift |
| The standard ramp where the branch is on the outside (right side in countries with right-hand traffic, left side in those with left-hand traffic). | The ramp branch is on the inside (left exit/entrance in countries with right-hand traffic, right exit/entrance for those with left-hand traffic), rather than the expected outside. | The ramp branch has a larger separation than the standard version of that type. Most commonly applied to A1 and A2 ramps. | Both the branch and the mainline diverge from the path of the mainline at the top in a symmetrical fashion, forming a wishbone or Y-shape. Typically the mainline is the same width as the branch. | The mainline undergoes curvature in the midst of the ramp. This occurs when the mainline shifts from an S-type network to a C-type network. |
 |  |  | | |
| Dual | Folded | Diagonal | FA | |
| There are two ramp branches on the ramp interface. This is most commonly seen with the bidirectional networks (RHW-2, RHW-3, and Double-Decker RHWs), or in conjunction with Shift. | There are two ramp branches that curve off at 90-degree angles, in opposite directions. There is only one Folded ramp interface, the RHW-2 D1 Folded. | The mainline is diagonal rather than orthogonal. The branch angles are handled the same as if the ramp were orthogonal (i.e. an orthogonal ramp branch off a diagonal ramp interface would still be an A or D-type ramp of some sort). | The mainline is at a fractional angle rather than orthogonal. The branch angles are handled the same as if the ramp were orthogonal (i.e. an orthogonal ramp branch off an FA ramp interface would still be an A or D-type ramp of some sort). |
Building Ramp Interfaces
There are three possible ways to construct Ramp Interfaces:
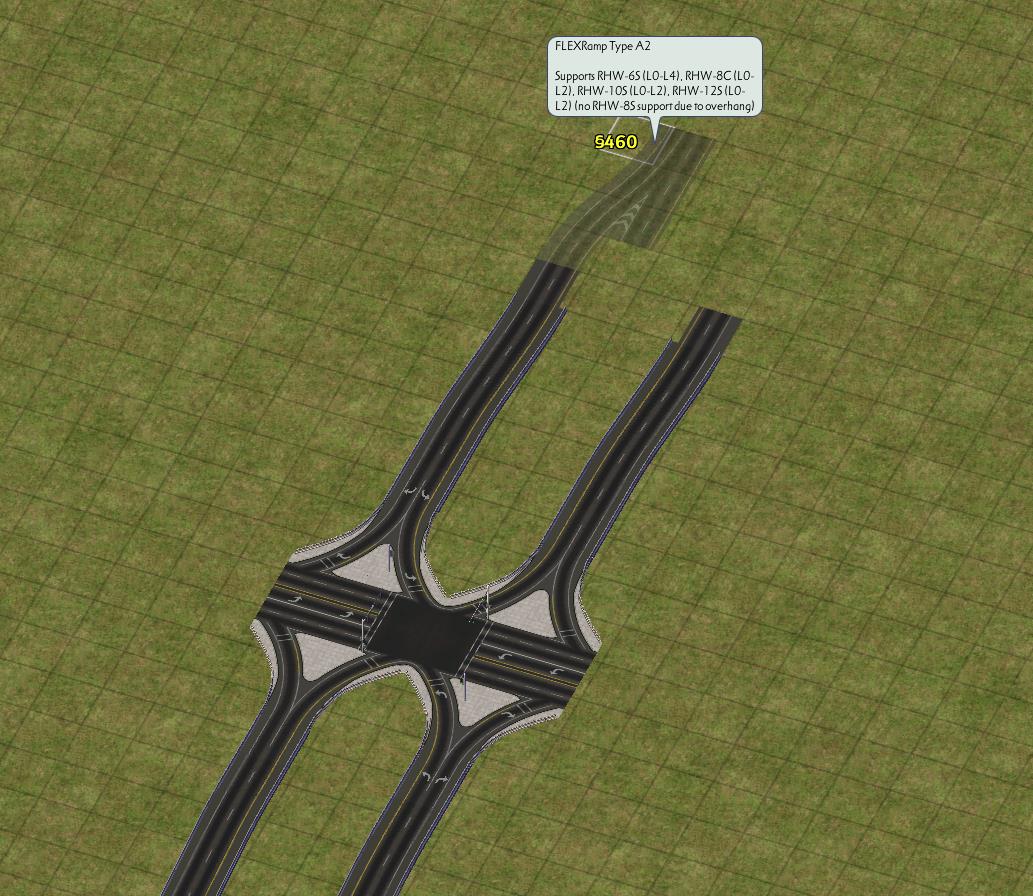
FLEXRamps - These are ploppable, generally slope-tolerant, and conform to match the surrounding network via overrides. These can be found under the FLEXRamps button.

FLEXRamps
Draggable Ramp Interfaces (DRI) - These are pattern-based draggable items, built by dragging the RealHighway network tool according to a specific pattern. Like the FLEXRamps, these will conform to match the surrounding network via overrides.
Puzzle Piece Ramp Interfeces DEPRECATED - These are conventional static puzzle pieces, many of which have starters attached to their ends. As these are static ploppables, they will not conform to the surrounding network, and one must select the specific puzzle piece for the desired network. This option is largely considered to be deprecated/outdated, with the exception of the few more specialized setups that have yet to receive FLEXRamp or DRI treatments. These can be found under the Ramps button.

Puzzle Piece Ramp Interfaces
In order to use a ramp interface to connect a RealHighway to one’s surface network, first place the desired ramp interface. Then, from the end of the branch, drag the RealHighway network tool out from it, just like using a starter piece. The network will convert to match the ramp. From there, continue dragging in the desired pattern, adding curves and transitions as necessary, and intersect the surface street with an At-Grade Crossing. (The Fractional Angle ramps, Types C and F, do not support dragging, and the appropriate Fractional Angle RealHighway (FARHW) puzzle pieces must be used instead.)
In order to connect to another RealHighway, follow the same process, but instead of forming an At-Grade Crossing, connect the ramp into another Ramp Interface on the other RealHighway.
Using FLEXRamps
FLEXRamps are ploppable FLEX on/offramp pieces, and are perhaps the easiest to navigate option to branch ramps off one’s RealHighway system. The FLEXRamp pieces may be found under the FLEXRamps button on the Highways menu. To use the FLEXRamps, simply find the desired ramp design, and plop it down. Each FLEXRamp has a default network, but will convert to match if one drags another RHW override network through it, or plops the ramp over an existing stretch of an RHW override network. The process is shown below (the process of overriding the base setup of the Draggable Ramp Interfaces is identical):
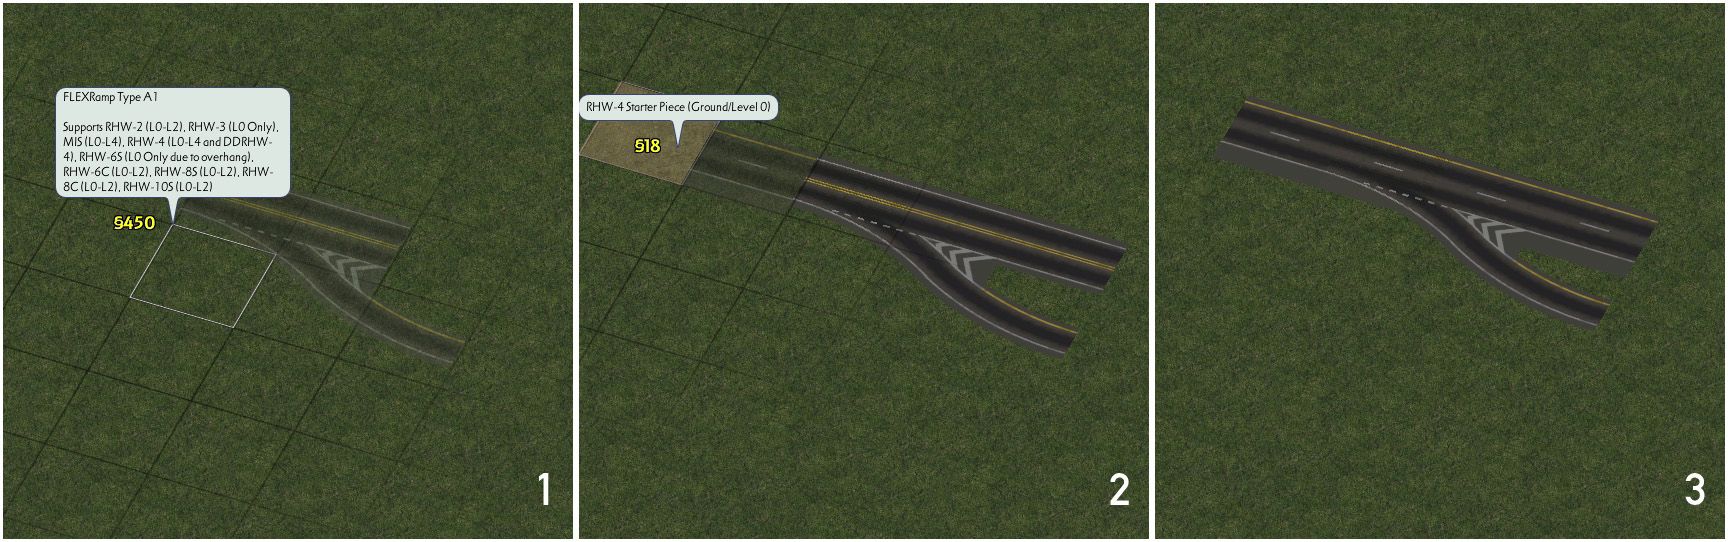
Due to the use of special network flags, FLEXRamps are relatively slope-tolerant, particularly compared to other ramp interface options.
Below is a list of the default networks for each FLEXRamp:
| Ramp | Default Network |
|---|---|
| Type A1 | RHW-2 |
| Type B1 | RHW-2 |
| Type D1 | RHW-3 |
| Type E1 | RHW-3 |
| Type A2 | RHW-6S |
| Type B2 | RHW-6S |
| Type D2 | RHW-6S |
| Type E2 | RHW-6S |
| Type A3 | RHW-8S |
| Type D3 | RHW-8S |
| Type A1-Inside | MIS Ramp |
| Type B1-Inside | MIS Ramp |
| Type D1-Inside | RHW-4 |
| Type E1-Inside | RHW-4 |
With the wider RHW networks (provided they are supported by the particular FLEXRamp type–see the piece description in game), for most situations, simply align the ramp interface with the shoulder tile for standard ramps, and with the median tile for the inside ramps. If trying to build an RHW-8S Type D2 or E2 setup, however, one should instead align it with the median tile. (Note also that the elevated versions of the RHW-6S do not support Type A1 setups, and the elevated versions of the RHW-8S do not support Type A1 setups, due to the overhang on the RHW-6S network.)
Building Draggable Ramp Interfaces (DRIs)
Draggable Ramp Interfaces, or DRIs, are ramp interfaces that are constructed as draggable patterns using the RealHighway network. With the exception of a very few specialized setups, virtually every RHW ramp interface setup can be built through draggable means, and at present, there are some ramps that are only possible as DRIs. Each ramp interface type supported by the system has a special drag pattern, which when constructed, will automatically convert into the appropriate on/offramp.
The process for overriding a FLEXRamp to have another RHW network as a mainline is identical to that of the FLEXRamps, as shown above. Elevated ramp interfaces can be constructed by dragging the appropriate elevated RHW network (L1-L4) or double-decker RHW through the DRI, which, provided the particular setup is supported by that network, will elevate the ramp. Many setups for narrower networks can be transformed into corresponding versions for wider networks by using the same method. This conversion is most reliable if the overriding network is dragged into the top end of the mainline.
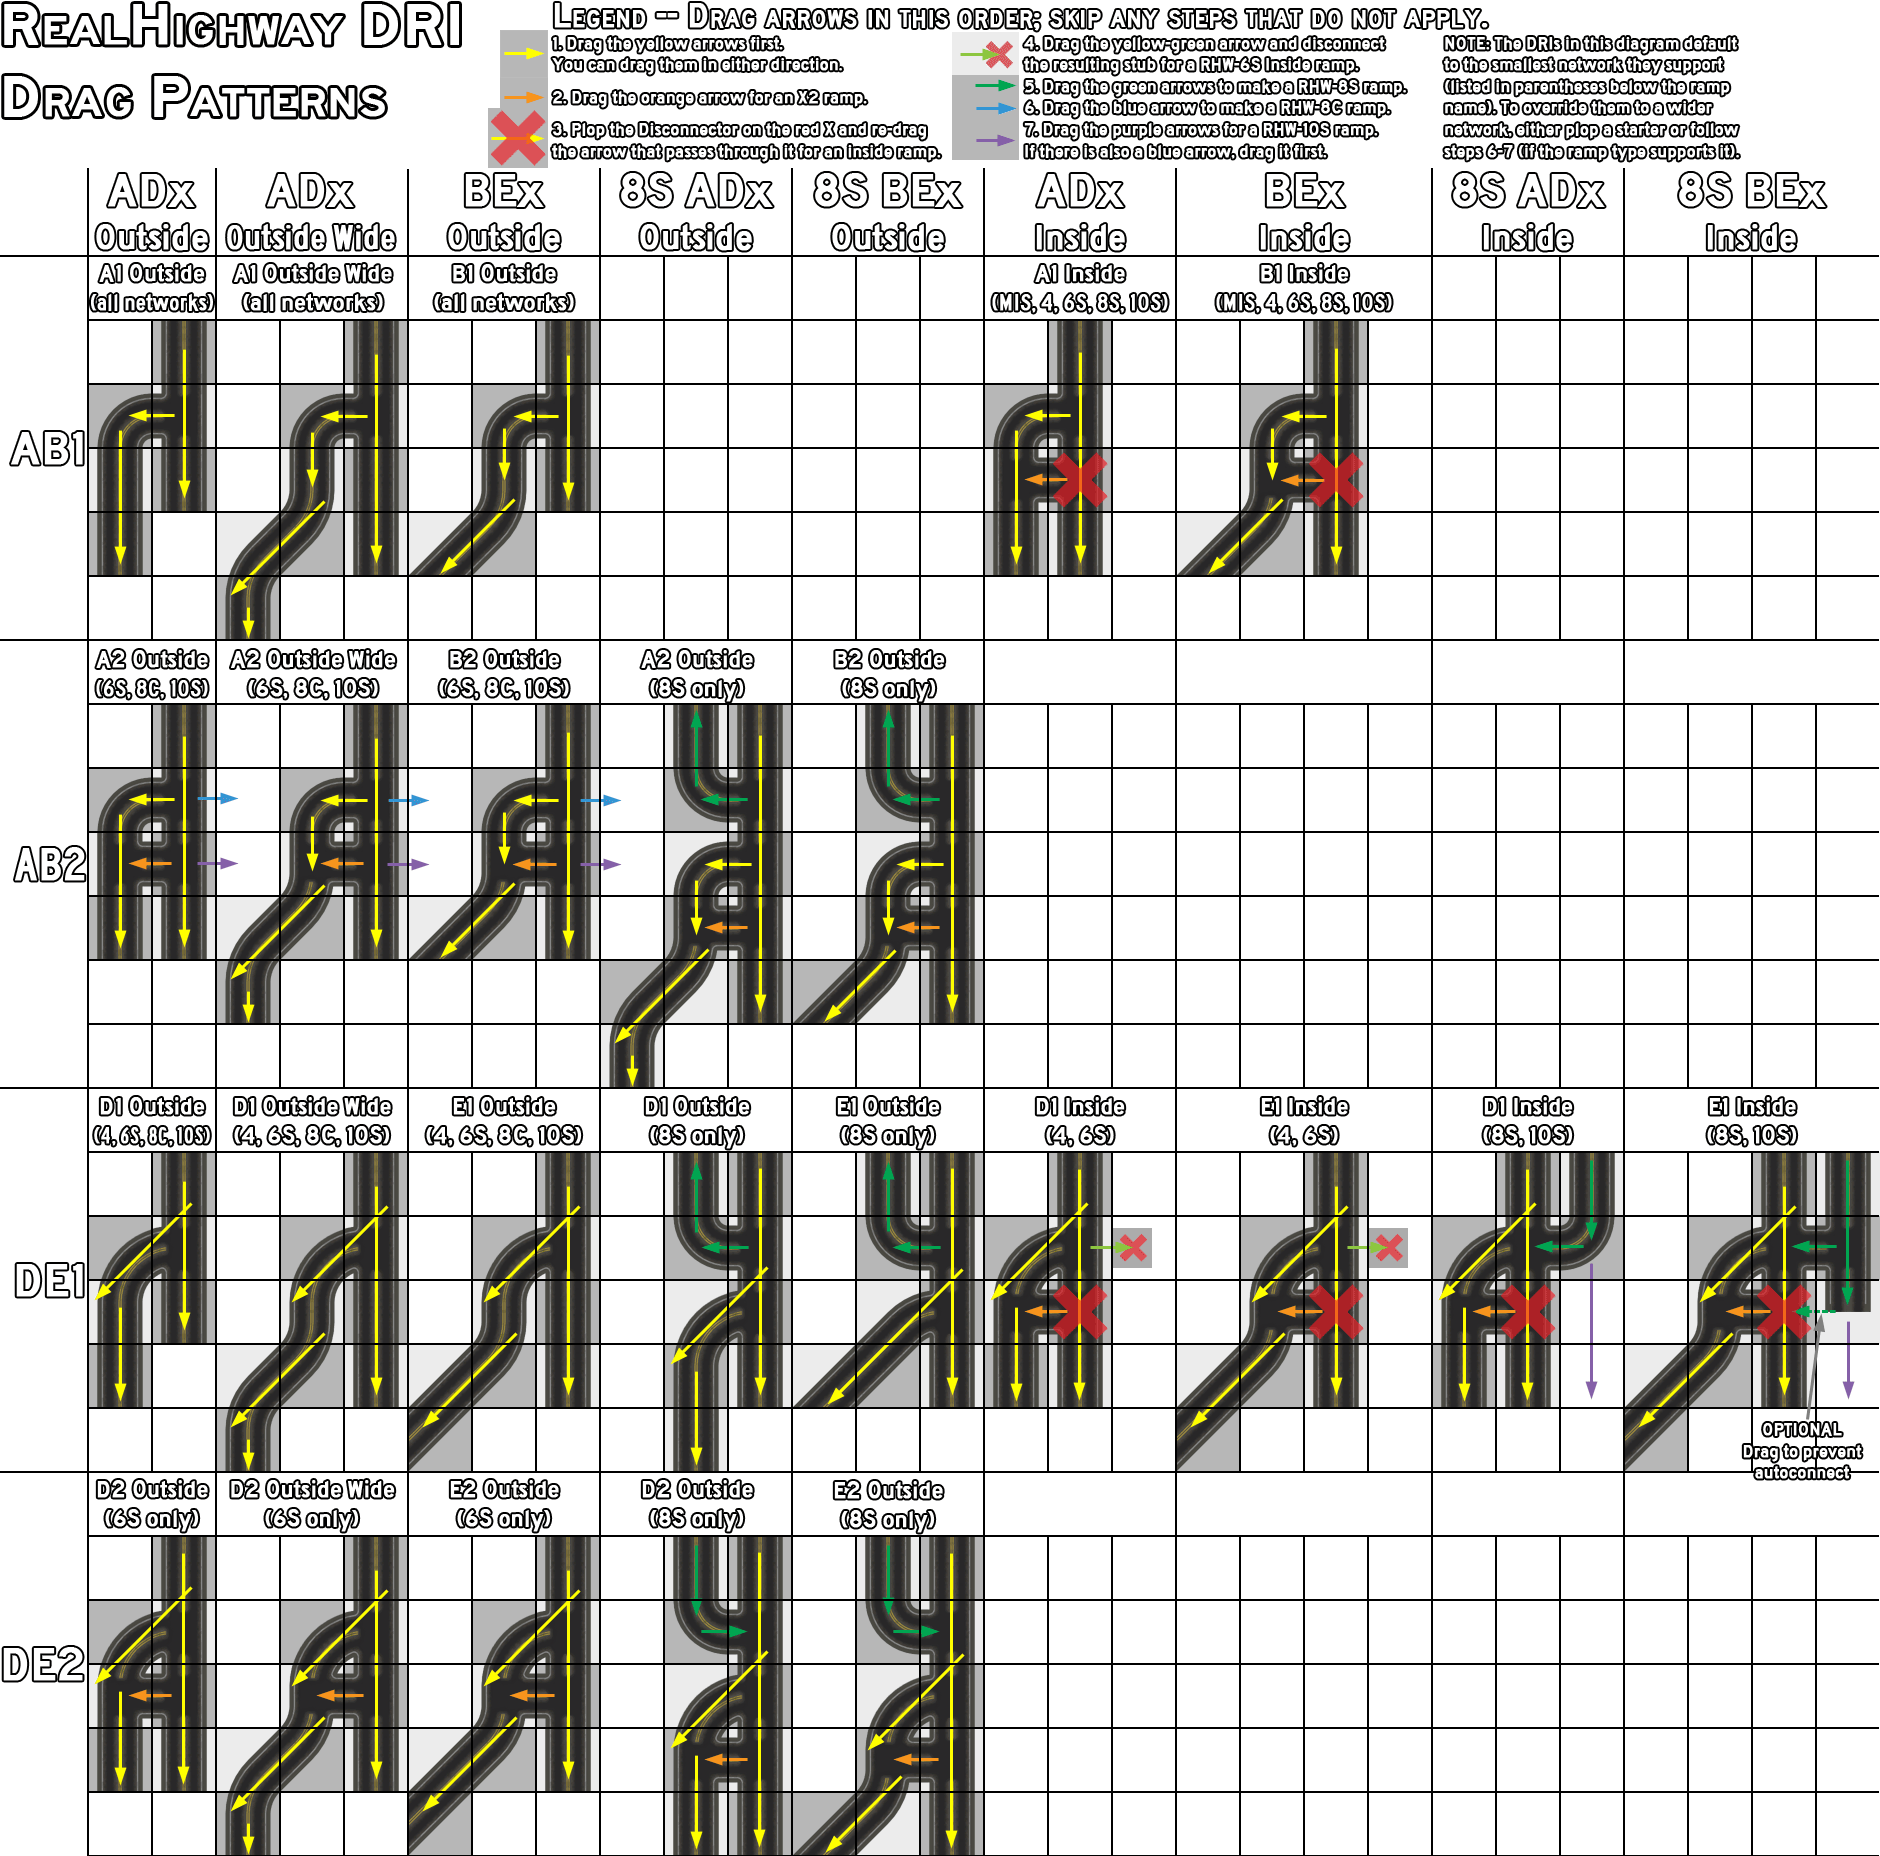
Drag patterns for a number of MIS ramps are also supported.
Older Puzzle Piece Ramp Interfaces DEPRECATED
A set of Puzzle Piece Ramp Interfaces also exists. While it was the original method for constructing ramp interfaces, it has largely become a deprecated method, aside from the few setups not covered otherwise, due to the demands it places on the menu system. The Puzzle Piece Ramp Interfaces exist under two buttons, the Puzzle Piece Ramp Interfaces button, and the Fractional Angle Ramp Interfaces button (which contains all the Type C and Type F ramps). One must find the precise puzzle piece needed for the particular setup on the desired network, and place it. As static puzzle pieces, these ramp interfaces cannot carry overrides.
Most (but not all) of the Puzzle Piece Ramp Interfaces have starters attached on their mainline approaches and branches, which does allow one to use them without having to place additional starters, but the presence of these starters also severely limits their slope tolerance. As such, they can generally only be used on flat terrain, or they will end up flattening parts of slopes. If the puzzle-based interface does not have a starter stub on its ends (as it the case with most of the Fractional Angle types), one must place it after constructing the base network, and a portion of the ramp.
QuickChange: A Shortcut to Quicker Interchanges
In addition to the ramp interfaces, a series FLEX-based QuickChange (QC) pieces which include a base ramp interface (Type A1 by default) with a height transition already attached, which provide quadrants for standard diamond and parclo (partial-cloverleaf) interchanges. To build a QuickChange setup, simply the desired setup, and drag an override network through the mainline portion (or plop it over an existing override network).
The QuickChange pieces may be found under the QuickChange button on the Highways menu.
QuickChange Button
QuickChange still operates with the RealHighway’s modular design philosophy in mind, and as such, is possible to swap in a different ramp interface type for the default Type A1 (such as a Type D1), simply by plopping the other ramp interface over the existing one.
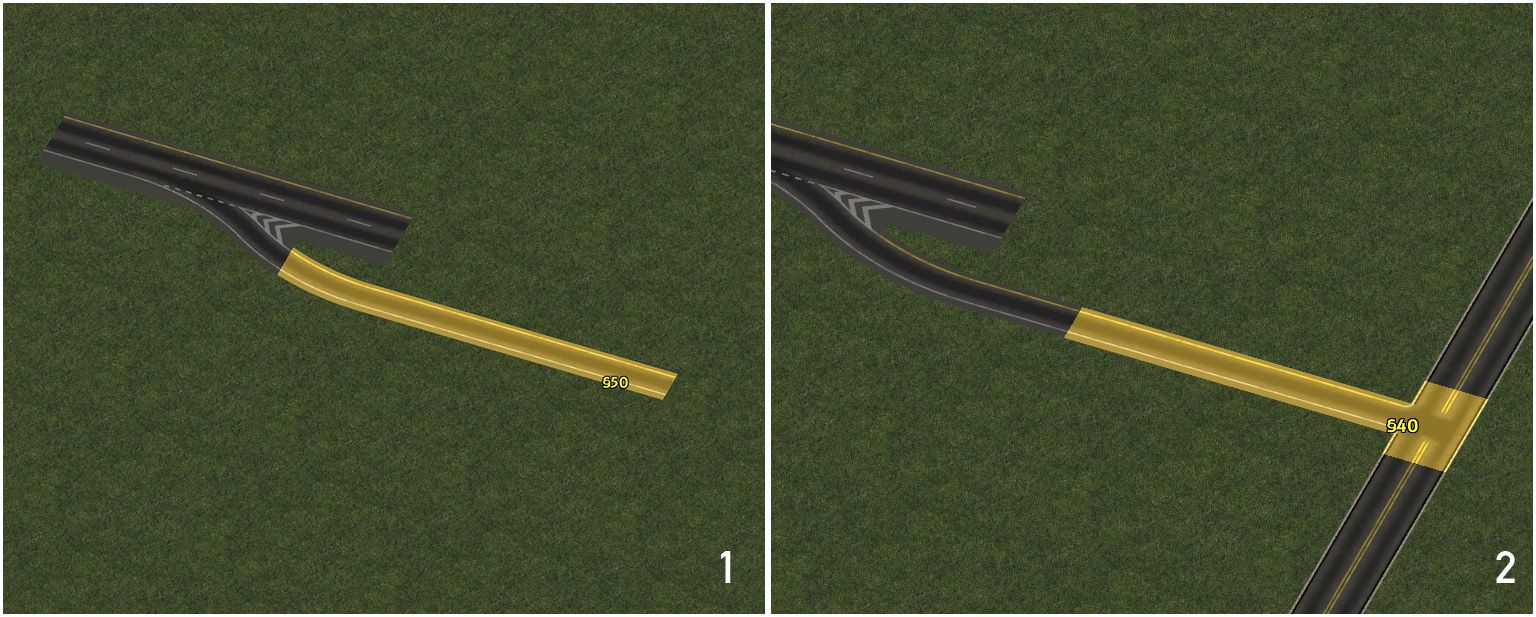
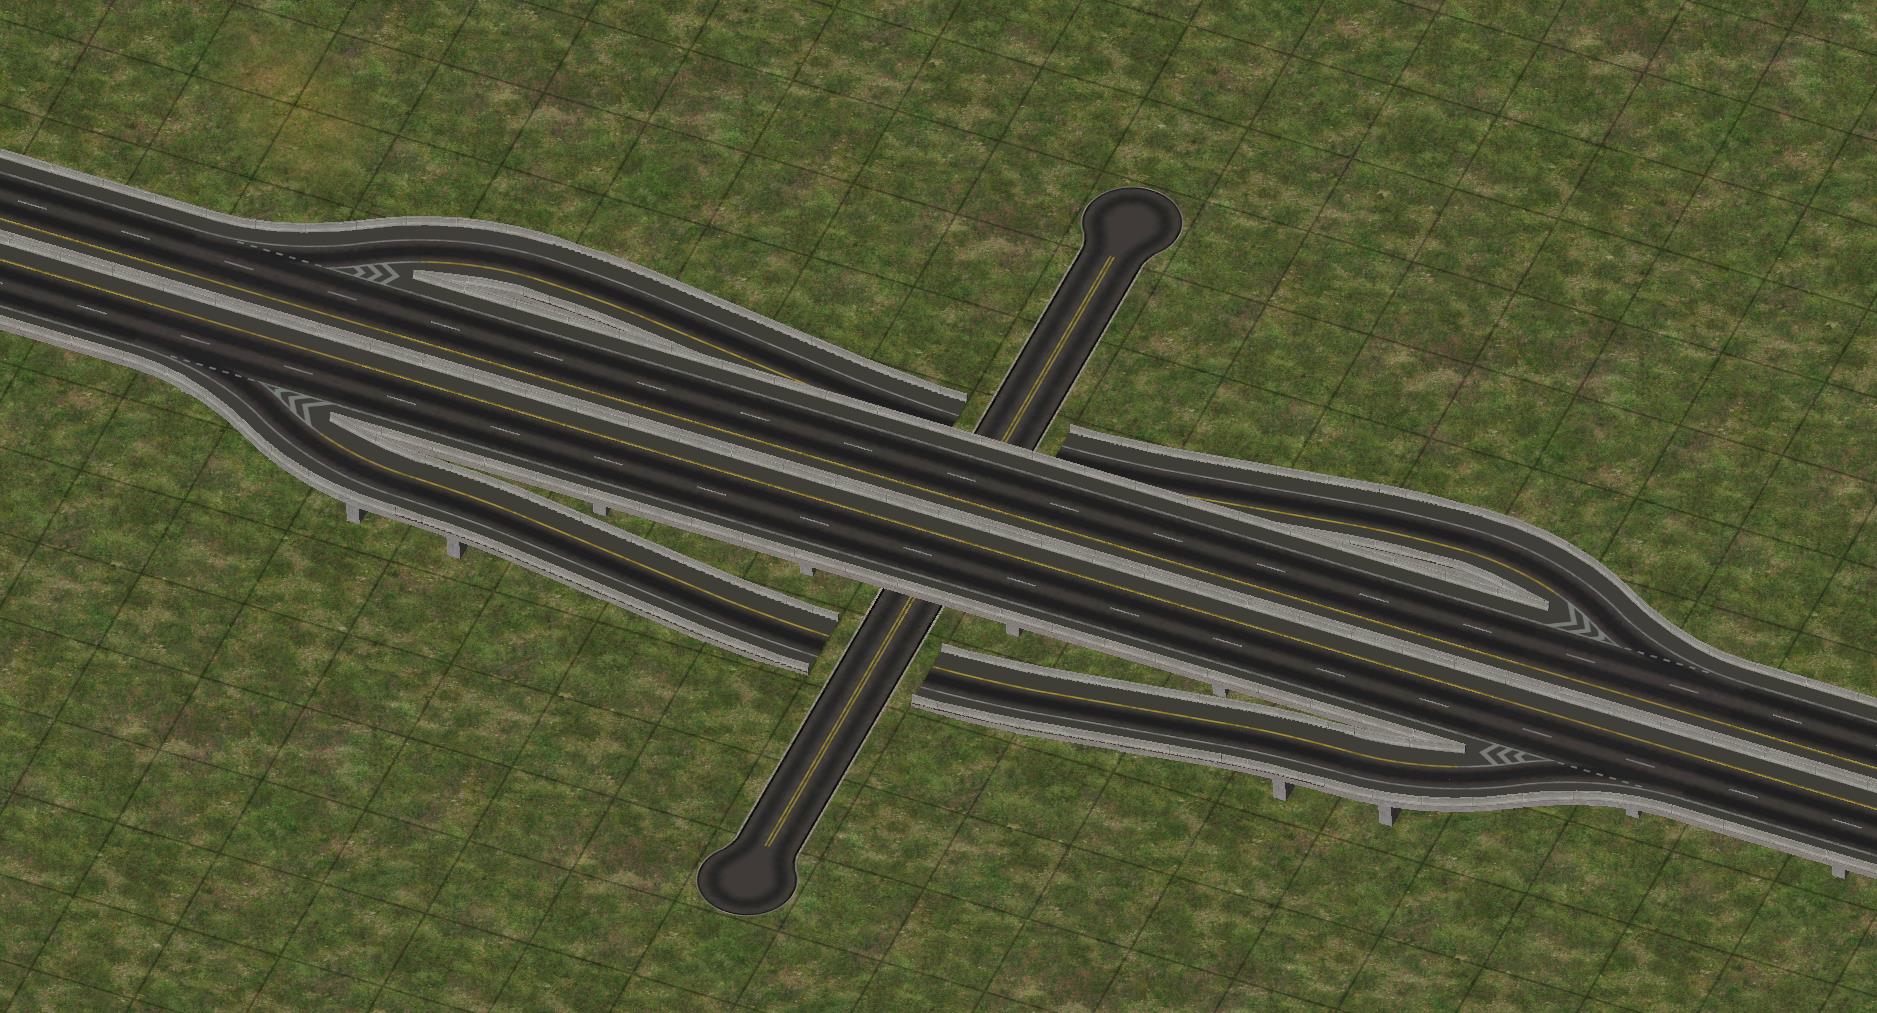
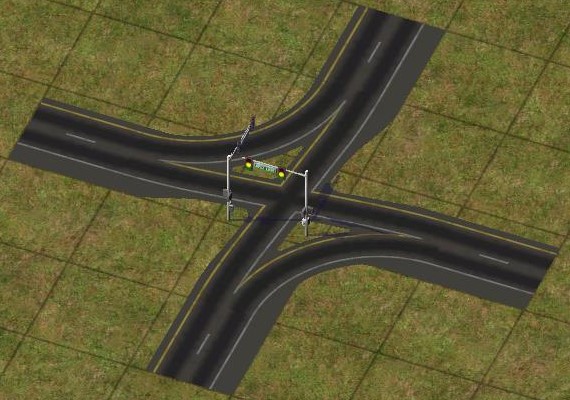
Tutorial: Simple Diamond Interchange with QuickChange
QuickChange pieces can be used to quickly create a diamond interchange. Start by drawing 2 adjacent L1 RHW-4 over a stretch of L0 Road. Place four QuickChange L1 RHW Partial Diamond pieces encircling the Road. If the RHW-4 destabilizes, place additional starters and/or click around the interchange with the RHW tool to fix any issues. Finish the interchange by using the RealHighway network tool to between the height transitions, right over the Road.
Use L1 RHW (any type) over Road
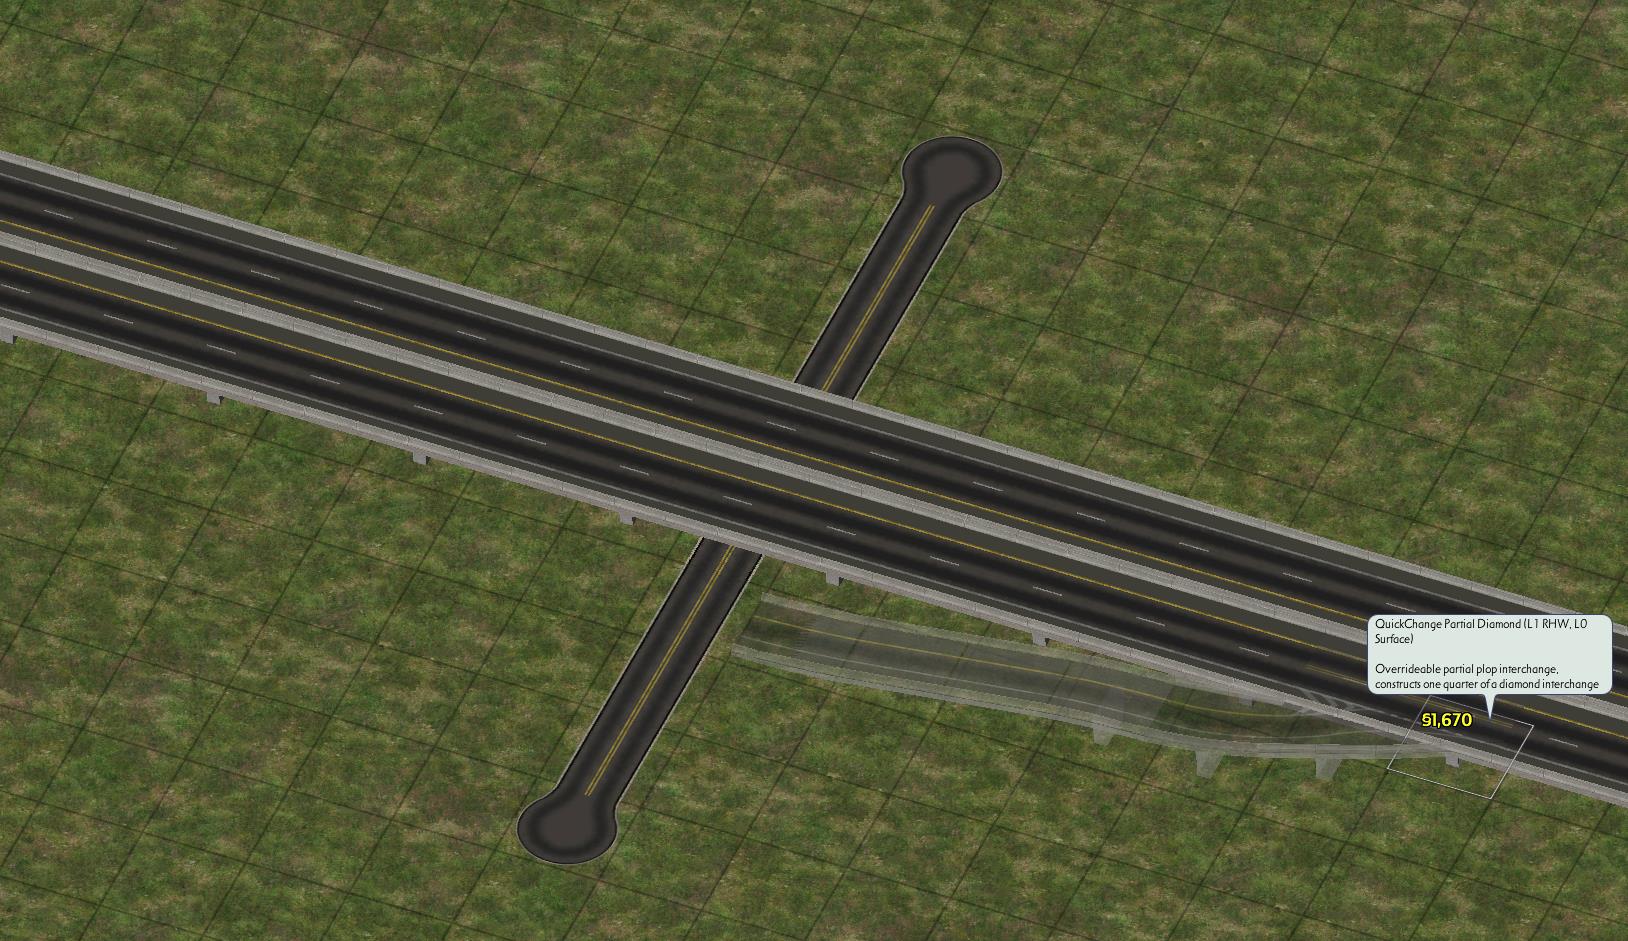
Use the QC Partial Diamond L1 over L0
Repeat 4x
Finish with the RealHighway network tool
This process can easily be adapted to other RHW networks, other surface street options (such as Avenues or Network Widening Mod networks), and to variants where the RHW is at ground level, and the surface street crosses over using one of the Draggable Elevated Road Viaducts.
Height Transitions
There are two methods of constructing Height Transitions, both of which involve ploppable items: the FLEX-based FLEXHeight (FLEX-HT) system, and the conventional puzzle piece approach. The FLEXHeight system is the more full-featured of the two, and vastly exceeds the capabilities of the older puzzle piece form, which is now considered depreciated and is not installed by default.
RHW FLEXHeight Button
RHW Height Transition Puzzle Pieces DEPRECATED
The FLEXHeight family consists of a variety of pieces:
- 1-Level FLEXHeight Transition (includes diagonal variant)
- 2-Level FLEXHeight Transition (includes diagonal variant)
- L0 → L1 On-Slope Transition (includes diagonal variant)
- L0 → L2 On-Slope Transition (includes diagonal variant)
- 1-Level FLEXHeight 90° Curved Transition
- 1-Level MIS 180° Loop Transition
- L0 → L1 Multi Radius Curve (R3) Transition
- L1 → L0 Multi Radius Curve (R3) Transition
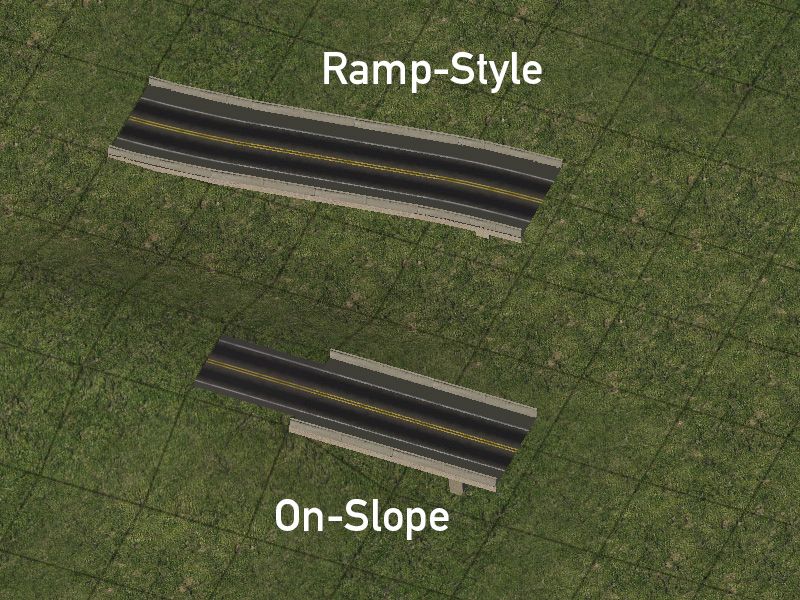
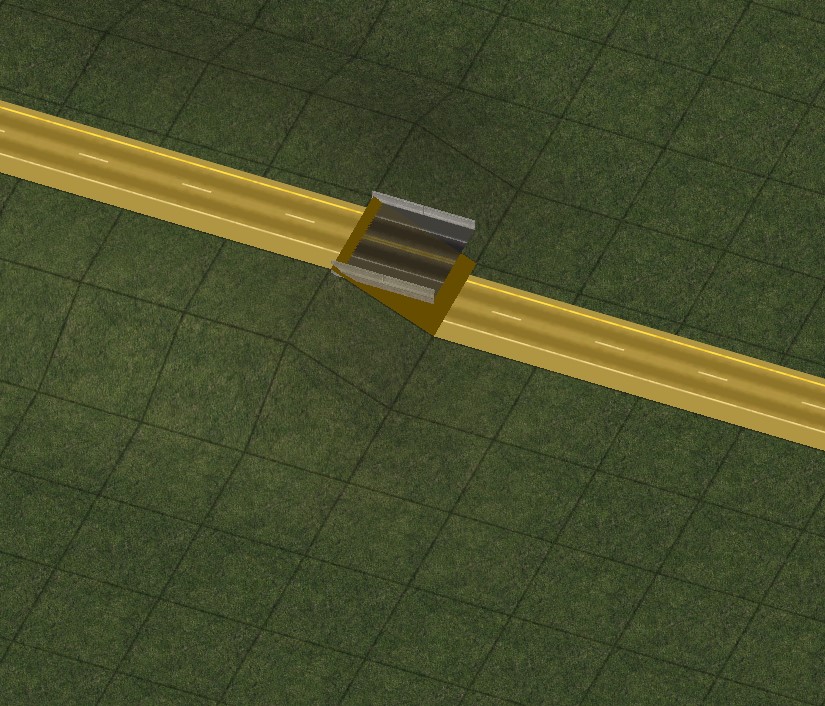
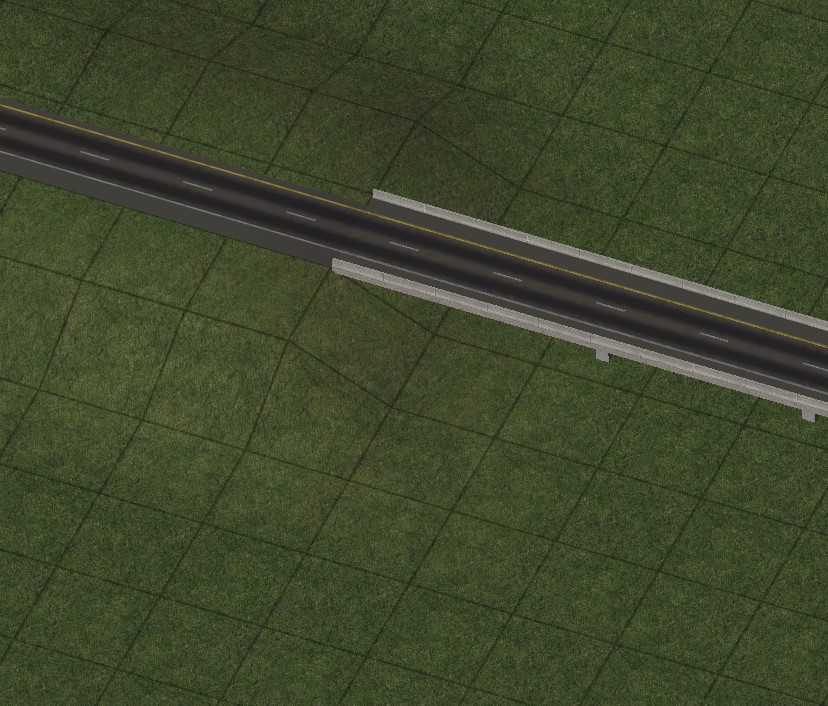
There are two subtypes of Height Transitions: Ramp-Style and On-Slope. The Ramp-Style transitions are designed for use on (relatively) level ground, and uses a multi-tile rise transition RealHighway from one height to another. They primarily exist in orthogonal versions, with some limited diagonal and curved variations. The On-Slope transitions are for use on an embankment, where the RealHighway transitions to a new height but remains at the same elevation. These also exists primarily in orthogonal versions, with some limited diagonal variations.
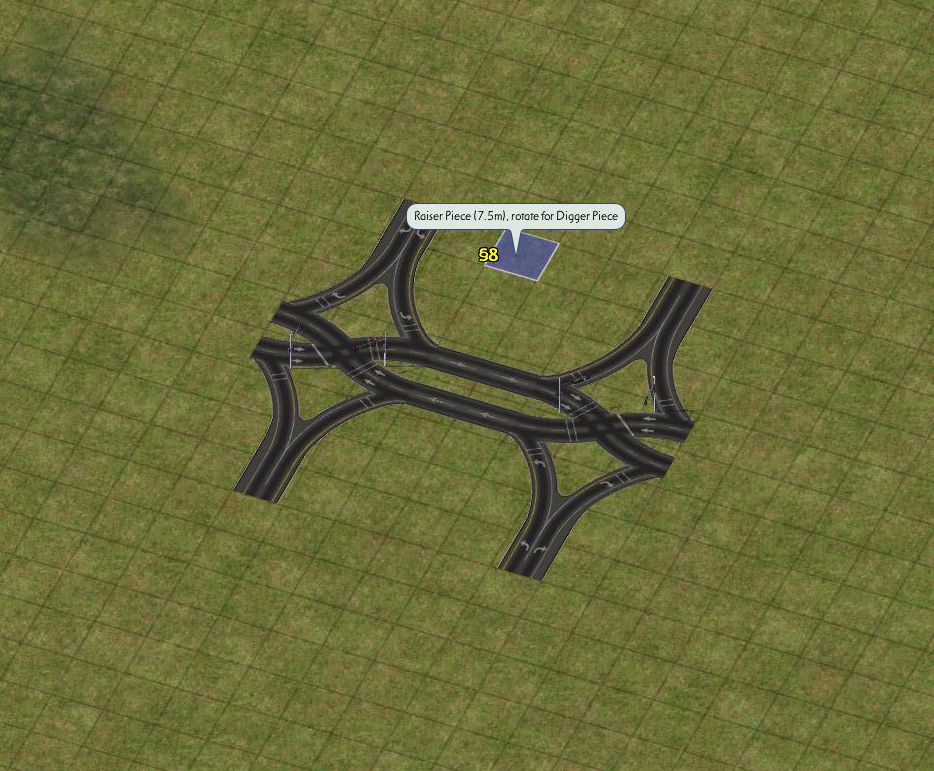
To use the Ramp-Style transitions, first place the desired piece, either a one level or two level transition. Place any RealHighway starter before the transition, and drag through with the
Ramp-Style height transition
On the orthogonal and diagonal transitions, is also possible to transition between two different elevations (i.e. L1 and L2 instead of L0 and L1), simply by plugging the appropriate overrides into the ends.
Additionally, 3-Level and 4-Level Ramp-Style transitions can be built by overlapping the ends of multiple FLEXHeight 1-Level or 2-Level pieces. Note that this can only be done with networks that support the L3 and L4 elevation (the RHW-4, MIS Ramp, and RHW-6S).

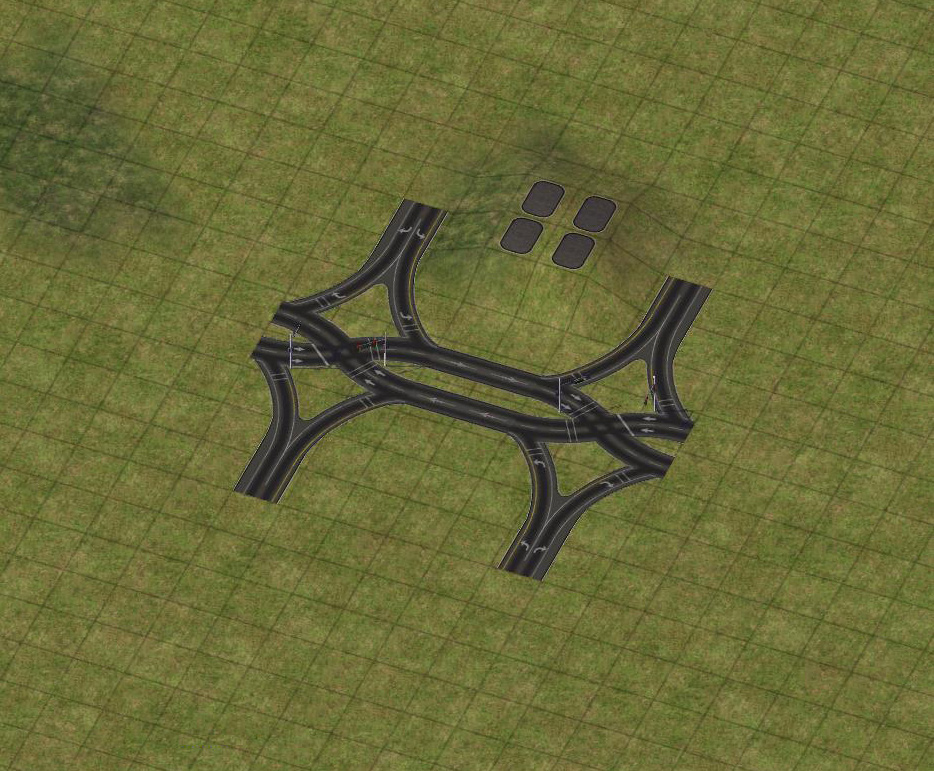
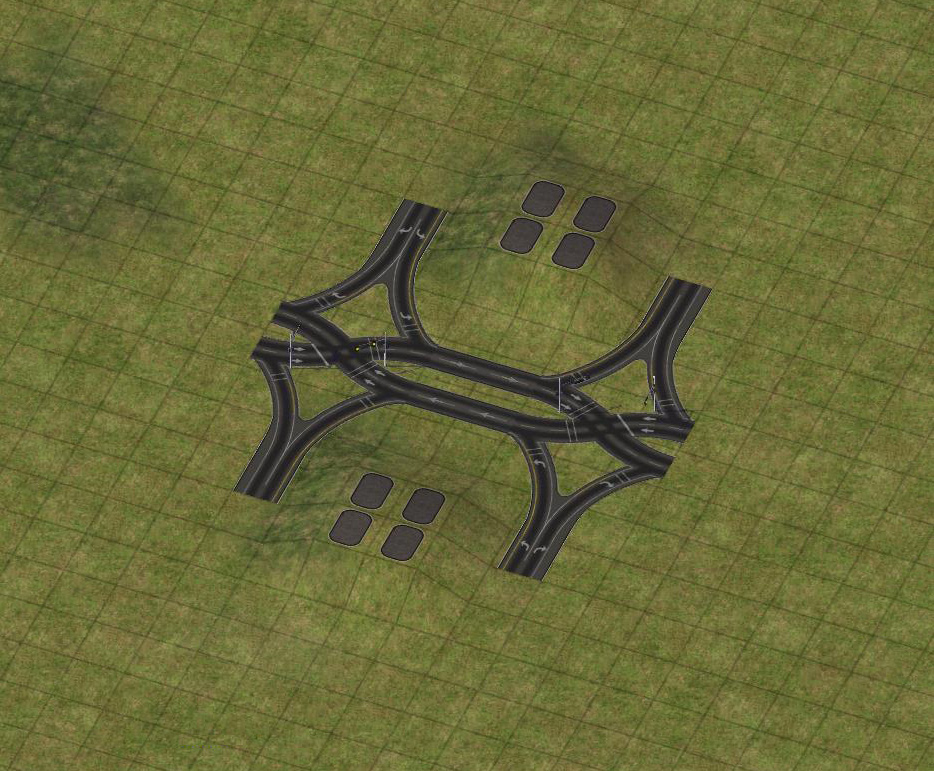
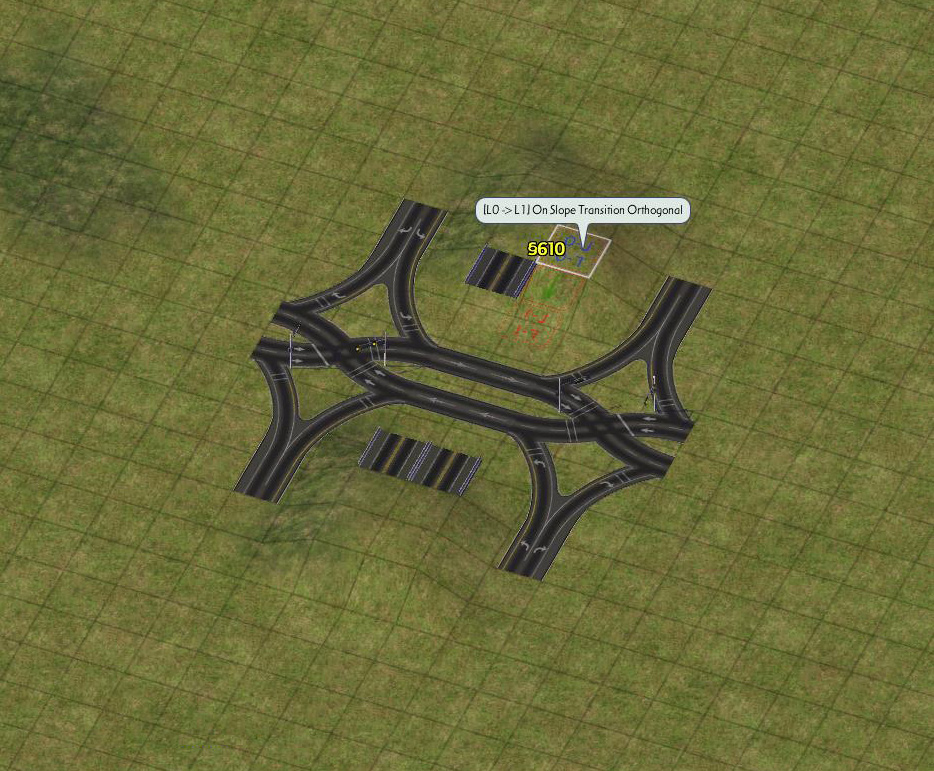
To use the On-Slope transition, you first need the terrain set to the proper height, with a one tile slope between the L0 and the elevated portion. The NAM’s Hole Diggers and Raisers are highly recommended to achieve the precise elevations required for the transitions. Start by placing the transition piece with the L0 side of the transition flat on the elevated ground and the L1 or L2 side hovering in the air. Finish by dragging RealHighway through the transition to override it to the desired network.
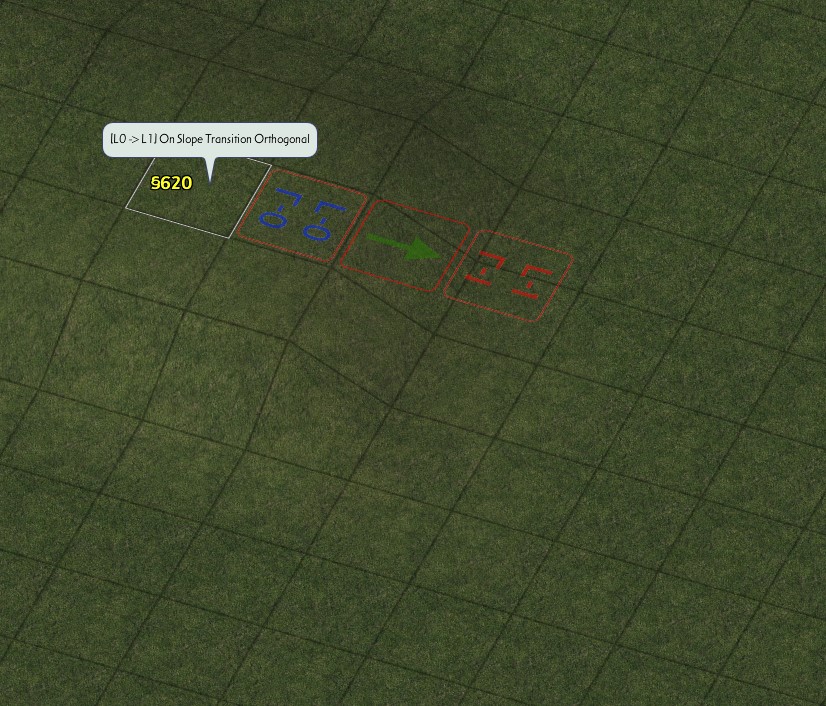
On-Slope height transition
To create height transitions for multi-tile networks, place multiple FLEXHeight transitions adjacent to one another, and drag each tile of the multi-tile network into the ends of the transition.
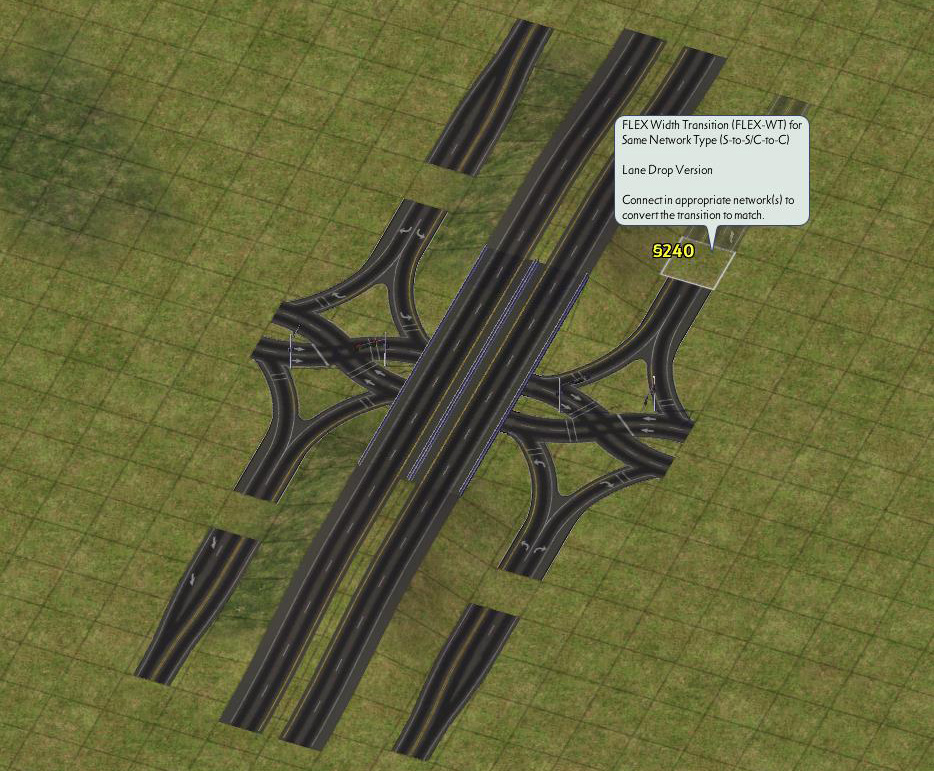
Width Transitions
The Width Transitions include the new FLEXWidth transition (FLEX-WT) system, as well as the older deprecated puzzle piece-based Width Transitions. The FLEXWidth transitions work very similarly to the FLEXHeight transitions - place the transition and drag the appropriate networks into each end of the transition, which will convert the transition to match the appropriate networks.
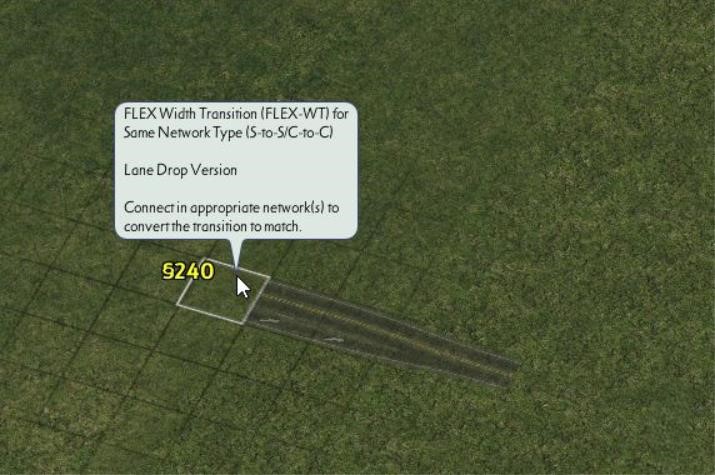


For the large “S-to-C” transitions, due to the design of the FLEX piece, asymmetrical setups are possible. All networks involved in the transition must be at the same height level, and with the exception of the RHW-2-to-4 and RHW-3-to-4 transitions, which are L0/ground-level only, all height levels are available for FLEXWidth transitions.
Puzzle Piece Width Transitions DEPRECATED
With the legacy puzzle piece-based Width Transitions, find the desired puzzle piece by using Tab/Shift+Tab to cycle through the options, and place it. Most Width Transitions already have starters on the ends; note, however, that this fact significantly limits the slope tolerance of these transitions.
Network Transitions
Network transitions cover transitions to non-RealHighway networks including the Maxis and Network Widening Mod (NWM) networks. These transitions are created by dragging the RealHighway and non-RealHighway network together to meet. If the setup is supported, the transition will override to match the involved networks.
A full list of supported transition setups can be found here, and a listing of items under the transition-related menu buttons can be found here.
Advanced Curves and FLEXFly
Using the FLEXFly (Flexible Flyover) System
The FLEXFly (Flexible Flyover) pieces are FLEX-based curved flyover ramps, which can be crossed under or over by almost every RealHighway network (except for the L0 RHW-2, for the purposes of stability). They can be found under the FLEXFly button on the Highways menu.
RHW FLEXFly Button
The FLEXFly pieces come in two angles–90° and 45°–and both single-lane/MIS Ramp-based or dual-lane/RHW-4-based versions are available, at height levels from L0 to L2. Their curve radii are equivalent to the R2 Multi-Radius Curves.
To use a FLEXFly piece, first place the desired setup. Each FLEXFly will allow draggable orthogonal crossings at any point in the curve, provided the crossing network is at different height level than the FLEXFly itself. To create these crossings, just drag the network under/over the FLEXFly. To continue the flyover ramp, just drag out from the ends of the FLEXFly, just as if it were a starter piece, or connect it to other RealHighway-related items (like height transitions) as desired.
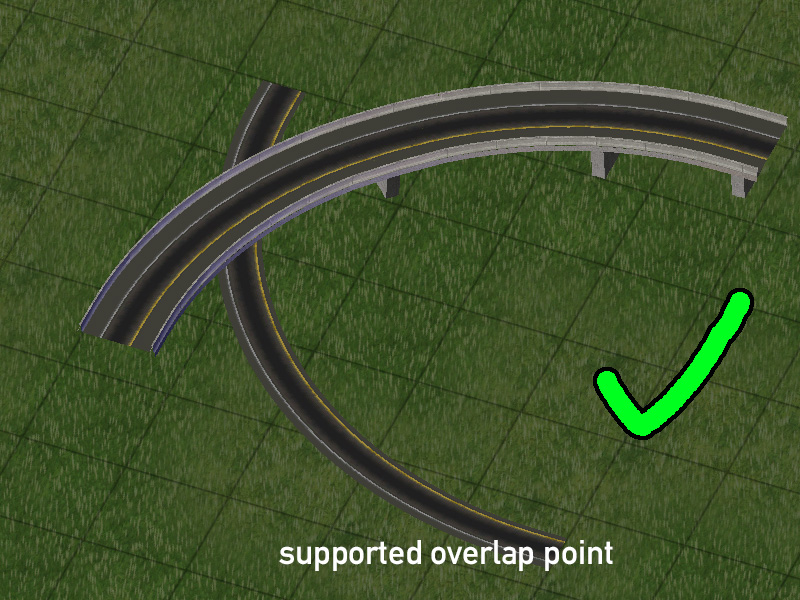
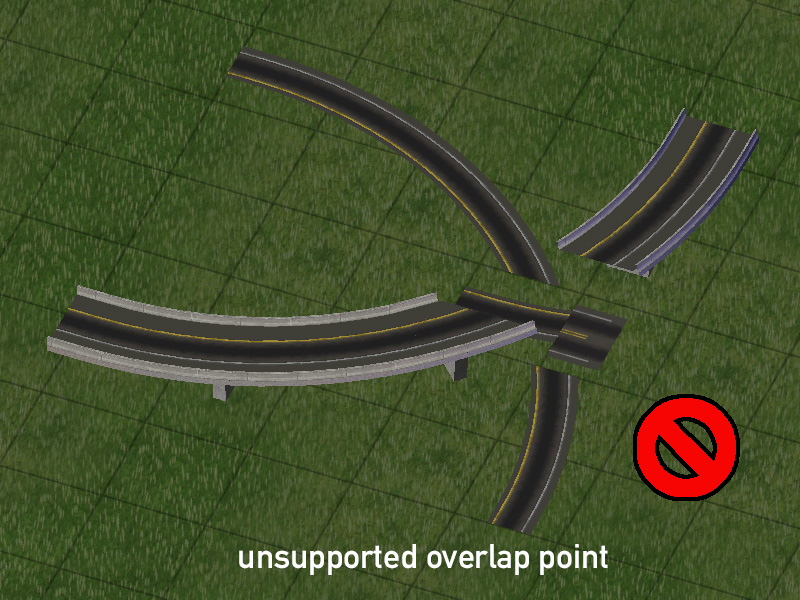
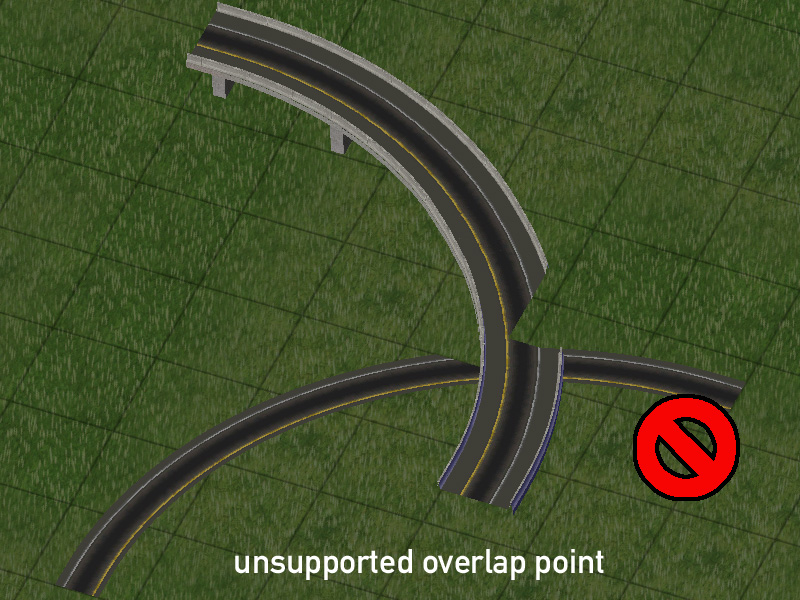
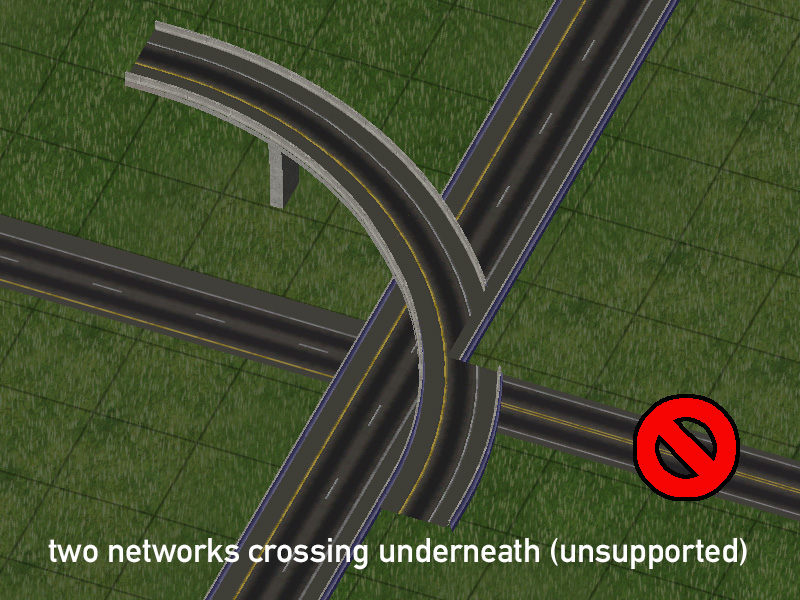
Note that FLEXFly pieces can only support a single crossing network at any given point. In certain situations, such as the first one (with the green checkmark), it is actually possible to cross one FLEXFly over another FLEXFly, though this is strictly limited. Attempting to build unsupported overlaps, or crossing two networks under one tile of FLEXFly will yield glitched or blank network tiles, as seen in the other three images (with the red circle-and-slash). Additionally, FLEXFly pieces do not support the overlap/composite technique of the R2 Multi-Radius Curves.
Fractional Angle RealHighways (FARHW)
One can also further their “grid-busting” efforts with the RealHighway system with the use of the Fractional Angle RealHighway (FARHW) Puzzle Pieces. The FARHW pieces allow one to build RealHighways at angles other than orthogonal and diagonal. Currently, only 18.4°/71.6° (or “FA-3”) is supported for RHW networks.
The FARHW pieces exist under three different buttons: the main FARHW pieces button, which contains the base fractional angle network pieces and curves to connect to orthogonal and diagonal networks, the FARHW Ramp Interfaces button, which contain ramp interfaces involving FARHW connections (including the Type C1, C2, F1, F2, and C3 ramps), and the FARHW Intersections and Transitions button, which contains intersection pieces with FARHW approaches as well as width transitions between different FARHW widths.
FARHW Button
FARHW Ramp Interfaces Button
FARHW Intersections and Transitions Button
When building stretches of FARHW, make sure that the line colors (or shoulder widths, if dealing with Euro textures) line up properly.
Note that with the exception of the FARHW Ramp Interfaces, none of the other FARHW pieces have starters on their ends, so one must be sure to place the orthogonal or diagonal ends of curves over an existing stretch of network.
Cosmetic Pieces
The Cosmetic Pieces are a set of puzzle pieces that are designed for precise control of the look of RealHighways, particularly with lane markings, including auxiliary lane and HOV lane markings. Due to the sheer number pieces (166 total at present), the Cosmetic Pieces are divided under four separate buttons, one for each network width (1-tile, 2-tile, and 3-tile), and one for cosmetic transitions. All four buttons can be found under the Highways menu.
RHW 1-Tile Cosmetic Pieces Button
RHW 2-Tile Cosmetic Pieces Button
RHW 3-Tile Cosmetic Pieces Button
RHW Cosmetic Transitions Button
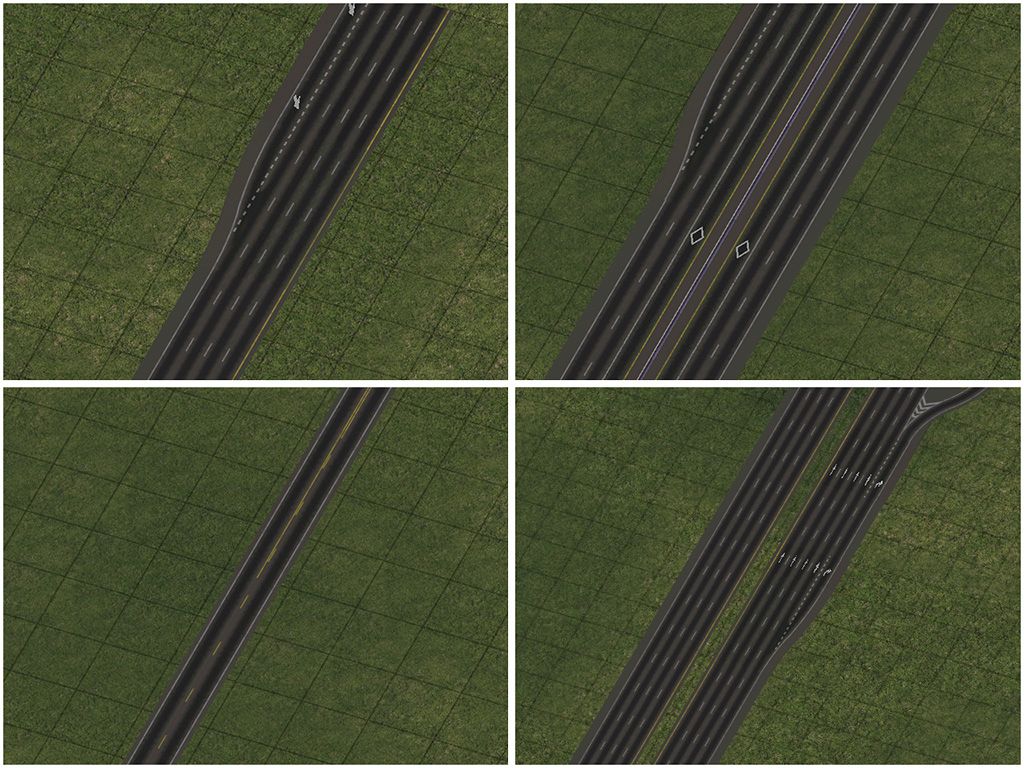
To use the Cosmetic Pieces, find the desired piece and place it. Please note that as puzzle pieces, the Cosmetic Pieces cannot accept or pass along overrides, albeit they can be placed over starter pieces in many situations.
Bridges
The NAM includes bridges for various RealHighway networks. Refer to the RealHighway Bridge section for a listing of all bridge styles and instructions on how to build them.
Tunnels
The base RealHighway network does NOT support tunnels. While certain slope settings may permit a tunnel to appear, it will be completely non-functional, due to hardcoded limitations that prevent traffic from using it. There is no known solution to this limitation at present. The only current workaround is to transition to another network that does support tunnels, or to use the new FLEX/Draggable version of the Flexible Underpasses and URoads.
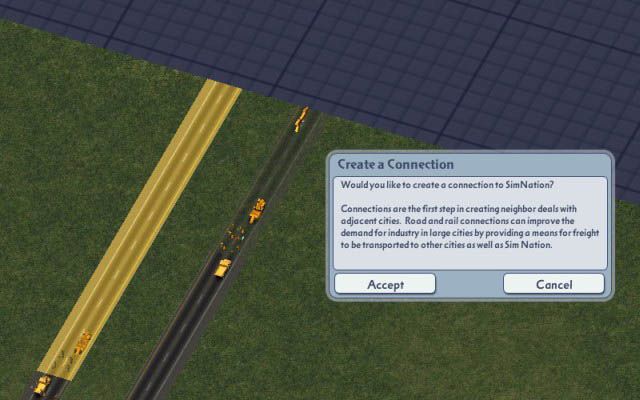
Neighbor Connections
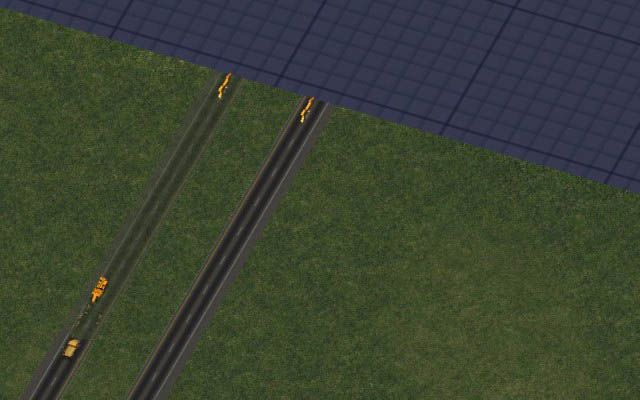
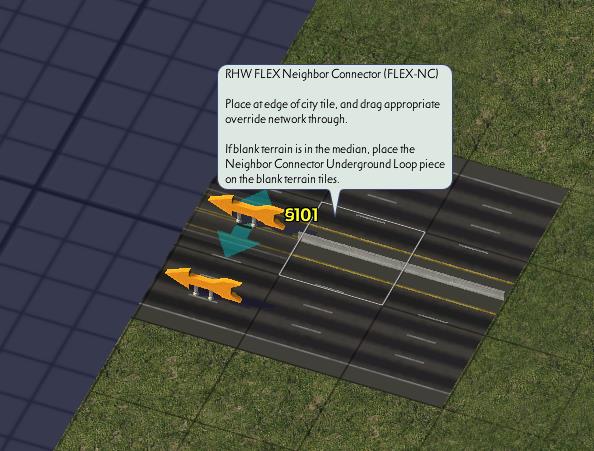
The single-tile two-way RealHighway networks (RHW-2, RHW-3, and DDRHW-4) can form functioning Neighbor Connections (NCs) the standard way, just by dragging the network over the edge of the city. Neighbor connections for all other RealHighway networks must use special pieces for them to function correctly, otherwise only freight trucks can use the connection. This is a game limitation, and is the same reason the game does not support NCs for one way roads.
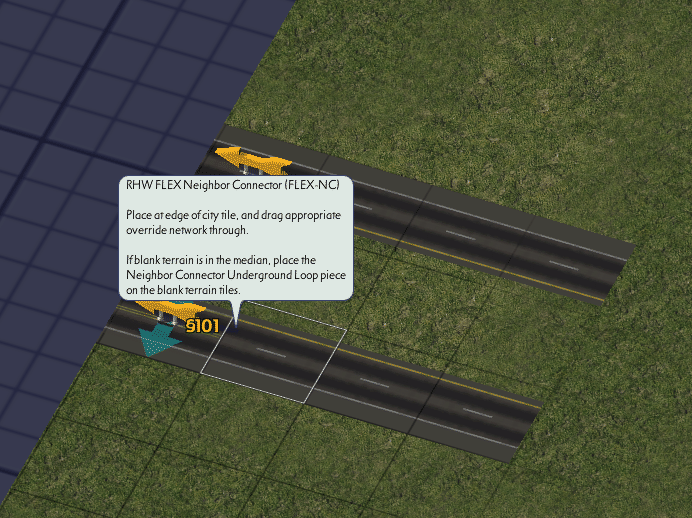
These two special neighbor connection pieces, the RHW FLEX Neighbor Connector and RHW Invisible Loop Connector, can be found under the RHW Neighbor Connector Pieces button.
RHW Neighbor Connector Pieces Button
Start by building a neighbor connection through the normal draggable means with the RHW network you wish to use.
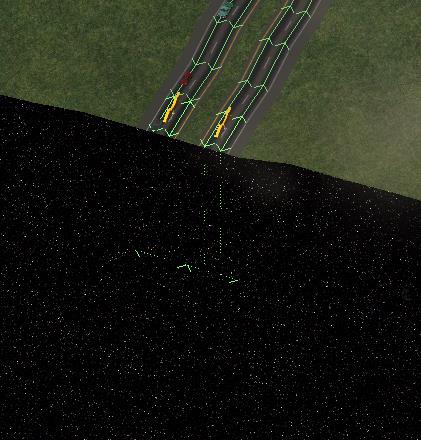
Place the FLEX Neighbor Connector (FLEX-NC) piece over each network tile that will be part of the Neighbor Connection, over top of the the game’s default yellow Neighbor Connection arrows. If the two sides of your RHW are separated by empty tiles, place Invisible Loop Connectors in the median area between the two NCs. Ensure the arrows are parallel to the edge of the city. The connector pieces are invisible when placed, but will show a subtle ‘ghost model’ when queried.
For “Combined” (“C-type”) networks, such as the RHW-6C and 8C, place the FLEX-NC piece over each tile. No Invisible Loop Connectors are required.
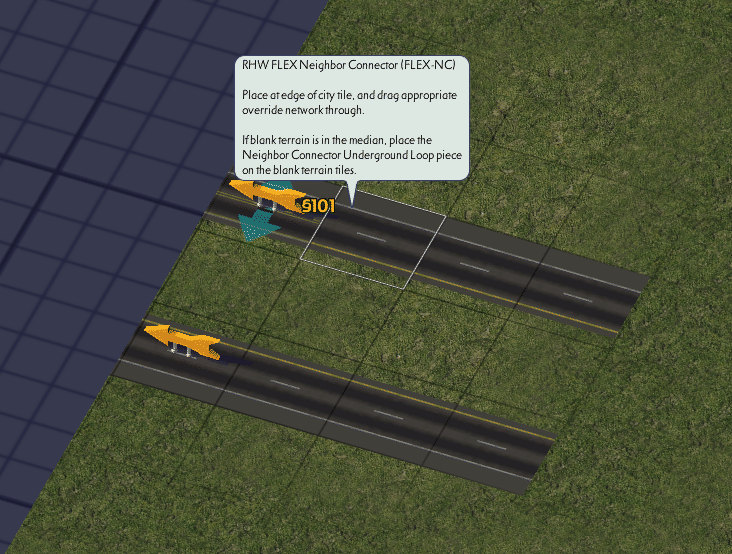
Use the FLEX-NC piece
Use the FLEX-NC piece
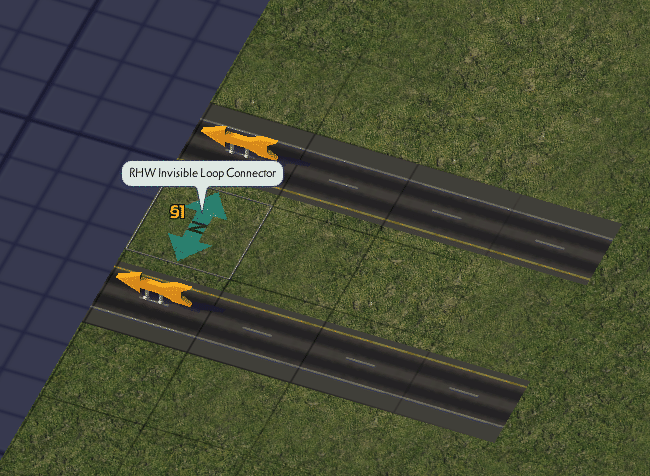
Use the Invisible Loop Connector

NC pieces shown when queried
Use the FLEX-NC piece 3x
Paths drape over the edge of the city
To complete the neighbor connection, repeat this process identically in the neighboring city tile. Run the traffic simulation for some time in both cities for the game to recognize that there is a valid connection.
With the addition of the FLEX Neighbor Connectors in NAM 42, all elevated networks are now supported.
Specialized Crossings and Interchanges
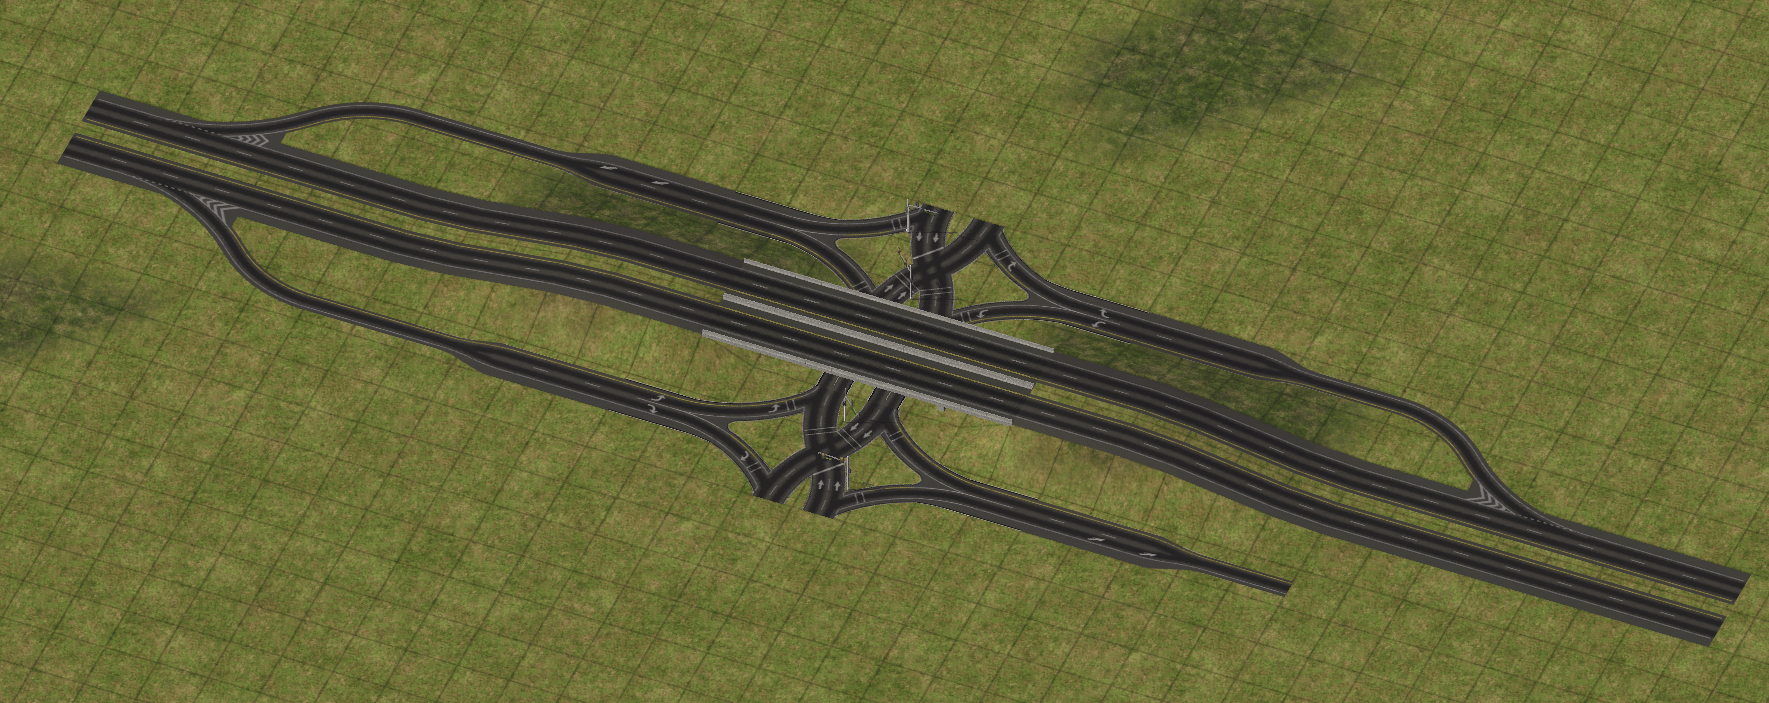
The RealHighway system includes the ability to recreate three oft-requested interchange designs: the Single-Point Urban Interchange (SPUI), the Diverging Diamond Interchange (DDI), and the Volleyball Interchange. These are “advanced” features of the plugin, and it is recommended that you are already comfortable with the RealHighways, the NAM Elevated Viaducts and the either the FLEX Turn Lanes (FTL) or Turn Lane Extension Pieces (TuLEPs) before trying to build SPUIs or DDIs.
The SPUI and DDI setups can be found under the RHW/Avenue Interface button on the Roads menu, while the Volleyball pieces can be found under the old puzzle-based Ramps button on the Highways menu.
RHW/Avenue Interface button Connector Pieces Button (contains SPUI and DDI items)
RHW Puzzle Piece Ramps Button (contains Volleyball pieces)
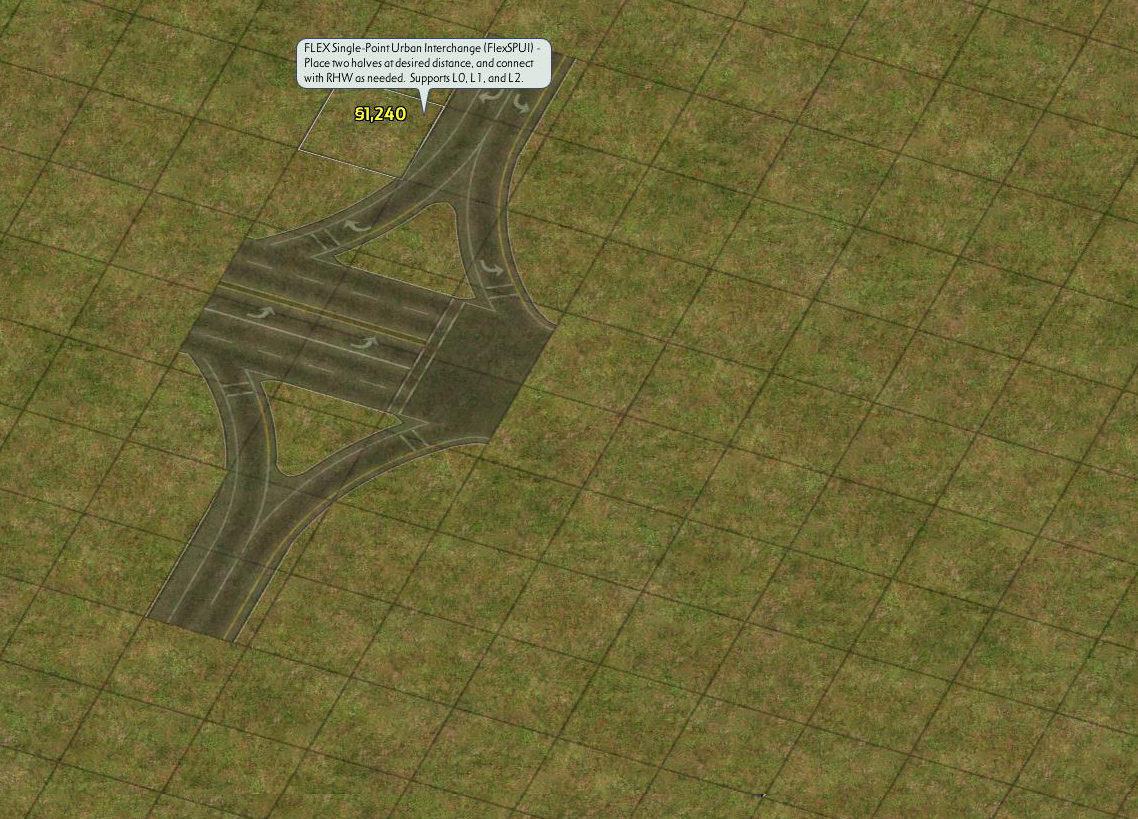
Single-Point Urban Interchange (SPUI)
A Single-Point Urban Interchange combines the two intersections of a diamond interchange into one single intersection over or under the free-flowing road.
These interchanges may either be ground level with elevated RealHighway running over them, or may be elevated over ground level RealHighway.
To build a SPUI, start by placing the the FlexSPUI pieces. Each piece is one half of the SPUI, and they may be placed adjacent to each other or separated by a number of tiles. If they are separated, drag avenue between the two sections to connect the center.
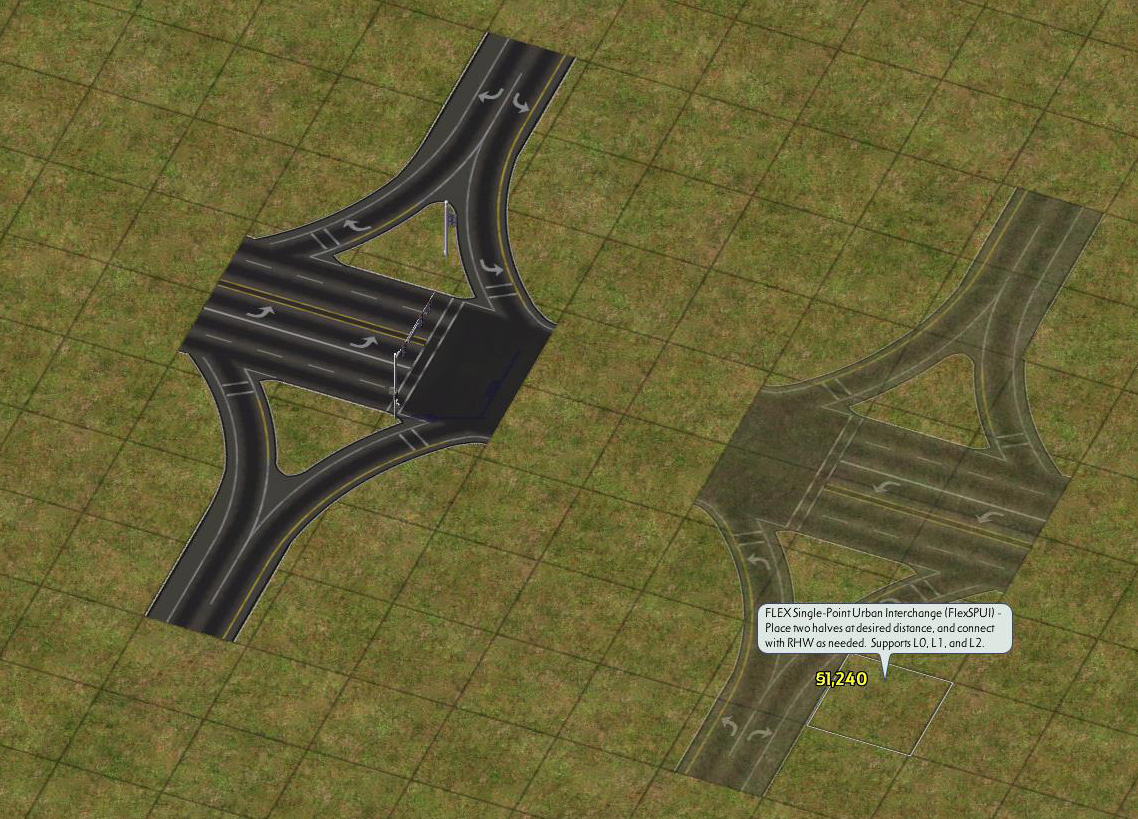
Second half may be adjacent or separated.
Use the Avenue tool to fill any separation (if applicable)
To build an elevated SPUI, place four FLEX-HT transitions of your desired height (L1 or L2) next to each ramp. Place RHW-4 starters adjacent to each height transition to override them, and use the RealHighway tool to drag from each starter to the interchange. When the first ramp has been completed, you’ll notice the SPUI interchange has changed height automatically. Complete the other ramps in the same manner by dragging with the RealHighway Tool. Place four FLEXRamp pieces at each end of the ramp – this example uses Type A2 to drop one lane for the exit (RHW-6S before the exit, to RHW-4 under the interchange, back to RHW-6S after the entrance). Follow by dragging RealHighway under the interchange. The interchange may be completed by using the FLEX-HT Transition for Avenue Type 120 piece, available from the Roads menu.

Place four FLEX-HT transitions
Override FLEX-HT transitions to RHW-4, drag into interchange
Interchange adjusts height automatically
Finish connecting the ramps
Place entrance/exit ramps
Drag RHW underneath

Finish with Avenue height transitions
🎉
To build a ground level SPUI, follow the same process, except the orientation of the FLEX-HT transitions should be reversed. The same FLEXRamp pieces may be used, and elevated RealHighway is dragged over the intersection.
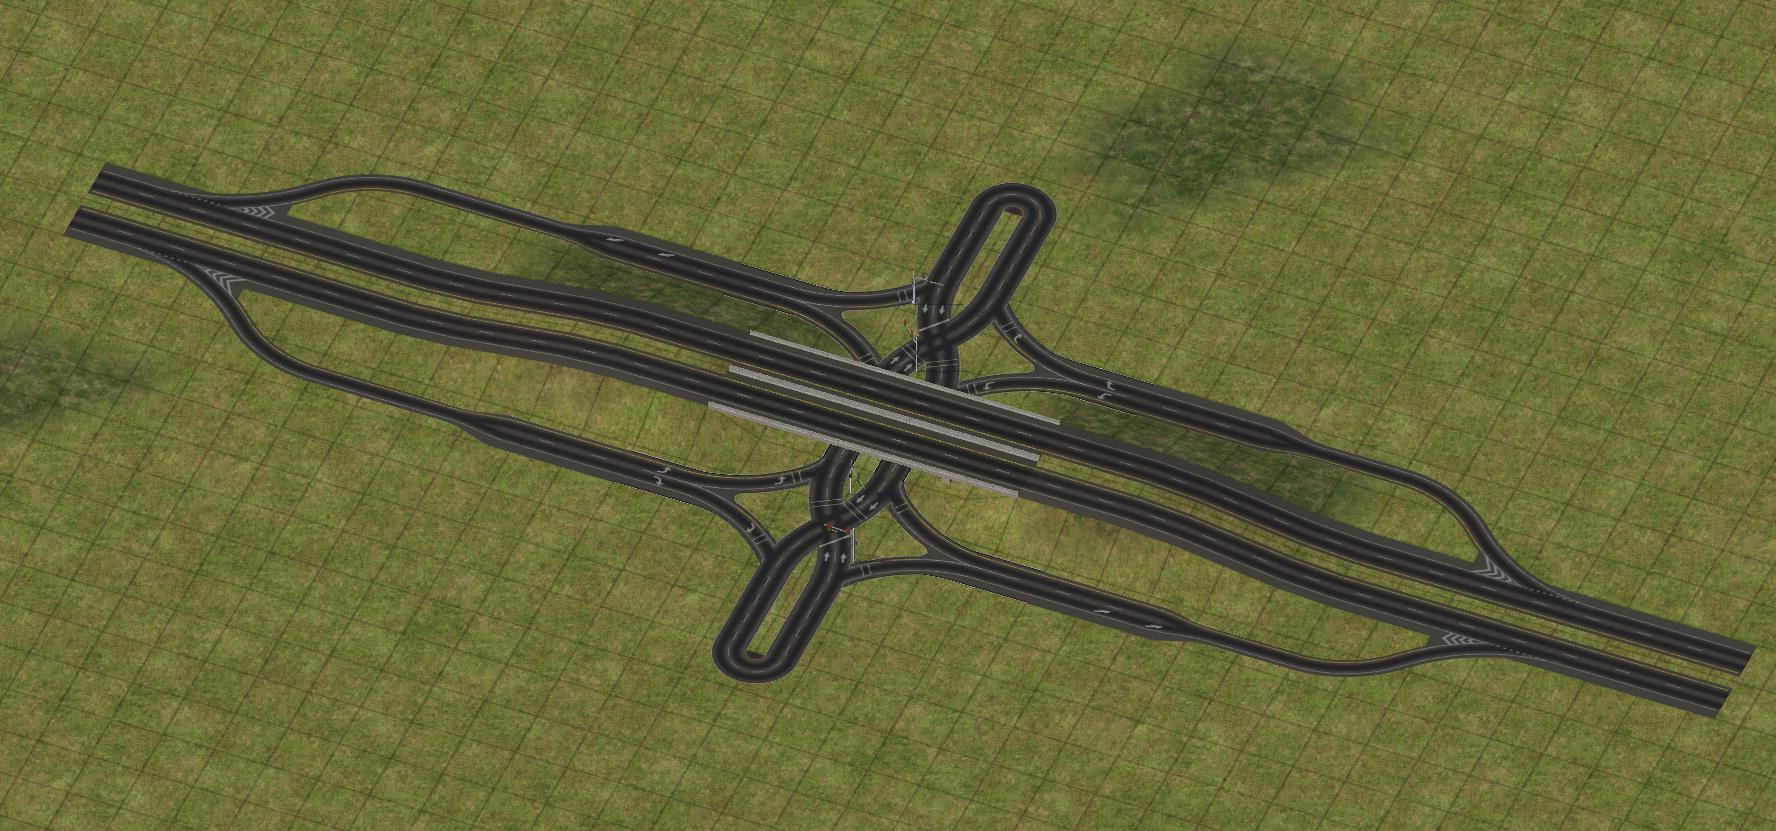
Diverging Diamond Interchange (DDI)
The Diverging Diamond Interchange (DDI), sometimes also called “Crossing Diamond”, is an interchange that has traffic cross onto the “wrong” side of the road, which allows left turn movements flow more smoothly and traffic onto (and sometimes off) the freeway to go unsignalized, with only the through movements on the surface street requiring signalization.
The construction process of a DDI is equivalent to the SPUI, with the only difference being the network in the center of the intersection OneWay Road instead of Avenue. You may follow the FlexSPUI tutorial above, or use the DDI tutorial below. This DDI tutorial is for a ground level DDI with a RealHighway overpass, and uses some alternative construction techniques.
Begin by placing two DDI pieces, and connect the center in both directions with OneWay Road. Starting two tiles from the OWR, use the Hole Diggers and Raisers to elevate the terrain. Use the Road tool to create a small area of elevated terrain, and repeat for the other side. Place four FLEXOnSlope transition pieces on the edge of the slope. Then, place four starter pieces to override the OnSlope transitions. For maximum stability, place them in the inside gap between the OWR and slope, though they do not necessarily need to be placed in this location. Continue by dragging RealHighway over the OnSlope transitions, elevated starters, and OWR. If you are using a slope mod, be sure to drag far enough to reach flat ground again.
Place DDI pieces and connect with OWR
Raise terrain
Create a small plateau
Repeat on the other side
Place FLEXOnSlope transitions
Place elevated starter pieces
Drag RealHighway
Place one FLEXWidth transitions on each end of the DDI. Ensure the correct FLEXWidth transitions are used, with the lane drop versions on entrances and the lane add versions on exits. In the gap between the DDI and starter, place a starter piece to override the starter to transition between RHW-4 and MIS. Use the RealHighway with a DRI pattern to create an A1 Outside Wide ramp. Repeat this four times to complete the interchange
Place four FLEXWidth transitions
Place four starters to override the width transitions
Use a DRI to create the ramps.
🎉
Volleyball Interchange
The Volleyball Interchange, also commonly known as a Three-Level Diamond or Split-Level Diamond, is a three-level interchange, in which all turning motions are handled by at-grade intersections on a separate height level from through traffic.
The old Puzzle Piece Ramp Interfaces button in the Highways menu contains 5 variations of the Volleyball Interchange intersections, two of which include traffic signals. To use them, place the intersections, then place starter pieces between each intersection to connect them.
Three-Level Crossings
In certain situations, using special Three-Level Crossing helper pieces (located under the RHW 3-Level Crossings button), it is possible to have three different RHW elevations cross one another on a single tile, which can be useful in constructing more complex interchanges, such as compact T-Interchanges and Stack Interchanges. To use the Three-Level Crossings, connect two different height levels of diagonal network, and the desired width of mainline at a third height level. It is recommended to use the 2-Tile version for the RHW-4 and RHW-6S, the 3-Tile version for the RHW-6C and RHW-8C, and the 4-Tile version for the RHW-8S and RHW-10S.
Note that any FLEXFly or curve pieces must be at least 1 tile away from a Three-Level Crossing FLEX Piece, as at present, the adjacency stability does not exist, nor does FLEXFly-over-FLEXFly functionality.

The “Stackasaurus Rex” Interchange, built by NAM Team developer Lucario Boricua, is an example of what is possible with the Three-Level Crossings.
RHW FLEX Turn Lanes (FTLs)
The RHW has its own set of FLEX Turn Lane (FTL) options available. Supported types include the RHW-2 (L0 only), RHW-4 Rural (L0 only), and MIS Ramps (L0 and L1). Support for SITAP-style signalized intersections is also available in at least some instances.
RHW-2 FTLs
To build the RHW-2 FTLs, begin with the transition, and drag RHW-2 out from it. The override of the turn lane will carry until you reach an intersection with another network. To make a +-intersection, repeat this process on the other side.
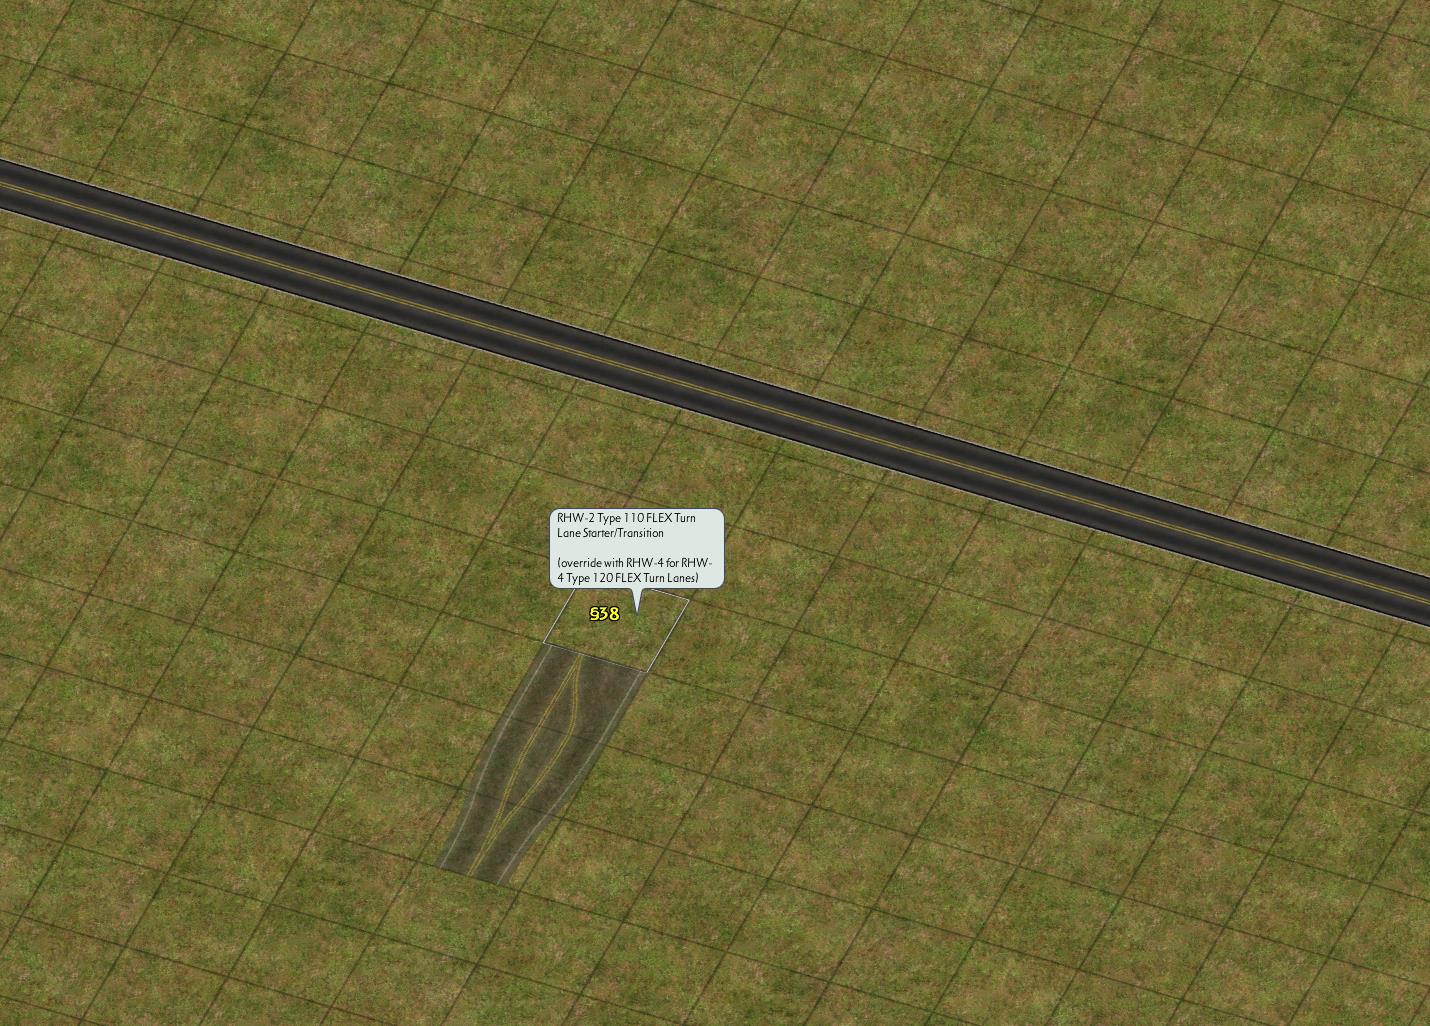
Use FTL starter
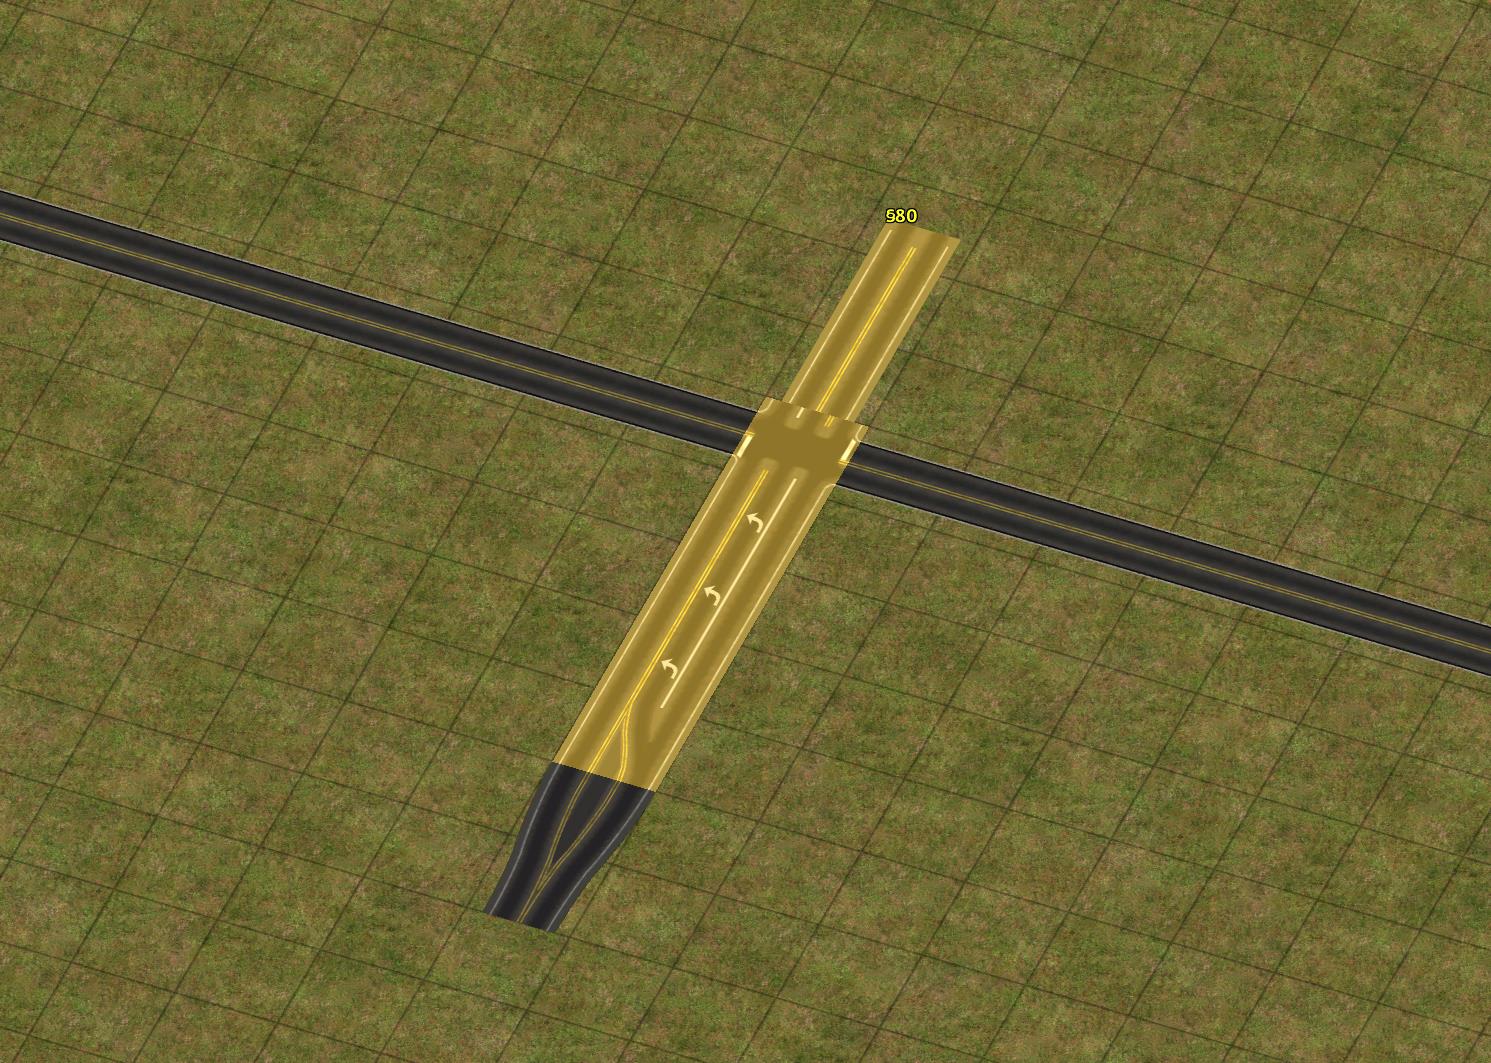
Drag RHW-2
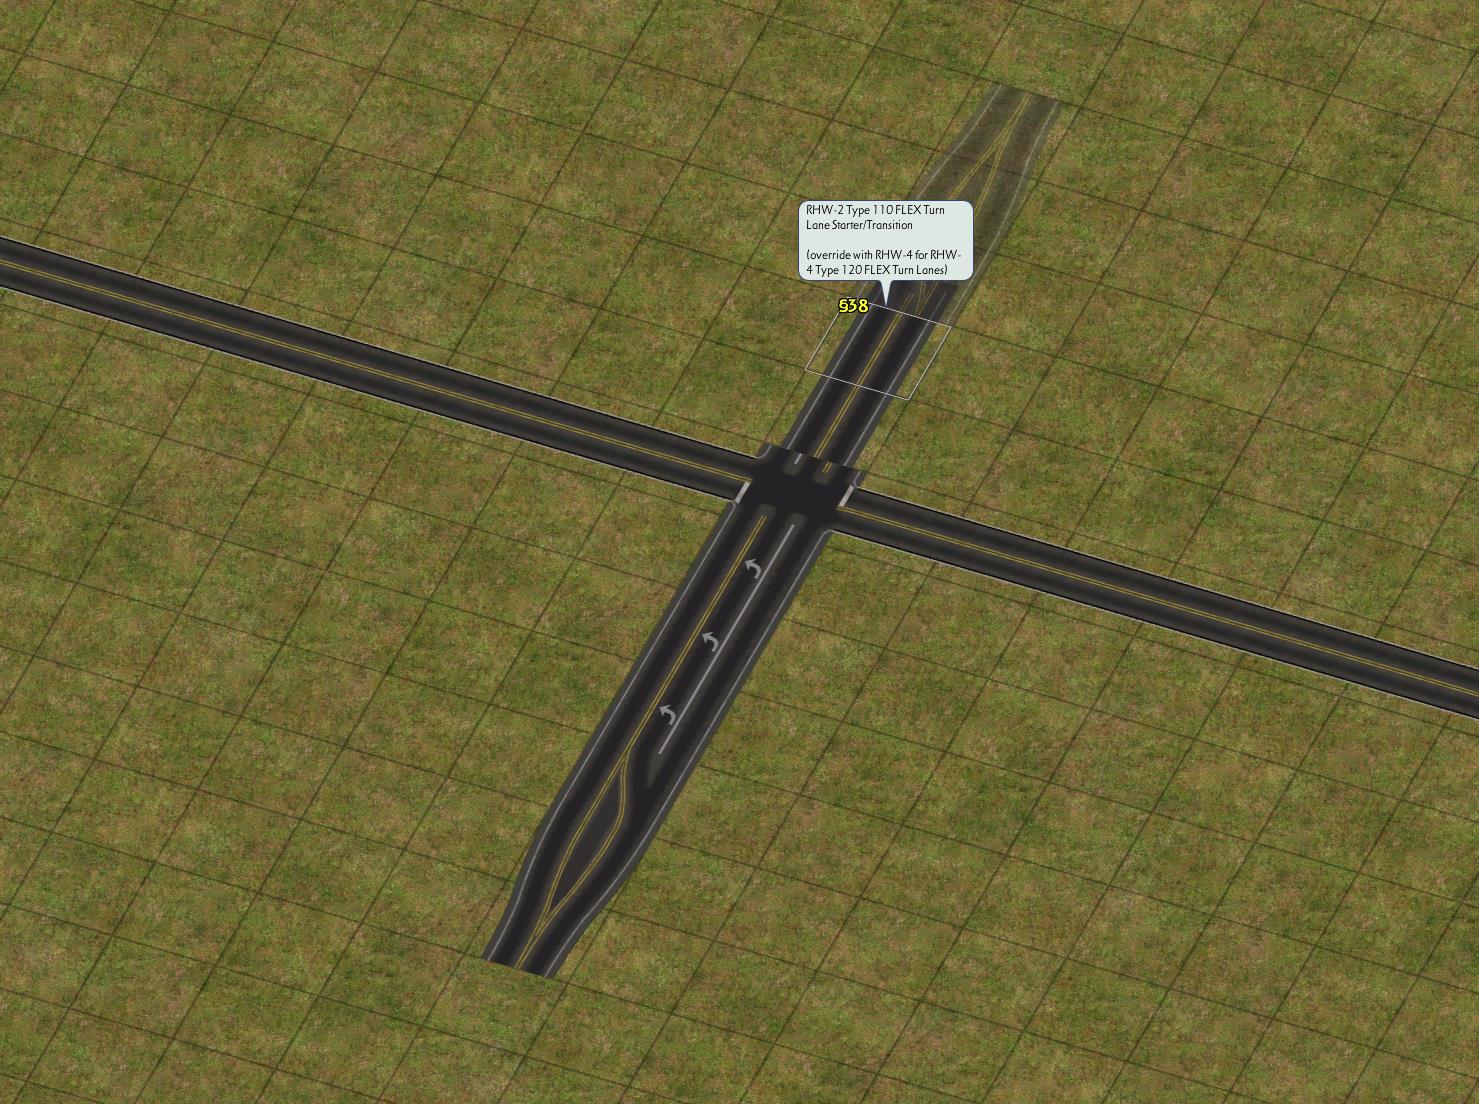
Use FTL starter on other side, then drag RHW-2
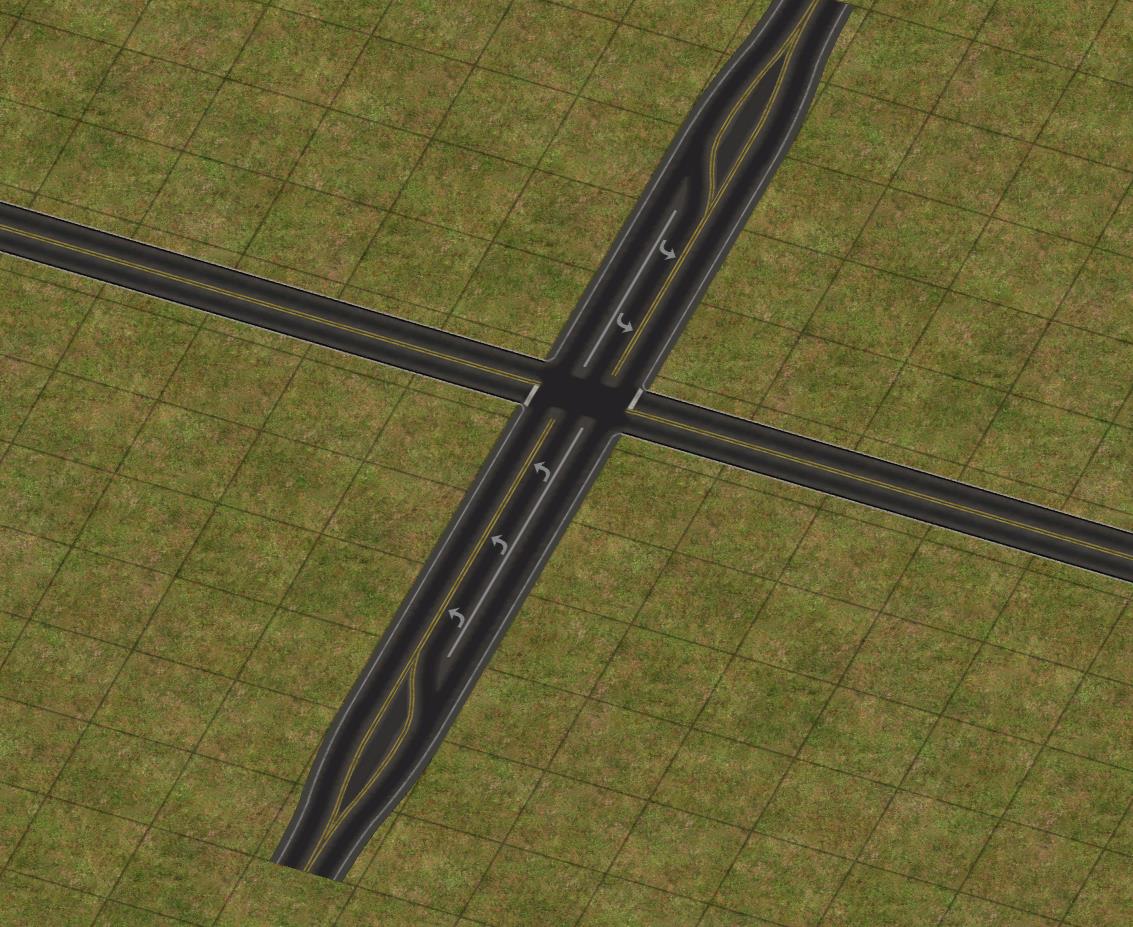
🎉
It is possible to signalize intersections with Roads and other RHW-2s, via two different methods. The first involves transitioning to Road immediately before the intersection. Use the bulldozer or Network Eraser to remove one tile at the center of the intersection. Use the Road tool to draw road in both directions across the intersection.
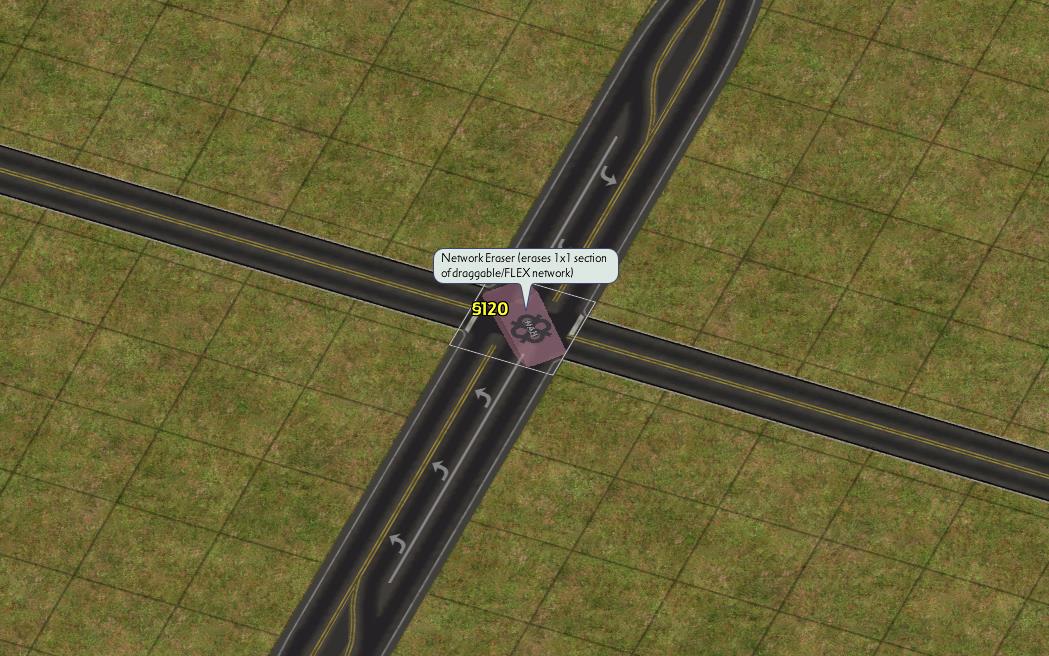
Remove center tile
Draw road
Draw road
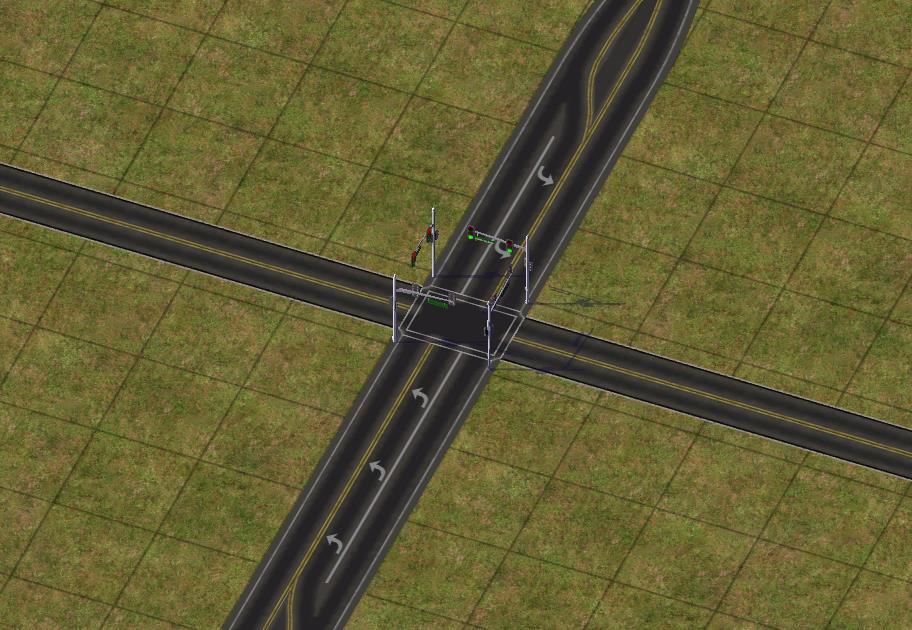
🎉
The second method involves using one of the RHW FLEX SITAP intersections in the back half of the RHW FLEX Turn Lanes Tab Loop. Start with the unsignalized intersection, locate the appropriate piece for the intersection, and place it.

Use the signalized intersection piece
🎉
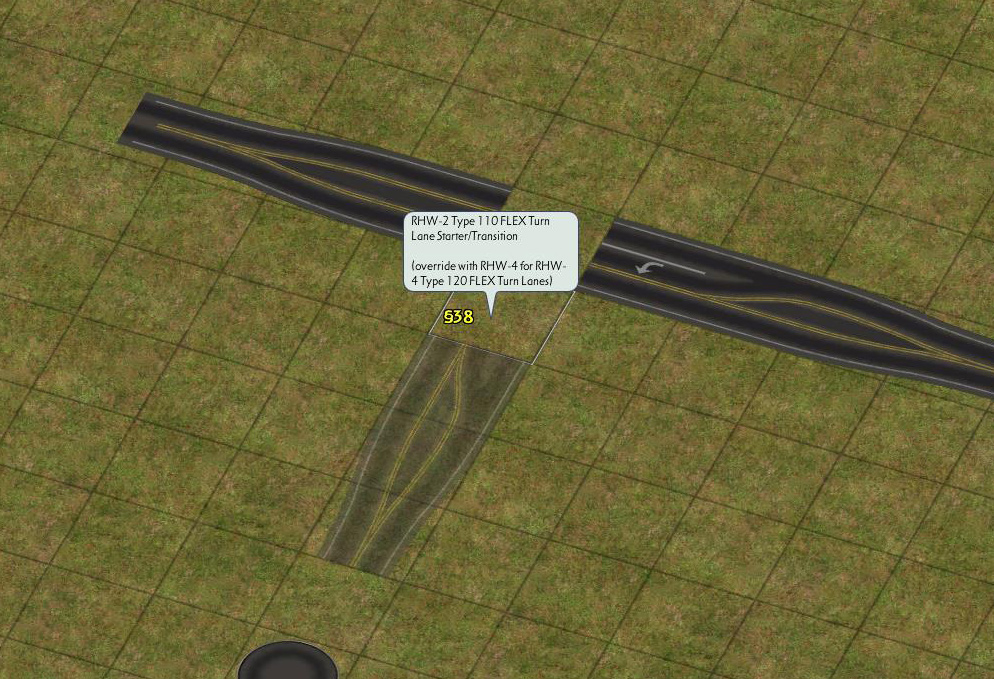
In the case of T-intersections, in which the RHW-2 is the thru network, use the T-Median transition on the opposite side.
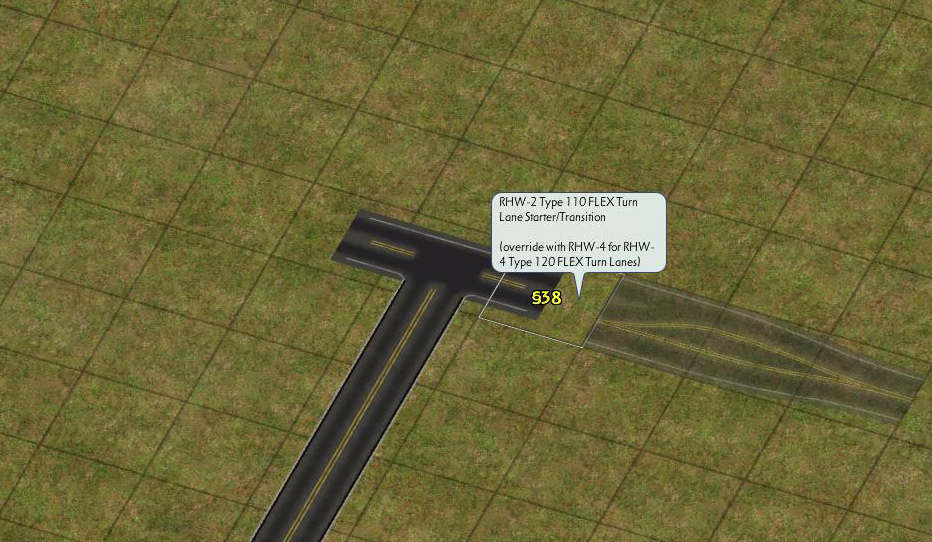
Use FTL starter
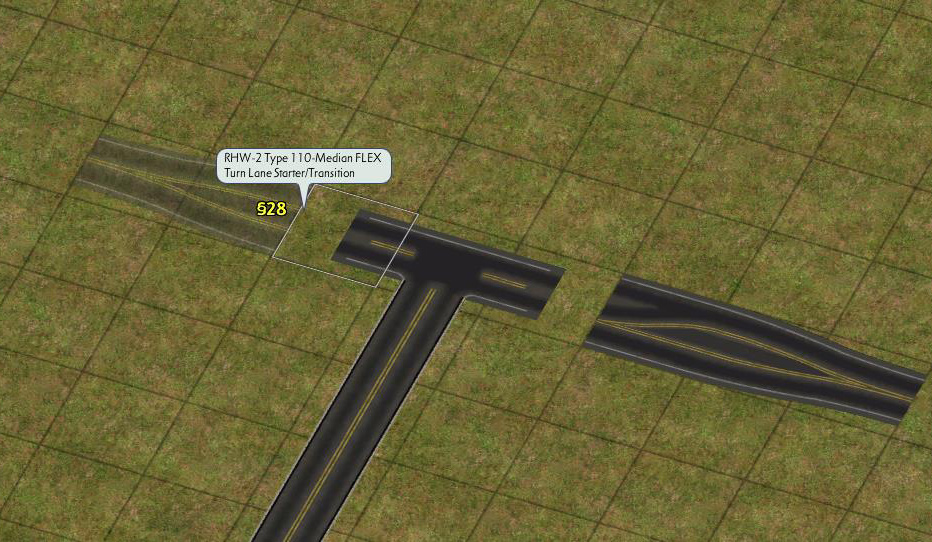
Use FTL median starter
🎉
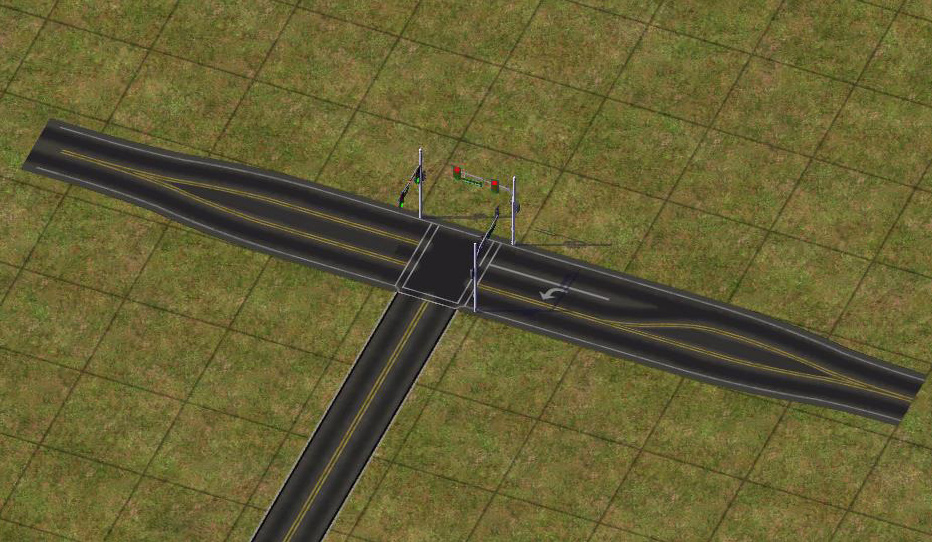
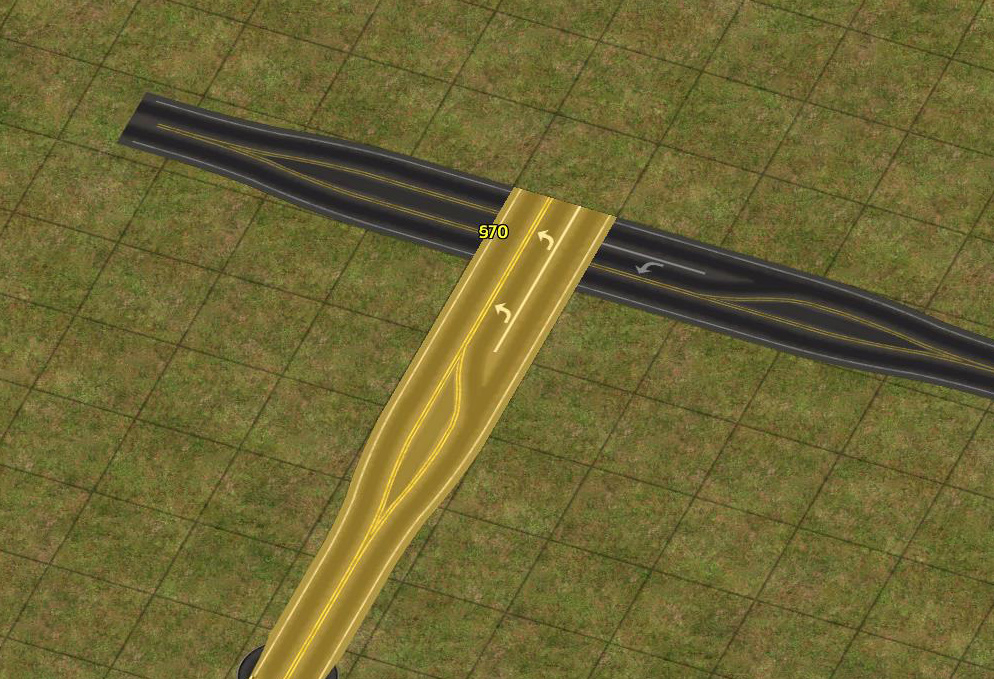
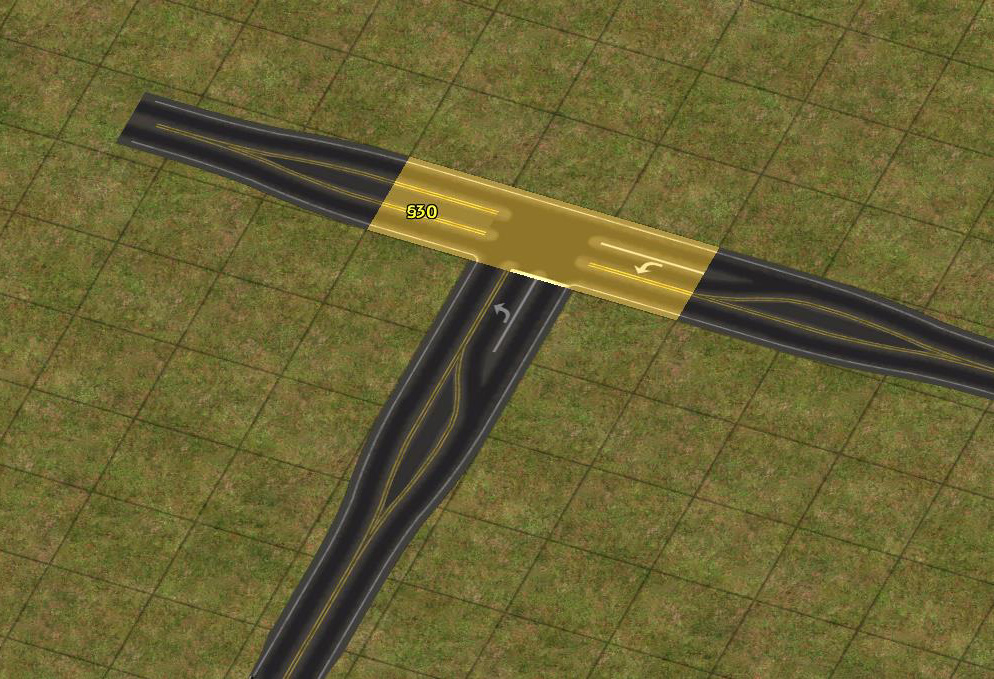
To add a traffic signal, locate the appropriate piece for the intersection from the back half of the RHW FLEX Turn Lanes Tab Loop, and place it.
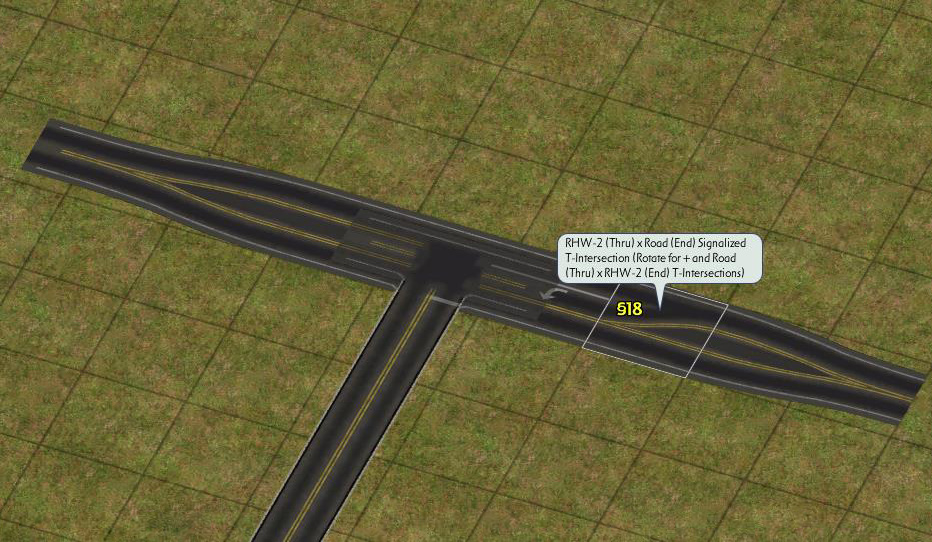
To add turn lanes onto the incoming road, remove a small length of the incoming road and replace with the FTL starter. Drag RealHighway through the intersection, and finish with the appropriate Signalized T-intersection piece.
Use FTL starter
Drag RHW up to intersection
Drag RHW across intersection
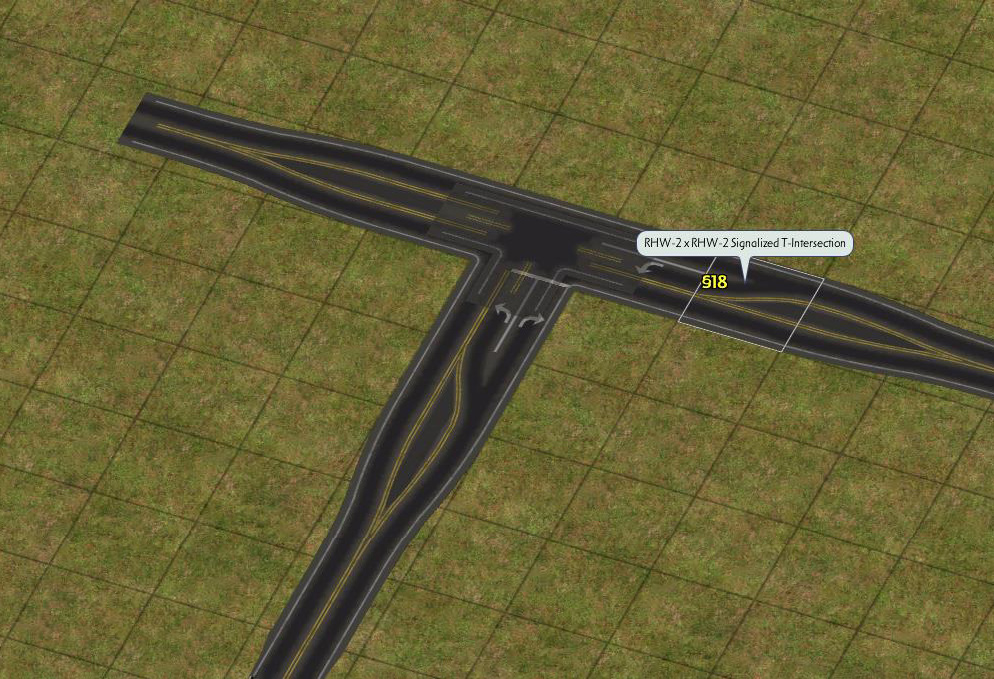
Place signalized intersection piece
🎉
RHW-4 FTLs
To build rural-style RHW-4 FTLs, start with the same transition as the RHW-2 FTLs, but use the RHW-4 starter to override it. Drag RealHighway through the intersection. Repeat this process from the other direction to complete the unsignalized intersection
Use the FTL starter, with an adjacent RHW-4 starter
Drag RealHighway
Repeat from the other direction
Signalized intersections are also possible, again using the appropriate signalized intersection piece.
Place two signalized intersection pieces
🎉
MIS FTLs
The MIS FTLs, known in their 2-lane form as “MIS-2”, currently come in two flavors: one that favors right turns, and the other that favors left turns. Each produces a different end result at a Road +-intersection (with SITAP support).

It is also possible to hook an RHW-4 into an MIS FTL, in which case the RHW-4 seamlessly transitions into an MIS-2 FTL.
Additionally, combination FLEX Height/Turn Lane transitions exist, allowing more flexibility when adding turn lanes to ramps in interchanges.
List of Menu Items
RHW Network Menu Items
Base Network
RHW-2 Network Button (located under the Highways Menu)
This button activates the base draggable RealHighway network tool, which defaults to the RHW-2 network. The use of Starter and various FLEX pieces can initiate overrides, transforming the RHW-2 into other networks.
RHW Starters
Starter Pieces (located under the Highways Menu)
The Starter Pieces allow one to widen and/or elevate their RealHighways, by dragging the base RealHighway network tool through them, causing them to convert to match.
- L0 RHW-4 Starter
- L0 MIS Starter
- L0 RHW-3 Starter
- L0 RHW-6S Starter
- L0 RHW-6C Starter
- L0 RHW-8S Starter
- L0 RHW-8C Starter
- L0 RHW-7C Starter
- L0 RHW-10S Starter
- L0 RHW-12S Starter
- L1 RHW-2 Starter
- L1 RHW-4 Starter
- L1 MIS Starter
- L1 RHW-3 Starter
- L1 RHW-6S Starter
- L1 RHW-6C Starter
- L1 RHW-8S Starter
- L1 RHW-8C Starter
- L1 RHW-7C Starter
- L1 RHW-10S Starter
- L1 RHW-12S Starter
- L2 RHW-2 Starter
- L2 RHW-4 Starter
- L2 MIS Starter
- L2 RHW-3 Starter
- L2 RHW-6S Starter
- L2 RHW-6C Starter
- L2 RHW-8S Starter
- L2 RHW-8C Starter
- L2 RHW-7C Starter
- L2 RHW-10S Starter
- L2 RHW-12S Starter
- L3 RHW-4 Starter
- L3 MIS Starter
- L3 RHW-6S Starter
- L4 RHW-4 Starter
- L4 MIS Starter
- L4 RHW-6S Starter
- DDRHW-4 Starter
RHW Fillers
Filler Puzzle Pieces (located under the Highways Menu)
The Filler Puzzle Pieces exist for ease of use in tight spaces, where overrides break down and the use of a starter is not feasible. Note that the RHW-8S, 10S, 6C, and 8C do not have diagonal fillers.
- L0 RHW-4 Filler Piece
- L0 Diag RHW-4 Filler Pieces (A and B)
- L0 WRHW-2 Filler Piece
- L0 MIS Filler
- L0 Diag MIS Filler Pieces (A and B)
- L0 RHW-3 Filler
- L0 Diag RHW-3 Filler Pieces (A and B)
- L0 RHW-6S Filler
- L0 Diag RHW-6S Filler Pieces (A and B)
- L0 RHW-6C Filler
- L0 RHW-8S Filler
- L0 RHW-8C Filler
- L0 RHW-7C Filler
- L0 RHW-10S Filler
- L1 RHW-2 Filler
- L1 RHW-4 Filler
- Diag L1 RHW-4 Filler Pieces (A and B)
- L1 MIS Filler
- Diag L1 MIS Filler Pieces (A and B)
- L1 RHW-3 Filler
- Diag L1 RHW-3 Filler Pieces (A and B)
- L1 RHW-6S Filler
- Diag L1 RHW-6S Filler Pieces (A and B)
- L1 RHW-6C Filler
- L1 RHW-8S Filler
- L1 RHW-8C Filler
- L1 RHW-7C Filler
- L1 RHW-10S Filler
- L2 RHW-2 Filler
- L2 RHW-4 Filler
- Diag L2 RHW-4 Filler Pieces (A and B)
- L2 MIS Filler
- Diag L2 MIS Filler Pieces (A and B)
- L2 RHW-3 Filler
- Diag L2 RHW-3 Filler Pieces (A and B)
- L2 RHW-6S Filler
- Diag L2 RHW-6S Filler Pieces (A and B)
- L2 RHW-6C Filler
- L2 RHW-8S Filler
- L2 RHW-8C Filler
- L2 RHW-7C Filler
- L2 RHW-10S Filler
- L3 RHW-4 Filler
- Diag L3 RHW-4 Filler Pieces (A and B)
- L3 MIS Filler
- Diag L3 MIS Filler Pieces (A and B)
- L3 RHW-6S Filler
- Diag L3 RHW-6S Filler Pieces (A and B)
- L4 RHW-4 Filler
- Diag L4 RHW-4 Filler Pieces (A and B)
- L4 MIS Filler
- Diag L4 MIS Filler Pieces (A and B)
- L4 RHW-6S Filler
- Diag L4 RHW-6S Filler Pieces (A and B)
- DDRHW-4 Filler
- Diag DDRHW-4 Filler Pieces (A and B)
RHW Ramp & Interchange Menu Items
QuickChange
QuickChange Pieces (located under the Highways Menu)
The QuickChange Xpress button offers pre-constructed full and partial interchanges, in FLEX format. For more details, see the QuickChange portion of this document.
- QuickChange L0 Dual Type 110 (Road)/L1 RHW
- QuickChange L1 Dual Type 110 (Road)/L0 RHW
- QuickChange L0 Dual Type 120 (Avenue)/L1 RHW
- QuickChange L1 Dual Type 120 (Avenue)/L0 RHW
- QuickChange L0 Dual Type 230 (AVE-6)/L1 RHW
- QuickChange L1 Dual Type 230 (AVE-6)/L0 RHW
- QuickChange L0/L1 Diamond
- QuickChange L1/L0 Diamond
- QuickChange L0/L1 Parclo-Inner
- QuickChange L1/L0 Parclo-Inner
FLEXRamps
FLEXRamps (located under the Highways Menu)
The FLEXRamps offer an easy way to have on/offramps branch off one’s RealHighways. Being FLEX pieces, a single piece can work for multiple networks. For more details, see the FLEXRamps portion of this document. To access diagonal versions (available for A1, B1, D1, and E1 ramps), simply rotate the piece with Home/End until the piece rotates appropriately.
- Type A1 FLEXRamp
- Type B1 FLEXRamp
- Type D1 FLEXRamp
- Type E1 FLEXRamp
- Type A2 FLEXRamp
- Type B2 FLEXRamp
- Type D2 FLEXRamp
- Type E2 FLEXRamp
- Type A1-Diagonal FLEXRamp
- Type B1-Diagonal FLEXRamp
- Type A1-Inside FLEXRamp
- Type B1-Inside FLEXRamp
- Type D1-Inside FLEXRamp
- Type E1-Inside FLEXRamp
- Type D1-Inside Dual Shift FLEXRamp
- Type A3 FLEXRamp
- Type D3 FLEXRamp
Puzzle Piece Ramps DEPRECATED
Puzzle Piece Ramp Interfaces and Specialized Crossings (located under the Highways Menu)
These puzzle pieces allow you to connect your RHW system through grade-separated interchanges to your surface street (Road, Avenue, One-Way Road) system, or to connect with other RHWs. Types A, B, D and E are located under this button, while Type C and F are located under the Fractional Angle RHW button. The Volleyball Specialized Crossing Pieces are also located here, in the non-deprecated section at the beginning of the TAB Ring. Note that aside from a few specialized setups, the pieces under this button are largely deprecated, and the use of FLEXRamps or DRIs will offer better functionality.
- RHW-3 Type A1/Type B1 Dual
- RHW-6C Type D1 Dual Shift
- RHW-8S Type D1 Dual Shift
- RHW-6C Type D1 Dual Inside Shift
- Diagonal RHW-6C Type A1
- RHW-10S Type D2
- RHW-10S Type E2
- Type 4-A1 Volleyball Intersection
- Type 4-D1 Volleyball Intersection
- Type 4-A2A Volleyball SCP
- Type 4-A2B Volleyball SCP
- Type 4-A2C Volleyball SCP
- RHW-4 Type A1 DEPRECATED
- RHW-4 Type A1 Diagonal DEPRECATED
- RHW-4 Type B1 DEPRECATED
- RHW-4 Type B1 Diagonal DEPRECATED
- RHW-4 Type A1 Inside DEPRECATED
- RHW-4 Type A1 Wide DEPRECATED
- RHW-4 Type D1 DEPRECATED
- RHW-4 Type E1 DEPRECATED
- RHW-4 Type E1 Wye DEPRECATED
- ERHW-4 Type A1 DEPRECATED
- ERHW-4 Type A1 Inside DEPRECATED
- RHW-3 Type A1 DEPRECATED
- RHW-3 Type B1 DEPRECATED
- RHW-2 Type A1 DEPRECATED
- RHW-2 Type A1 Dual DEPRECATED
- RHW-2 Type B1 DEPRECATED
- RHW-2 Type B1 Dual DEPRECATED
- RHW-2 Type D1 DEPRECATED
- RHW-2 Type D1 Wye DEPRECATED
- RHW-2 Type D1 Folded DEPRECATED
- RHW-2 Type E1 DEPRECATED
- RHW-2 Type E1 Wye DEPRECATED
- ERHW-2 Type A1 DEPRECATED
- RHW-6S Type A1 DEPRECATED
- RHW-6S Type B1 DEPRECATED
- RHW-6S Type A1 Wide DEPRECATED
- RHW-6S Type D1 DEPRECATED
- RHW-6S Type E1 DEPRECATED
- RHW-6S Type A2 DEPRECATED
- RHW-6S Type B2 DEPRECATED
- ERHW-6S Type D1 DEPRECATED
- RHW-6C Type A1 DEPRECATED
- RHW-6C Type B1 DEPRECATED
- RHW-8S Type A1 DEPRECATED
- RHW-8S Type B1 DEPRECATED
- RHW-8S Type D1 DEPRECATED
- RHW-8S Type E1 DEPRECATED
- RHW-8S Type D2 DEPRECATED
- RHW-8S Type E2 DEPRECATED
- RHW-8C Type A1 DEPRECATED
- RHW-8C Type B1 DEPRECATED
- RHW-8C Type D1 DEPRECATED
- RHW-8C Type E1 DEPRECATED
- RHW-10S Type A1 DEPRECATED
- RHW-10S Type B1 DEPRECATED
- RHW-10S Type D1 DEPRECATED
- RHW-10S Type E1 DEPRECATED
- DDRHW-4 Type A1 DEPRECATED
RHW Transition Menu Items
FLEXHeight Transitions
FLEXHeight Transitions (located under the Highways Menu)
These FLEX pieces allow you to transition to a different elevation with your RealHighway networks. The “1-Level” and “2-Level” setups can be used with any network, while the 180° MIS Curve will only work with the L0 and L1 MIS.
- FlexHeight 1-Level Orthogonal
- FlexHeight 1-Level Diagonal
- FlexHeight 2-Level Orthogonal
- FLEXOnSlope 1-Level Orthogonal
- FLEXOnSlope 2-Level Orthogonal
- FLEXOnSlope 1-Level Diagonal
- FLEXOnSlope 2-Level Diagonal
- FlexHeight 1-Level 90-Degree Transition
- FlexHeight MIS 1-Level 180-Degree Transition
- FlexHeight 1-Level R3 45-Degree Transition (Orthogonal Lower/Diagonal Higher)
- FlexHeight 1-Level R3 45-Degree Transition (Orthogonal Higher/Diagonal Lower)
FLEXWidth Transitions
These FLEX pieces allow you to transition to a different width with your RealHighway networks (presently Orthogonal-only).
- FLEXWidth Transition for Same Network Type (S-to-S or C-to-C)
- FLEXWidth Transition for Same Network Type/Tile Drop
- FLEXWidth Transition for Different Network Type (S-to-C) Asymmetrical
- FLEXWidth Transition for Different Network Type (S-to-C) Symmetrical/Wishbone
- FLEXWidth Transition for RHW-2/3-to-4 (and Dual RHW-4 to DDRHW-4) Asymmetrical
- FLEXWidth Transition for RHW-2/3-to-4 (and Dual RHW-4 to DDRHW-4) Symmetrical/Wishbone
Height Transition Puzzle Pieces DEPRECATED
Height Transition Puzzle Pieces (located under the Highways Menu)
These older puzzle pieces allow for transitions between two different height levels of RHW networks. They generally have starter drag end stubs. Use of the FLEXHeight Transitions is generally recommended instead, as they support more networks.
- RHW-2-to-RHW-4 Transition A
- RHW-2-to-RHW-4 Transition B
- RHW-4-to-RHW-6S Transition Style A
- RHW-6-to-8 Transition Style A
- RHW-8-to-10 Transition Style A
- RHW-4-to-6C Transition
- RHW-6C-to-6S Transition A
- RHW-6C-to-6S Transition B
- RHW-6C to RHW-8C transition
- RHW-6C-to-8 Transition
- MIS-to-RHW-4 Transition
- RHW-2-to-3 Transition
- RHW-2-to-WRHW-2 Transition
- WRHW-2-to-RHW-3 Transition
- RHW-3-to-RHW-4 Transition A1/A2
- RHW-3-to-RHW-4 Transition B1/B2
- RHW-4 Ground-to-Elevated ON
- RHW-4 Ground-to-Elevated OFF
- RHW-4 Ground-to-Elevated On-Slope ON
- RHW-4 Ground-to-Elevated On-Slope OFF
- RHW-6S Ground-to-Elevated ON/OFF
- RHW-6S Ground-to-Elevated On-Slope ON/OFF
- MIS Ground-to-Elevated L2 ON
- MIS Ground-to-Elevated L2 OFF
- MIS Ground-to-Elevated L2 On-Slope ON
- MIS Ground-to-Elevated L2 On-Slope OFF
- RHW-2 Ground-to-Elevated L2
- RHW-2 Ground-to-Elevated L2 T On-Slope
- RHW-2 Ground-to-Elevated L2 On-Slope
- RHW-6C Ground-to-Elevated L2
- RHW-6C Ground-to-Elevated L2 On-Slope
- MIS Ground-to-Elevated L2 Curved ON
- MIS Ground-to-Elevated L2 Curved OFF
- MIS Ground-to-Elevated L2 Curved ON Starterless
- MIS Ground-to-Elevated L2 Curved OFF Starterless
- L2-ERHW-4 to L3-ERHW-4 transition Starterless
- RHW-4 Ground-to-Mid-Elevated L3 Starterless
- MIS L2-to-L3 Starterless
- MIS Ground-to-Mid-Elevated L3 Starterless
Width Transition Puzzle Pieces DEPRECATED
Width Transition Puzzle Pieces (located under the Highways Menu)
These puzzle pieces allow for transitions between two different widths of RHW networks. They generally have starter drag end stubs. The transition allowing the DDRHW-4 to connect to the L1 and L2 RHW-4 is located here as well (as it entails a change of tile width).
- RHW-2-to-RHW-4 Transition A
- RHW-2-to-RHW-4 Transition B
- RHW-4-to-RHW-6S Transition Style A
- RHW-6-to-8 Transition Style A
- RHW-8-to-10 Transition Style A
- RHW-4-to-6C Transition A
- RHW-4-to-6C Transition B
- RHW-6C-to-6S Transition A
- RHW-6C-to-6S Transition B
- RHW-8S to RHW-8C Symmetrical Transition
- RHW-8S to RHW-8C Compact Transition
- RHW-6C to RHW-8C transition
- RHW-6C-to-8S Transition
- RHW4-to-MIS Transition
- RHW-2-to-3 Transition
- RHW-2-to-WRHW-2 Transition
- WRHW-2-to-RHW-3 Transition
- RHW-3-to-RHW-4 Transition A1/A2
- RHW-3-to-RHW-4 Transition B1/B2
- L1 RHW-4-to-RHW-6S Transition Style A
- L1 RHW-6S-to-8S Transition Style A
- L1 RHW-8S-to-10S Transition Style A
- L1 RHW-6C-to-8C Transition
- L1 RHW4-to-MIS Transition
- L2 RHW-4-to-RHW-6S Transition Style A
- L2 RHW-6S-to-8S Transition Style A
- L2 RHW-8S-to-10S Transition Style A
- L2 RHW-6C-to-8C Transition
- L2 RHW4-to-MIS Transition
- DDRHW-4-to-Dual-RHW-4 (L1/L2) Connector
RHW Curves & FLEXFly Menu Items
FLEXFly
FLEXFly Pieces (located under the Highways Menu)
These FLEX pieces allow for construction of flyover ramps.
- FLEXFly MIS L0 90-Degree (Type A1)
- FLEXFly MIS L0 90-Degree (Type A2)
- FLEXFly MIS L0 45-Degree (Type B1)
- FLEXFly MIS L0 45-Degree (Type B2)
- FLEXFly MIS L1 90-Degree (Type A1)
- FLEXFly MIS L1 90-Degree (Type A2)
- FLEXFly MIS L1 45-Degree (Type B1)
- FLEXFly MIS L1 45-Degree (Type B2)
- FLEXFly MIS L2 90-Degree (Type A1)
- FLEXFly MIS L2 90-Degree (Type A2)
- FLEXFly MIS L2 45-Degree (Type B1)
- FLEXFly MIS L2 45-Degree (Type B2)
- FLEXFly RHW-4 L0 90-Degree (Type A1)
- FLEXFly RHW-4 L0 90-Degree (Type A2)
- FLEXFly RHW-4 L0 45-Degree (Type B1)
- FLEXFly RHW-4 L0 45-Degree (Type B2)
- FLEXFly RHW-4 L1 90-Degree (Type A1)
- FLEXFly RHW-4 L1 90-Degree (Type A2)
- FLEXFly RHW-4 L1 45-Degree (Type B1)
- FLEXFly RHW-4 L1 45-Degree (Type B2)
- FLEXFly RHW-4 L2 90-Degree (Type A1)
- FLEXFly RHW-4 L2 90-Degree (Type A2)
- FLEXFly RHW-4 L2 45-Degree (Type B1)
- FLEXFly RHW-4 L2 45-Degree (Type B2)
RHW Curves
RHW Curve Pieces (located under the Highways Menu)
These pieces allow you to build smoother curves.
- FLEX-MRC R2 45
- FLEX-MRC R2 90
- FLEX-MRC R3 45
- FLEX-MRC R4 45
- FLEX-MRC R5 45
- FLEX S-Curve
- FLEX Basketweave
- RHW-4 Double Curve
- RHW-4 Outer Curve
- RHW-4 Inner Curve
- RHW-4 Lane Shift
- RHW-4 Dual Lane Shift
- MIS S-Curve 1
- MIS 45-Curve 1
- MIS 45-Curve 2
- MIS 90-Curve
- RHW-2 S-Curve
- RHW-2 45-Curve
- RHW-2 90-Curve (Large)
- RHW-2 90-Curve (Small)
- RHW-3 S-Curve 1
- RHW-3 S-Curve 2
- RHW-3 45-Curve 1
- RHW-3 45-Curve 2
- RHW-6S Single Lane Shift
- RHW-6S Dual Lane Shift
- RHW-6S Outer Curve
- RHW-6S Inner Curve
- RHW-8S Outer Curve
- RHW-8S Inner Curve
- RHW-6C S-Curve Half
- RHW-8C S-Curve Half
- RHW-10 Outer Curve
- RHW-10 Inner Curve
Fractional Angle RHW Menu Items
FARHW Puzzle Pieces LEGACY
Fractional Angle RHW (FARHW) Pieces (located under the Highways Menu)
These pieces allow one to build RHW networks at fractional angles (18.4°/71.6°) in puzzle piece form.
- FARHW-2 Straight
- FARHW-2 Short Curve
- FARHW-2 Long Curve
- FARHW-2 Diagonal to FARHW-2 Curve
- FARHW-4
- Dual FARHW-4
- FARHW-4 Short Curve outer
- FARHW-4 Short Curve inner
- Dual FARHW-4 Short Curve
- FARHW-4 to Diag Curve outer
- FARHW-4 to Diag Curve inner
- Dual FARHW-4 to Diag Curve
- FARHW-6S Short Curve outer
- FARHW-6S Short Curve inner
- FARHW-6S
- FARHW-6S to Diag Curve outer
- FARHW-6S to Diag Curve inner
- FARHW-6C Short Curve
- FARHW-6C to Diagonal RHW-6C Curve
- FARHW-6C Half Straight Piece
- FARHW-8C Short Curve
- FARHW-8C to Diagonal RHW-8C Curve
- FARHW-8C Half Straight Piece
- FAMIS-1
- FAMIS-FAMIS 143deg Curve
- FAMIS Short Curve outer
- FAMIS Short Curve inner
- FAMIS to Diag Curve inner
- FAMIS to Diag Curve outer
- FAMIS Long Curve small outer
- FAMIS Long Curve small inner
FARHW Ramp Puzzle Pieces LEGACY
Fractional Angle RHW (FARHW) Pieces (located under the Highways Menu)
These pieces allow one to build the Type C and Type F ramp interfaces, in puzzle piece form.
- RHW-2 Type C1
- RHW-2 Type C1 Dual
- RHW-4 Type C1
- RHW-4 Type C1 Inside
- RHW-4 Type C1 diagonal
- RHW-4 Type F1
- RHW-4 Type F1 diagonal
- RHW-6S Type C1
- RHW-6S Type C1 diagonal
- RHW-6S Type C2
- RHW-6S Type F1
- RHW-6S Type F1 diagonal
- RHW-6C Type C1
- RHW-6S Type F2
- RHW-8S Type C1
- RHW-8S Type F1
- RHW-8C Type F1
- RHW-8S Type C2
- RHW-8C Type C2
- RHW-8S Type F2
- RHW-10S Type F1
- RHW-10S Type C2
- RHW-10S Type F2
- RHW-10S Type C3
- MIS/FAMIS Ramp Type C1 - out
- Avenue Type C1 RHW-MIS Exit/Entrance Ramp
FARHW Intersection Puzzle Pieces LEGACY
Fractional Angle RHW (FARHW) Intersections and Transitions (located under the Highways Menu)
These pieces allow one to build width transitions and intersections involving Fractional Angle RealHighways (FARHWs), in puzzle piece form.
- FA MIS-to-RHW-4 Trans A
- FA MIS-to-RHW-4 Trans B
- Fractional Angle Diamond M4A Full (arranged in increasing width)
- Fractional Angle Diamond 44A Full
- Fractional Angle Diamond 44B Full
- Fractional Angle Diamond 64B Full
- Fractional Angle Diamond M4 TuLEPless Full (also arranged in increasing width)
- Fractional Angle Diamond 44 TuLEPless Full
- Fractional Angle Diamond 44A Halves
- Fractional Angle Diamond M2A Full
Cosmetic Piece Menu Items
These pieces allow you to manipulate the appearance of your RHW networks and transitions with fine control.
1 Tile Cosmetic Pieces
1-Tile Cosmetic Puzzle Pieces (located under the Highways Menu)
Ploppable cosmetic pieces for 1 tile width networks.
- RHW-2 CP Dash Orth
- RHW-2 CP SolDash Dash Orth
- RHW-2 CP Dash LRA Dash Orth
- RHW-2 CP Dash Diag
- RHW-2 CP SolDash Diag
- RHW-2 CC Dash S-curve
- RHW-2 CC Dash 45-curve
- RHW-2 CC Dash 90-curve
- RHW-2 CC Dash 18-curve
- RHW-2 CC Dash 72-curve
- RHW-2 CC Dash 27-curve
- RHW-2 CC FARHW Dash
- RHW-2 CCFARHW SolDash1
- RHW-2 CC Curve SolDash2
- RHW-3 CP RM LRA IN
- RHW-3 CP RM TpA OUT 1
- RHW-3 CP RM TpA OUT 2
- RHW-3 CP BM1 UM
- RHW-3 CP BM1 LRA IN
- RHW-3 CP BM1 EA
- RHW-3 CP BM1 EA + TrA
- RHW-3 CP DS1 UM
- RHW-3 CP DS1 LRA IN
- RHW-3 CP BM1 EA in
- RHW-3 CP BM1 EA+TrA in
- RHW-3 CP BM1 SpA in
- RHW-3 CP SM1 UM
- RHW-3 CP SM1 EA in
- RHW-3 CP SM1 EA+TrA in
- RHW-3 CP SM1 SpA
- RHW-3 x RHW-2 TuLEP intersection
- RHW-3 x RHW-3 TuLEP intersection
- RHW-3 x WRHW-2 TuLEP intersection
- RHW-4 CP RM LRA OUT
- RHW-4 CP RM LRA IN
- RHW-4 CP RM TpA OUT
- RHW-4 CP RM TpA IN
- RHW-4 CP RM TrA
- RHW-4 CP BM1 UM
- RHW-4 CP BM1 LRA OUT
- RHW-4 CP BM1 LRA IN
- RHW-4 CP BM1 EA OUT
- RHW-4 CP BM1 EA+TRA OUT
- RHW-4 CP BM1 SpA OUT
- RHW-4 CP DS1 UM
- RHW-4 CP DS1 LRA IN
- RHW-4 CP DS1 EA OUT
- RHW-4 CP DS1 EA+TRA OUT
- RHW-4 CP SD1 UM
- RHW-4 CP SD1 LRA IN
- RHW-4 CP Transition NEL
- RHW-4 CP NEL Single UM
- RHW-4 CP NEL LRA
- RHW-4 CP NEL EA
- RHW-4 CP NEL EA+TrA
- RHW-4 CP ROP Type A1
- RHW-4 CP ROP Type B1
2 Tile Cosmetic Pieces
2-Tile Cosmetic Puzzle Pieces (located under the Highways Menu)
Ploppable cosmetic pieces for two tile width networks.
- RHW-6S CP UM LRA OUT
- RHW-6S CP UM LRA IN
- RHW-6S CP UM TpA OUT
- RHW-6S CP UM TpA IN
- RHW-6S CP UM TrA
- RHW-6S CP BM1 UM
- RHW-6S CP BM1 LRA OUT
- RHW-6S CP BM1 EA OUT
- RHW-6S CP BM1 EA + TrA OUT
- RHW-6S CP BM1 Ea + TpA OUT
- RHW-6S CP BM2 UM
- RHW-6S CP BM2 LRA IN
- RHW-6S CP BM2 EA IN
- RHW-6S CP BM2 EA + TrA IN
- RHW-6S CP DS1 UM
- RHW-6S CP DS1 EA OUT
- RHW-6S CP DS1 EA + TrA OUT
- RHW-6S CP DS1 Ea + TpA OUT
- RHW-6S CP DS2 UM
- RHW-6S CP DS2 LRA IN
- RHW-6S CP SD1 UM
- RHW-6S CP SD1 LRA OUT
- RHW-8S CP UM LRA OUT
- RHW-8S CP UM LRA IN
- RHW-8S CP UM TpA OUT
- RHW-8S CP UM TrA
- RHW-8S CP BM1 UM
- RHW-8S CP BM1 LRA OUT
- RHW-8S CP BM1 EA OUT
- RHW-8S CP BM1 EA + TrA OUT
- RHW-8S CP BM1 Ea + TpA OUT
- RHW-8S CP BM2 UM
- RHW-8S CP BM2 EA OUT
- RHW-8S CP BM2 EA + TrA OUT
- RHW-8S CP BM3 UM
- RHW-8S CP BM3 LRA IN
- RHW-8S CP DS1 UM
- RHW-8S CP DS1 EA OUT
- RHW-8S CP DS1 EA + TrA OUT
- RHW-8S CP DS1 Ea + TpA OUT
- RHW-8S CP DS2 UM
- RHW-8S CP DS2 EA OUT
- RHW-8S CP DS2 EA + TrA OUT
- RHW-8S CP DS3 UM
- RHW-8S CP DS3 LRA IN
- RHW-8S CP SD1 UM
- RHW-8S CP SD1 LRA OUT
- RHW-10S CP UM LRA OUT
- RHW-10S CP UM LRA IN
- RHW-10S CP UM TpA OUT
- RHW-10S CP UM TrA
- RHW-10S CP BM1 UM
- RHW-10S CP BM1 LRA OUT
- RHW-10S CP BM1 EA OUT
- RHW-10S CP BM1 EA + TrA OUT
- RHW-10S CP BM1 Ea + TpA OUT
- RHW-10S CP BM2 UM
- RHW-10S CP BM2 EA OUT
- RHW-10S CP BM2 EA + TrA OUT
- RHW-10S CP BM3 UM
- RHW-10S CP BM3 LRA IN
- RHW-10S CP DS1 UM
- RHW-10S CP DS1 EA OUT
- RHW-10S CP DS1 EA + TrA OUT
- RHW-10S CP DS1 Ea + TpA OUT
- RHW-10S CP DS2 UM
- RHW-10S CP DS2 EA OUT
- RHW-10S CP DS2 EA + TrA OUT
- RHW-10S CP DS3 UM
- RHW-10S CP DS3 LRA IN
- RHW-10S CP SD1 UM
- RHW-10S CP SD1 LRA OUT
3 Tile Cosmetic Pieces
3-Tile Cosmetic Puzzle Pieces (located under the Highways Menu)
Ploppable cosmetic pieces for three tile width networks.
- RHW-6C CP UM LRA OUT
- RHW-6C CP UM LRA IN
- RHW-6C CP UM TpA OUT
- RHW-6C CP UM TrA
- RHW-6C CP BM2 UM
- RHW-6C CP BM2 LRA IN
- RHW-6C CP BM2 EA IN 1
- RHW-6C CP BM2 EA IN 2
- RHW-6C CP SD2 UM
- RHW-6C CP SD LRA IN
- RHW-6C CP HOV UM
- RHW-6C CP HOV M
- RHW-8C CP UM LRA OUT
- RHW-8C CP UM TpA OUT
- RHW-8C CP UM TrA
- RHW-8C CP BM1 UM
- RHW-8C CP BM1 LRA OUT
- RHW-8C CP BM1 EA OUT
- RHW-8C CP BM1 EA+TrA OUT
- RHW-8C CP BM1 EA+TpA OUT
- RHW-8C CP DS1 UM
- RHW-8C CP DS1 EA OUT
- RHW-8C CP DS1 EA+TrA OUT
- RHW-8C CP DS1 EA+TpA OUT
- RHW-8C CP DS1 UM
- RHW-8C CP DS1 EA OUT
Cosmetic Transition Pieces
Cosmetic Transition Puzzle Pieces (located under the Highways Menu)
Ploppable cosmetic pieces to transition between network widths.
- RHW-4-to-RHW-6S Transition BM1
- RHW-4-to-RHW-6S Transition BM2
- RHW-4-to-RHW-6S Transition LRA
- RHW-6S-to-RHW-8S Transition BM1
- RHW-6S-to-RHW-8S Transition BM2
- RHW-6S-to-RHW-8S Transition LRA
- RHW-8S-to-RHW-10S Transition BM1
- RHW-8S-to-RHW-10S Transition BM2
- RHW-8S-to-RHW-10S Transition LRA
- RHW-6C-to-RHW-8C Transition BM1
- RHW-3 CP Transition BM1
RHW Utility Menu Items
RHW Neighbor Connectors
RHW Neighbor Connectors (located under the Highways Menu)
These pieces allow you to build properly functioning Neighbor Connections with RHWs beyond the base RHW-2 (Neighbor Connectors are also not needed for RHW-3 and Double-Decker RHW-4 connections).
- RHW FLEX Neighbor Connector (FLEX-NC).
- RHW Invisible Loop Connector
RHW Cross-Network Menu Items
Specialized RHW x Surface Intersections
These FLEX pieces allow for specialized intersections with RHW ramps.
- FlexSPUI (Single-Point Urban Interchange) Terminus
- FlexDDI (Diverging Diamond Interchange) Terminus
RHW/Road DEPRECATED
Road/RHW Puzzle Pieces and FLUPs (located under the Roads Menu)
These puzzle pieces extend the NAM Elevated Road Puzzle Pieces to allow you to cross RHW networks.It also contains the current set of RHW FLUPs pieces. For most instances, use of the Draggable Elevated Road Viaducts is recommended instead.
- Road-over-RHW-4 Orthogonal/Orthogonal
- Road-over-RHW-4 Diagonal/Orthogonal
- Road-over-RHW-4 Orthogonal/Diagonal
- Road-over-RHW-4 Diagonal/Diagonal
- Road-over-RHW-2 Orthogonal/Orthogonal
- Road-over-RHW-2 Diagonal/Orthogonal
- Road-over-RHW-2 Orthogonal/Diagonal
- Road-over-RHW-2 Diagonal/Diagonal
- Road-over-MIS Ramp Orthogonal/orthogonal
- Road-over-RHW-6S Orthogonal/Orthogonal
- Road-over-RHW-6C Orthogonal/Orthogonal
- Road-over-RHW-8S Orthogonal/Orthogonal
- Road-over-RHW-8C Orthogonal/Orthogonal
- Road-over-RHW-10S Orthogonal/Orthogonal
- Road-over-RHW-3 Orthogonal/Orthogonal
- Elevated Road/EMIS +-Intersection
- Elevated Road/EMIS T-Intersection
- FLUPs Underpass-Under RHW-MIS/RHW-2/RHW-4/RHW-6C
- FLUPs Underpass-Under RHW-6S/RHW-8S/RHW-10
- FLUPs RHW-2 Ramp
RHW/One-Way Road DEPRECATED
One-Way Road (OWR)/RHW Puzzle Pieces (located under the Roads Menu)
These puzzle pieces extend the NAM Elevated One-Way Road Puzzle Pieces to allow you to cross RHW networks. For most instances, use of the Draggable Elevated One-Way Road Viaducts is recommended instead.
- OWR-over-RHW-4 Orthogonal/Orthogonal
- OWR-over-RHW-2 Orthogonal/Orthogonal
- OWR-over-MIS Ramp Orthogonal/Orthogonal
- OWR-over-RHW-6S Orthogonal/Orthogonal
- OWR-over-RHW-6C Orthogonal/Orthogonal
- OWR-over-RHW-8S Orthogonal/Orthogonal
- OWR-over-RHW-8C Orthogonal/Orthogonal
- OWR-over-RHW-10S Orthogonal/Orthogonal
- OWR-over-RHW-3 Orthogonal/Orthogonal
- Elevated OWR/EMIS +-Intersection
- Elevated OWR/EMIS T-Intersection
RHW/Avenue DEPRECATED
These puzzle pieces extend the NAM Elevated Avenue Puzzle Pieces to allow you to cross RHW networks.
Avenue/RHW Puzzle Pieces and FlexSPUI (located under the Roads Menu)
These puzzle pieces extend the NAM Elevated Avenue Puzzle Pieces to allow you to cross RHW networks. It also contains the Single-Point Urban Interchange (SPUI) and Diverging Diamond Interchange (DDI) intersection pieces. For most instances, use of the Draggable Elevated Avenue Viaducts is recommended instead.
- Avenue-over-RHW-4 Orthogonal/Orthogonal
- Avenue-over-RHW-2 Orthogonal/Orthogonal
- Avenue-over-MIS Ramp Orthogonal/Orthogonal
- Avenue-over-RHW-6S Orthogonal/Orthogonal
- Avenue-over-RHW-6C Orthogonal/Orthogonal
- Avenue-over-RHW-8S Orthogonal/Orthogonal
- Avenue-over-RHW-8C Orthogonal/Orthogonal
- Avenue-over-RHW-10S Orthogonal/Orthogonal
- Avenue-over-RHW-3 Orthogonal/Orthogonal
- Avenue/MIS +-Intersection Avenue/MIS T-Intersection
- Avenue Type A1 RHW-MIS Exit/Entrance Ramp
- Avenue Type B1 RHW-MIS Exit/Entrance Ramp
- Diverging Diamond-Avenue
- FlexSPUI Avenue Type A
RHW/Rail DEPRECATED
These puzzle pieces extend the old pre-RealRailway NAM Rail Viaduct set to allow one to cross RHW networks.
Heavy Rail/RHW Puzzle Pieces (located under the Rails Menu)
These puzzle pieces extend the old pre-RealRailway NAM Rail Viaduct set to allow one to cross RHW networks. Note that these pieces are largely deprecated at this point, with the addition of the Draggable Elevated RealRailway (RRW) Viaducts, and are not recommended for use with the RealRailway system.
- Rail-over-RHW-4 Orthogonal/Orthogonal
- Rail-over-RHW-2 Orthogonal/Orthogonal
- Rail-over-MIS Ramp Orthogonal/Orthogonal
- Rail-over-RHW-6S Orthogonal/Orthogonal
- Rail-over-RHW-6C Orthogonal/Orthogonal
- Rail-over-RHW-8S Orthogonal/Orthogonal
- Rail-over-RHW-8C Orthogonal/Orthogonal
- Rail-over-RHW-10S Orthogonal/Orthogonal
- Rail-over-RHW-3 Orthogonal/Orthogonal
Region Transport View
The NAM includes the popular RHW Regional Transport Map mod by jondor as an optional feature, which is included by default. This feature contains an updated and expanded map legend with the addition of the RealHighway network, as well as the addition of Monorail as a separate color from El-Rail/GLR. This mod is NOT compatible with any other Regional Transport Map mods.
This mod utilizes a workaround to display RHWs on the regional transport map. Because of the way this workaround functions, the red color of the Maxis Highways would show up as a halo around diagonal roads, bridges and certain puzzle pieces. The black color does as well, but is less noticeable. It is possible that some diagonal networks look wierd in the transit map - because of the way this workaround functions, the diagonal roads, avenues and streets show up intermingled with the highway color. This is not possible to fix but the map colors were chosen to make it less noticable than other color combinations.
Other Known Issues
- Placing FLEX On-Slope Transitions immediately next to crossing points, without a one-tile gap before the crossing, can destabilize the overrides and prevent the crossing from working properly.
Information on Support and Development Updates
For technical support and information on new features coming to the RealHighway system in future releases, please check out the official RealHighway (RHW) - Development and Support threads on the forums at SimCity 4 Devotion and Simtropolis.